HDMI Port is not Working on PC: 7 Ways to Fix it
Try these tested solutions to HDMI problems on Windows 10
- If your HDMI port is not working, recently installed apps may interfere and need to be uninstalled.
- It would be best if you used to try easy checks such as restarting your device and cleaning out dirt from the HDMI head before venturing into more complex fixes.
You must have encountered a problem that has led to your HDMI port not working on windows 10. This is a problem other users have experienced.
This port is handy for connectivity, especially with modern equipment, so we will show you how to fix this problem.
Why is my HDMI port not working on my PC?
There are multiple reasons why the HDMI port isn’t working on Windows, and in most cases, this is just a glitch with your graphics card, so you might want to check your drivers.
This issue can affect any PC, and many reported that HDMI isn’t working on laptops. If drivers aren’t the issue, a solid workaround would be to use a specialized adapter.
However, that’s not always the best solution since sometimes the USB to HDMI adapter won’t work, so it’s essential to find the core cause of this issue.
Here are some quick examples of how these issues can manifest:
- HDMI won’t work on a laptop – In most cases, the TV fails to recognize your laptop.
- The HDMI audio won’t play – Oftentimes, the video is available, but the audio won’t play.
- HDMI image is too big for the screen – Fortunately, installing the latest graphics driver updates should fix this problem within minutes.
- HDMI video is choppy – This usually happens when a second monitor is connected via HDMI.
The most common problem with HDMI is that audio or video is missing, and in most cases, that’s caused by driver incompatibility, but there are a few things you can do to fix this problem.
How do I test my HDMI port?
- Check for damage along the length of the chord.
- Check for particles in the head of the chord and the port on the device. You can spray some compressed air to remove these particles.
- Insert one end of the chord in the source device and the other in the display device.
- Boot the display device and ensure it is set to HDMI mode.
- Boot your source device and ensure it is set to export images.
- If the image and sound quality are fine, nothing is wrong with your HDMI chord.
If there’s no sound, video is missing, or your HDMI port is not working on your PC, follow the below steps to refresh your audio and video drivers.
How can I fix the HDMI port if it’s not working on PC?
- Why is my HDMI port not working on my PC?
- How do I test my HDMI port?
- How can I fix the HDMI port if it's not working on PC?
- 1. Set your HDMI device as the Default Device
- 2. Update your drivers
- 2.1 Update drivers manually
- 2.2 Update your drivers with an advanced tool
- 3. Rollback to the older driver
- 4. Uninstall the graphics driver
- 5. Remove recently installed software
- 6. Run System Restore
- 7. Replace your cable
Before you go into any of the solutions provided, make sure you do the following:
- Enable your HDMI port on Windows 10
- Restart your computer
- Make sure to select the correct HDMI port on the display device
- Check the hardware and make sure the HDMI cable is not slipping out
- Set your HDMI device as the Default Device
- Update your drivers
- Rollback to the older driver
- Uninstall the graphics driver
- Remove recently installed software
- Run System Restore
- Replace your cable
1. Set your HDMI device as the Default Device
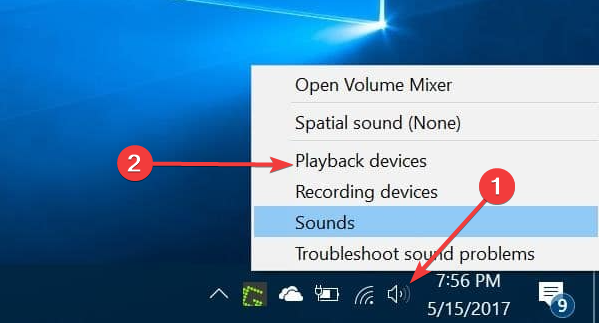
- Right-click on the volume icon on the taskbar and select Playback devices.

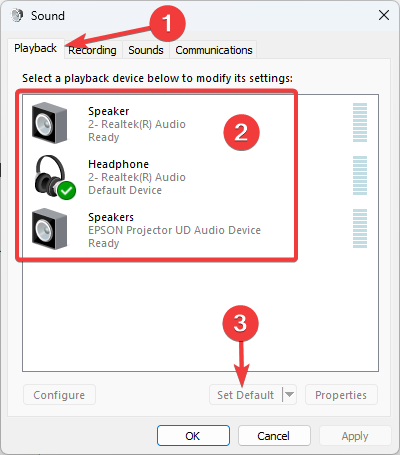
- In the newly open Playback tab, select Digital Output Device or HDMI if they exist on the list of devices, then click Set default.

First, the HDMI port will not work on your monitor if your HDMI device is not set as the default device.
2. Update your drivers
2.1 Update drivers manually
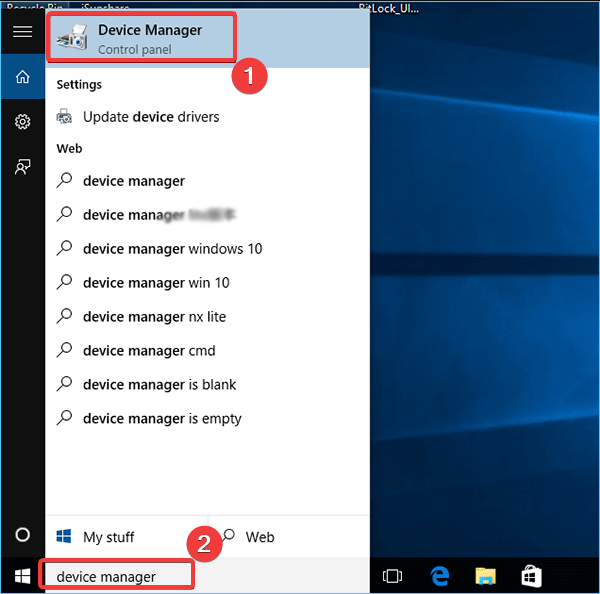
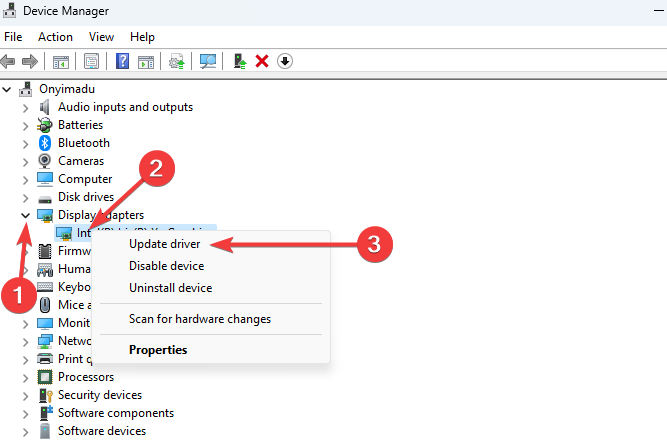
1. Click the search bar on your taskbar, type Device Manager, and select the Device Manager app.
2. Expand any section with outdated devices (Start with the Display adapters).
3. Right-click on the device and select Update driver.
4. Click Search automatically for drivers.
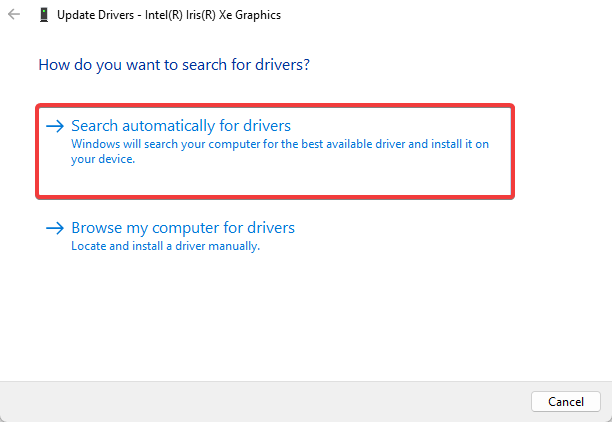
5. Install the drivers found by the wizard.
Expert tip:
SPONSORED
Some PC issues are hard to tackle, especially when it comes to missing or corrupted system files and repositories of your Windows.
Be sure to use a dedicated tool, such as Fortect, which will scan and replace your broken files with their fresh versions from its repository.
Sometimes, all you need to do to fix the HDMI port not working issue is to install the latest drivers. Just visit your graphics card or motherboard manufacturer’s website and download the latest drivers.
You can also update your video and audio drivers using the Device Manager, as shown above.
2.2 Update your drivers with an advanced tool
One common factor that can generate your HDMI port not to function correctly is out-of-date drivers. Therefore, updating your device is crucial, and we recommend you do this by using professional software.
- Download and install the Outbyte Driver Updater app.
- Launch the software and wait for the app to detect all incompatible drivers.
- Now, it will show you a list of all outdated drivers to select the ones to Update or Ignore.

- Click on Update & Apply Selected to download and install the latest versions.
- Restart your PC to ensure the applied changes.


Outbyte Driver Updater
Maintain your device healthy by letting OutByte Driver Updater find the latest driver options.3. Rollback to the older driver
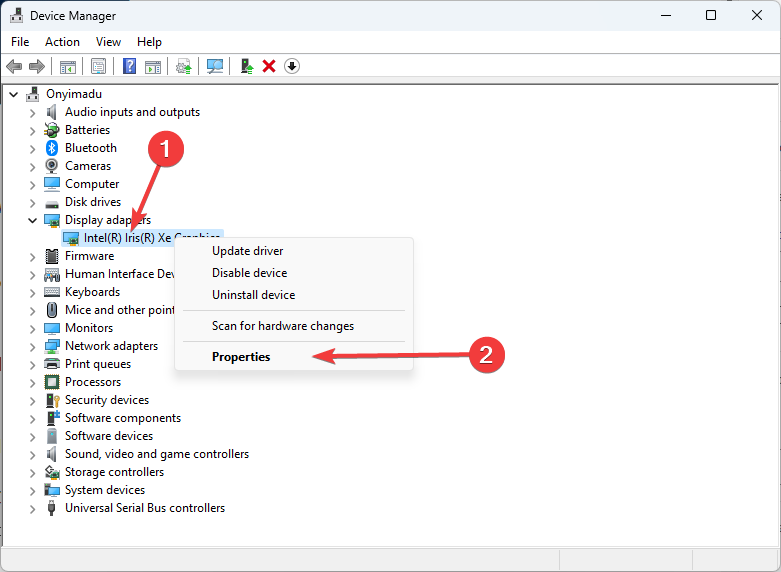
- Click the search bar, type Device Manager, and select the Device Manager app.

- Expand any section with devices to be rolled back.
- Right-click it and choose Properties.

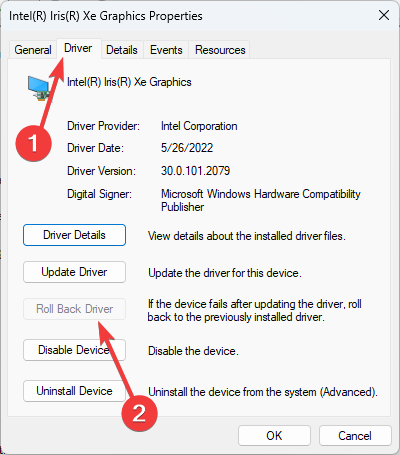
- Navigate to the Driver tab and click on Roll Back Driver if it is not greyed out.
- Restart your computer.
Sometimes, it’s better to use the default driver to avoid compatibility issues. You’ll need to uninstall the current driver, and the default one will install itself.
However, using the Roll Back feature is also an effective method of getting back an old driver. Check if this resolves the issue of the HDMI port not working on Windows 10.
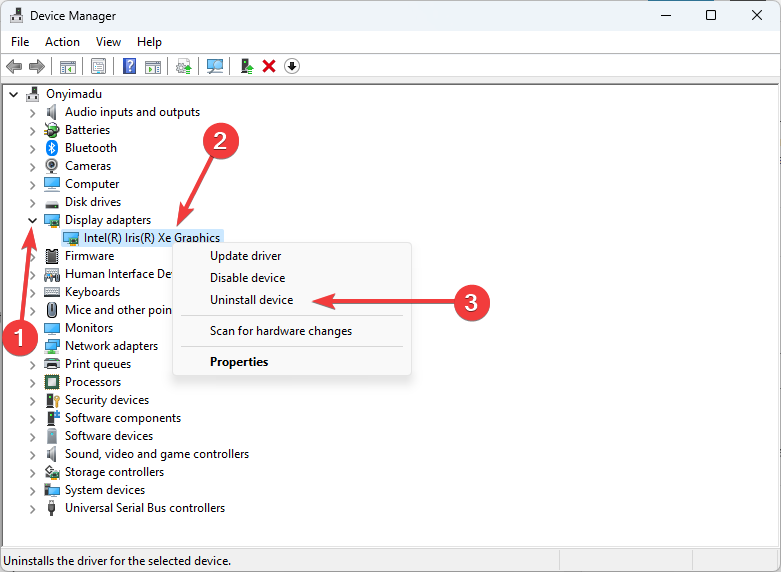
4. Uninstall the graphics driver
- Click the search bar, type Device Manager, and select the Device Manager app.
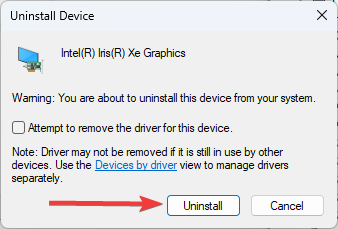
- Expand the Display adapter menu, right-click on your graphics driver, and select Uninstall device.
- Click on Uninstall.

Check if this resolves the issue of the HDMI port not working on Windows 10.
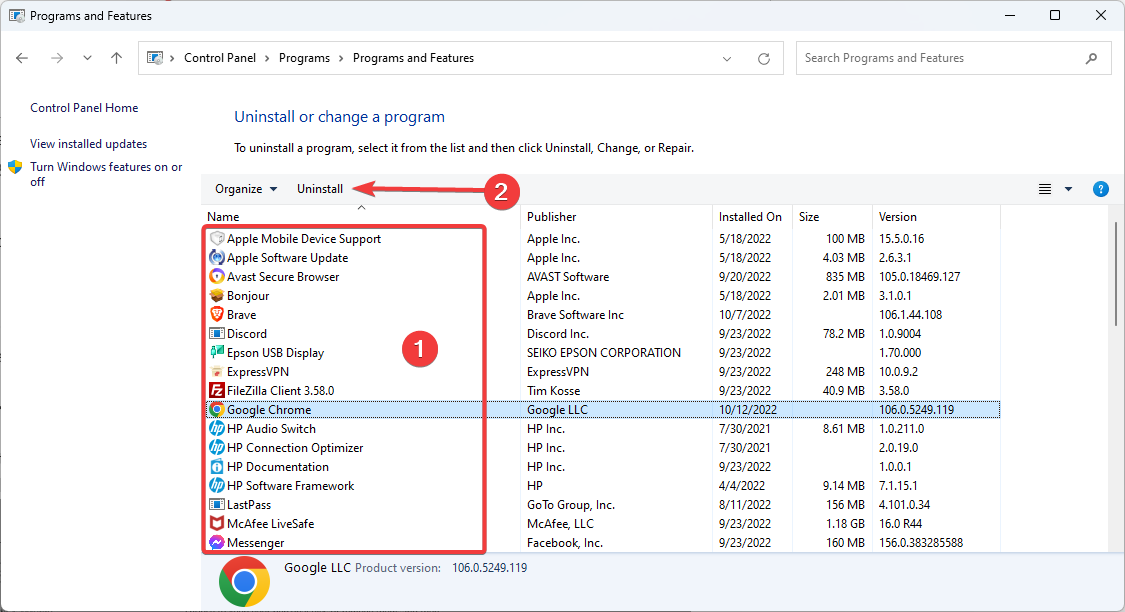
5. Remove recently installed software
- Go to Start and type Control Panel and open up the app.

- Click on Uninstall a program.

- Select the program recently added, and click Uninstall (Repeat this step for recently added programs).


If you recently installed new software on your computer, try uninstalling it. Then, check if this resolves the issue of the HDMI port not working on Windows 10.
This solution may work if the HDMI port is not showing in your Device Manager. Sometimes, newly installed software may trigger compatibility issues and various connection problems.
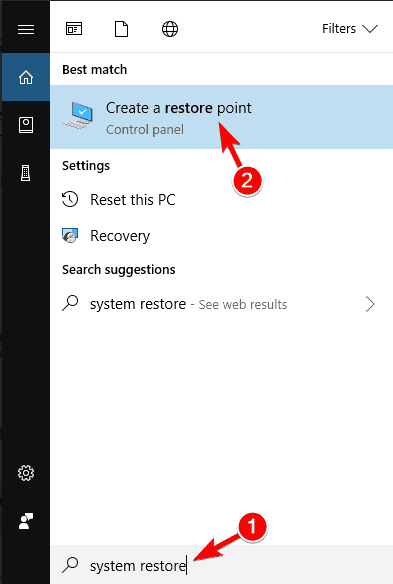
6. Run System Restore
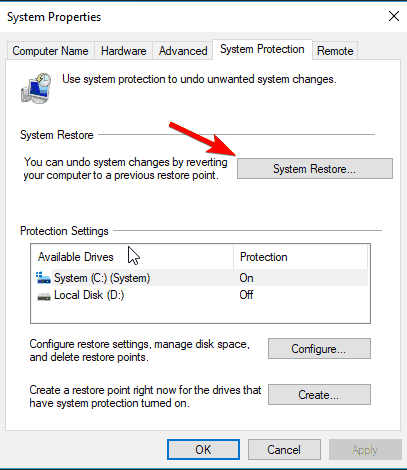
- Press Windows Key + S and enter system restore, then choose Create a restore point from the menu.

- The System Properties window will now appear. Now click the System Restore button.

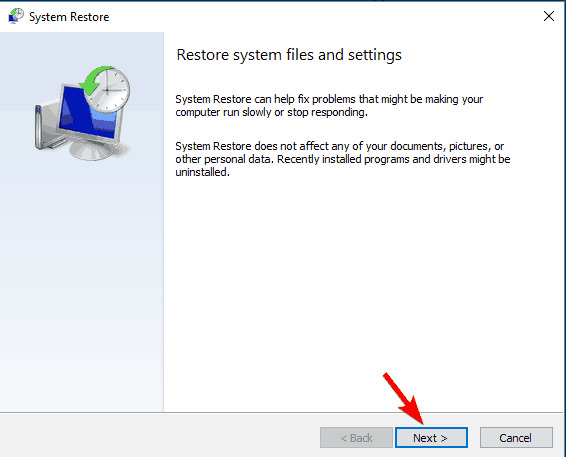
- When the System Restore window opens, click Next.

- If available, check Show more restore points. Select the desired restore point from the menu and click Next.

- Now follow the instructions on the screen to complete the restoration process.

The System Restore option allows you to restore the previous well-performing system configuration without losing files, except for a few customizable features and settings.
7. Replace your cable
Also, there might be situations when your problem is hardware-related. In this case, we recommend you look at some highly-rated products you could buy.
This way, you can ensure the HDMI output works great on your Windows 10 devices.
That would be all; we hope these solutions helped you solve any problem you may encounter regarding your HDMI port not working on your Windows 10 device.
As always, if you come across other solutions to fix HDMI issues on your PC, you can help the Windows community by listing the troubleshooting steps in the comments below.
Also, if you have any comments, questions or suggestions, contact us in the same comment section. Don’t forget to tell us which solution worked for you.