10 Easy Methods to Convert MBR to GPT Disk Without Data Loss
The built-in Diskpart tool allows you to convert files in no time
- The MBR format is slowly becoming obsolete.
- Users have been looking for ways to convert their MBR disks to GPT format without losing any of their data.
- To accomplish this, you can use both built-in tools and third-party software.
There are two types of partition structures that your PC can use, MBR and GPT. Sometimes you might need to convert your MBR disk to GPT disk, and today we’re going to show you how to do that on Windows 10.
Before we show you how to convert MBR to GPT disk, we need to explain to you the difference between the two.
What is MBR?
MBR is an older partition structure and it was introduced in 1983. MBR, or Master Boot Record, has a special boot sector that allows your operating system to boot.
This partition structure has its limitations, and it works only with drives that are less than 2TB in size. This wasn’t a problem a few years ago, but with the rising number of larger hard drives, it’s no wonder that the MBR standard is becoming slowly but surely outdated.
Using MBR partition structure you can have up to four primary partitions, which can be a problem for some users.
What is GPT?
On the other hand, GPT or GUID Partition Table is a new standard and it’s associated with UEFI. GPT doesn’t have any of the limitations of its predecessor, so you can have an almost unlimited number of partitions.
Unlike MBR, GPT stores copies of partitioning and boot data in different locations on your disk. As a result, your system will be more stable and you won’t experience any major problems if that data is overwritten or corrupted.
GPT also supports a cyclic redundancy check feature that checks your data for corruption. If any corruption occurs, GPT can attempt to recover the data from another location on your disk.
Overall, GPT is a newer standard and it offers better performance than its predecessor. There’s a hardware limitation, and if you’re using a PC that has BIOS instead of UEFI, you won’t be able to boot from GPT disks.
GPT also requires a 64-bit version of Windows 10, 8, 7, or Vista, so if you’re using any of these versions you won’t have any problems with GPT.
Now that you know the difference between the two, let’s see how we can convert MBR disks to GPT.
How do I convert MBR to GPT without losing data?
You can convert MBR to GPT disk without data loss by using the Diskpart tool. You can also use the built-in Disk Management feature.
Alternatively, you can also use an automated tool called MBR2GPT, that will convert the disk from MBR to GPT without removing any files.
For detailed instructions on how to convert MBR to GPT without data loss, follow the steps listed below for every solution.
1. Use Diskpart
Diskpart is a powerful tool that can help you convert your MBR partition to GPT without data loss. We have to mention that Diskpart will remove all files and folders from your hard drive, so we strongly recommend you to back up your important files before using it.
You can’t use Diskpart on your system drive while you’re running Windows, but you can use it to convert any other drive with ease.
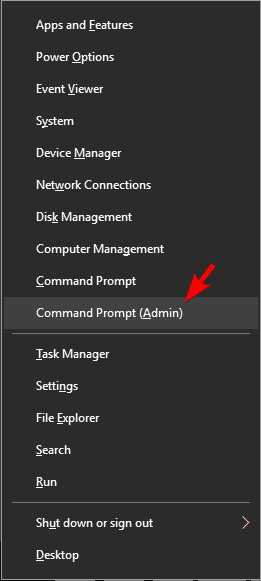
1. Press Windows Key + X to open the Power Menu.

2. Choose Command Prompt(Admin) from the list. If Command Prompt isn’t available, you can use PowerShell instead.
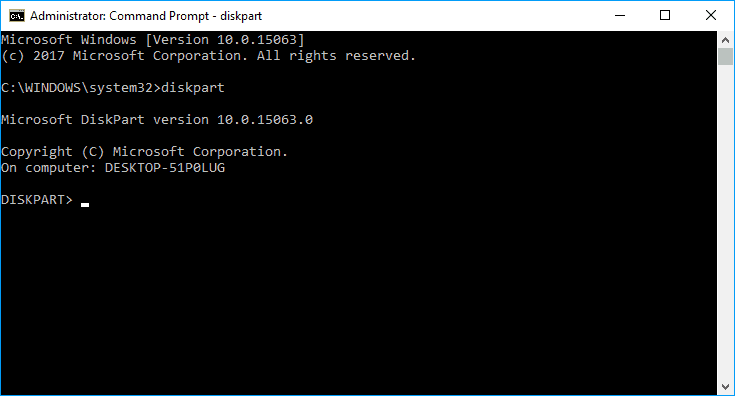
3. When Command Prompt starts, enter diskpart and press Enter.
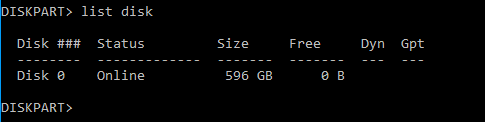
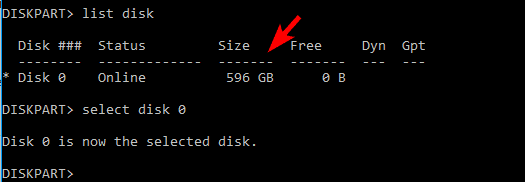
4. Input list disk and press Enter.
Now you’ll see the list of all hard drives on your PC. If you have only one drive, you won’t be able to convert it while you’re logged in to Windows.
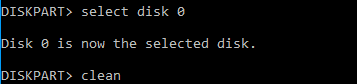
5. Enter select disk X. Replace the X with the correct number that represents your hard drive. It’s crucial that you select the correct disk, so be extra cautious.
If you don’t select the correct disk you’ll cause data loss, so we advise you to double check everything.
One of the simplest ways to select the proper hard drive is to check its size. If you have two or more hard drives you’ll be able to distinguish them easily by their size.
6. Now type clean and press Enter. After running this command all files and partitions will be removed from your hard drive, so be sure to back up all important files.
7. Now just write convert gpt and press Enter.
8. After doing that, the selected hard drive will be converted from MBR to GPT.
2. Convert the drive while installing Windows
According to users, your PC can automatically convert your drive from MBR to GPT while installing Windows.
Expert tip:
SPONSORED
Some PC issues are hard to tackle, especially when it comes to missing or corrupted system files and repositories of your Windows.
Be sure to use a dedicated tool, such as Fortect, which will scan and replace your broken files with their fresh versions from its repository.
Of course, you need to boot the installation media in UEFI mode and then the drive will be automatically converted to GPT. To do that, follow these steps:
- Boot the installation media in UEFI mode.
- You’ll be asked to choose the installation type. Choose Custom.
- Now select all partitions from your drive and click on Delete. This will remove all files from your hard drive, so be sure to back up your files beforehand. After deleting all partitions, you’ll see a large single area of unallocated space.
- Select the unallocated space and click on Next.
- Now follow the instructions to complete the setup.
This method is useful if you’re installing Windows on a brand new computer or if you want to reinstall your system and convert your main hard drive. This method is rather straightforward, but in order to use it you need to have UEFI support and boot the installation media in UEFI mode.
3. Use Diskpart during Windows installation
If you want to convert MBR to GPT disk, you can do that easily with Diskpart. This is a powerful tool and it allows you to convert your drive with ease. We already showed you how to use Diskpart to convert your drive, but if you want to convert your system drive that has Windows on it, you need to do it during the installation process. To do that, follow these steps:
- Boot your PC from the installation media.
- Set the desired language and click on Next.
- Click on Repair your computer option in the bottom right corner.
- Choose Troubleshoot > Advanced options > Command Prompt and select your user name. If needed, enter your password.
- After you start Command Prompt, follow the steps from Solution 1 to start and use Diskpart.
We also have to mention that you can start Command Prompt instantly while installing Windows by using Shift + F10 shortcut.
This method is similar to our first solution, but by running Diskpart outside of Windows you can convert your system drive that has Windows on it. Once again, using Diskpart will delete all files from the selected hard drive, so be careful while using this method.
Keep in mind that you don’t have to use installation media to start Command Prompt outside of Windows.
You can also perform this process by navigating to Advanced Startup options and starting Command Prompt from there.
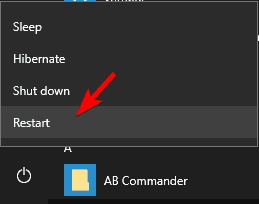
The easiest way to do that is to open the Start Menu, click the Power button, press and hold the Shift key and choose Restart from the menu. Now you just have to navigate to Troubleshoot > Advanced options > Command Prompt.
After doing that you should be able to start Command Prompt and use Diskpart without any problems.
4. Use Disk Management
So far we showed you mostly command-line tools, but if you prefer a more user-friendly solution, you’ll be pleased to hear that you can convert your MBR to GPT drive using a graphical user interface.
To do that, you just have to start Disk Management and convert your drive. This is rather simple and you can do it by following these steps:
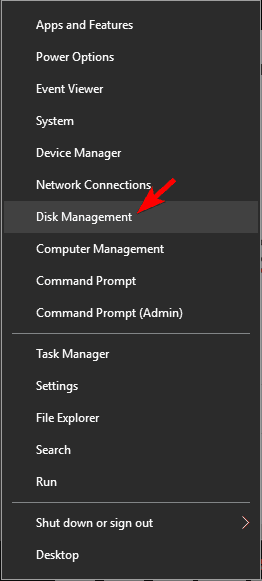
- Press Windows Key + X and choose Disk Management.

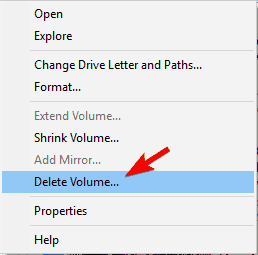
- When Disk Management opens, you’ll see a list of all hard drives and partitions on your PC. Before you can convert your disk to GPT, you need to delete all files and partitions from it. To do that, right-click the desired partition and choose Delete Volume. Repeat this step for all partitions on your hard drive.

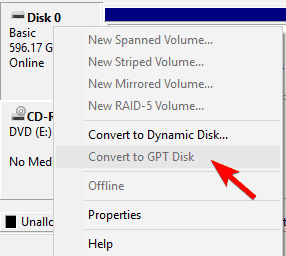
- After deleting all partitions, right-click your hard drive and choose Convert to GPT Disk from the menu.

Keep in mind that this method can’t convert your system drive while you’re using Windows, but you can convert any other hard drive on your PC. As you can see, this method is simple and fast, and if you prefer using a graphical interface, feel free to try it. We have to warn you that this method will remove all your files from your hard drive, so be sure to back them up beforehand.
5. Use MBR2GPT
Converting MBR to GPT isn’t hard, but in most cases, the conversion process will remove all files from your disk. Windows 10 brought a new tool called MBR2GPT that allows you to convert your disk without removing your files. To use this tool, follow these steps:
- Navigate to Advanced Startup. To do that, simply open the Start Menu, press the Power button, hold the Shift Key and click on Restart.
- Now you’ll see a list of options. Go to Troubleshoot > Advanced options > Command Prompt. Now select your user account and enter your password if required.
- When Command Prompt starts, run mbr2gpt /validate command.</li>
- If everything is in order and you didn’t get any errors, enter mbr2gpt /convert command and press Enter. After running this command your disk will be converted from MBR to GPT.
According to users, you can use this tool inside the Windows environment, but that’s not recommended since you can encounter various problems. If you want to use this tool inside the Windows environment, you need to add /allowFullOS after each command. This means that you’ll need to run these commands in the Windows environment:
- mbr2gpt /validate /allowFullOS
- mbr2gpt /convert /allowFullOS
It’s worth mentioning that you can specify which disk you want to convert by using the /disk:X parameter. For example, if you want to convert your first hard drive, you just need to enter mbr2gpt /convert /disk:1.
6. Use AOMEI Partition Assistant
Another freeware solution that can help you convert your MBR hard drive to GPT without file loss is AOMEI Partition Assistant. The application is relatively simple to use, and you can convert your drive by following these steps:
- Download AOMEI Partition Assistant and install it.
- Start the application and select your disk. Now choose Convert to GPT from the menu on the left.
- When the confirmation message appears, click on OK.
- Now click the Apply icon and the conversion process will start.
- Wait for the process to finish.
After the process is completed your drive will be converted to GPT. This application won’t delete your files during the conversion so you can use it without fear.
7. Use MiniTool Partition Wizard
If you want to convert your MBR to GPT without losing data, you might be able to do that with MiniTool Partition Wizard. This is a free and simple tool that can convert your disk with ease. To use this tool, follow these steps:
- Download MiniTool Partition Wizard.
- After installing the application, start it and click on Launch Application.
- Select the disk you want to convert and then choose Convert MBR Disk to GPT Disk option.
- Now click the Apply icon and when the confirmation message appears click on Yes.
- Now the conversion process will start. After the process is completed, click on OK to save changes.
MiniTool Partition Wizard is a simple tool and you can convert your hard drive to GPT with ease. The application is completely free and it won’t remove your files, so feel free to try it out.
8. Use EaseUS Partition Master
Another free third-party application that can help you convert your hard drive from MBR to GPT without data loss is EaseUS Partition Master. To convert your drive using this app, follow these steps:
- Download EaseUS Partition Master from the official page and install it.
- Once you start the application, select the disk you want to convert and click on Convert MBR to GPT from the menu on the left.
- Click the Apply icon and then click on Yes to confirm the changes.
- Wait for the process to complete.
Once the process is finished, your drive will be converted with all your files intact. EaseUS Partition Master is a simple and freen> application, and if you want to convert your drive without file loss, we suggest that you try it out.
9. Use PartitionGuru software
If you want to convert your hard drive without losing your files, you might want to try PartitionGuru. This is a powerful tool that allows you to recover files, manage partitions, delete files, restore your Windows system, manage virtual disks, etc.
The application also allows you to convert your hard drive from MBR to GPT with ease. To do that, follow these steps:
- Download PartitionGuru.There’s even a portable version available, so you don’t have to install the application in order to use it.
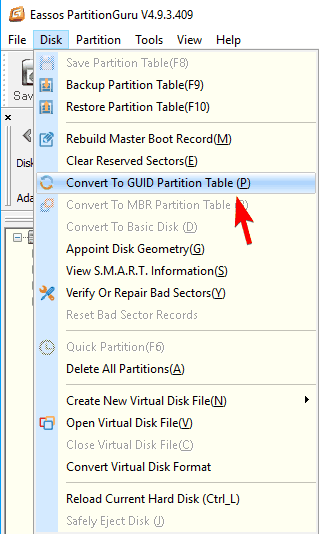
- Once you start the application, choose your hard drive and navigate to Disk > Convert To GUID Partition Table.

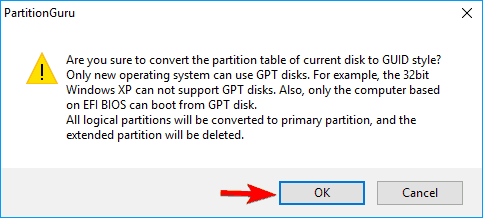
- When a confirmation message appears, click on OK.

- Wait for the conversion process to finish.
After the process is finished your drive will be converted to GPT and all your files will be preserved. This application is free and portable and since it can run without an installation we advise you to try it out.
10. Use gptgen
If you want to convert your drive from MBR to GPT without file loss, you can do that easily with gptgen command. To do that, just follow these steps:
- Open Command Prompt as administrator.
- When Command Prompt opens, enter the following commands:
- gptgen.exe .physicaldriveX
- gptgen.exe .physicaldriveX
- gptgen.exe -w .physicaldriveX
- gptgen.exe -w .physicaldriveX
Before running the commands, be sure to replace X with the hard drive that you want to convert. In our example, that would be Disk 1, so the commands would look like this:
- gptgen.exe .physicaldrive1
- gptgen.exe .physicaldrive1
- gptgen.exe -w .physicaldrive1
- gptgen.exe -w .physicaldrive1
After running these commands your drive will be converted and all your files will remain intact.
GPT partition structure has its advantages, and it will eventually completely replace <span id=”urn:enhancement-d0bc197b-dad6-783d-c3f0-9ca89ea25b7a” class=”textannotation >MBRn> partition system. However, converting from MBR to GPT is rather simple, as long as you have support for UEFI.
We showed you several methods to convert your MBR disk to GPT without data loss, so feel free to try any of them.
Keep in mind that some methods will remove all your files from the hard drive, so choose carefully.