Master Windows 11 Quick Assist: Download, Install & Use Guide
Learn the steps to use Quick Assist app effectively on Windows 11
- To help your friend or to get help from someone, the Quick Assist app made by Microsoft is handy.
- In addition to screen sharing, Quick Assist offers a range of useful features that make remote assistance more efficient and effective.
- To use Quick Assist on Windows 11, simply download it from the Microsoft Store and follow the steps outlined in this article.
If you want to know about the Quick Assist app for Windows 11, you are in the right place. Here, you will learn how to download, install and use this application properly.
The Quick Assist app is a very helpful appliThe Quick Assist app is a must-have tool for Windows 11 users who need remote assistance for their computer. By giving a support person or knowledgeable friend remote access to her PC, she can quickly resolve technical issues or learn new skills.
This article will guide you through the process of downloading, installing, and effectively using the Quick Assist app in Windows 11.
What is the main purpose of the Quick Assist app?
This app is somewhat similar to the Remote Desktop or TeamViewer app. However, Quick Assist works a bit differently. It is ideal for those who want to help other Windows users troubleshoot problems or teach things. In the same way, it is helpful for persons who want to get help.
For those interested in learning more about similar tools, check out our guide on how to fix a connection blocked after a timeout in TeamViewer.
With Quick Assist, users can perform the following tasks:
- Help others: If you want to help someone fix something or do something on their PC, the Quick Assist app comes in handy.
- Get help: To get help, a support agent or your friend also can access your PC using this app.
- Send instruction messages: Not only just screen sharing or controlling may be changed, but you also can exchange instruction messages and feedback in real-time.
- Add annotation: Unlike other remote screen-sharing apps, Quick Assist let you add annotations.
- Quickly select a different monitor: If the remote PC has a multi-monitor setup, you can easily access them.
Else, this app can help you with some other things that you will understand once you start using it.
How to use the Quick Assist app properly?
Expert tip:
SPONSORED
Some PC issues are hard to tackle, especially when it comes to missing or corrupted system files and repositories of your Windows.
Be sure to use a dedicated tool, such as Fortect, which will scan and replace your broken files with their fresh versions from its repository.
If you want to use this tool comfortably, you must do the following things:
- Make sure you have a stable internet connection.
- Ensure that the remote PC has Windows 11 or a recent version of Windows 10.
Follow these steps and instructions to use Quick Assist effectively on any supported Windows computer:
1. Download and install Quick Assist
- Go to the Quick Assist download page.
- Click on the Get in Store app.
- Click on Open Microsoft Store.
- Next, click on Get to install it.

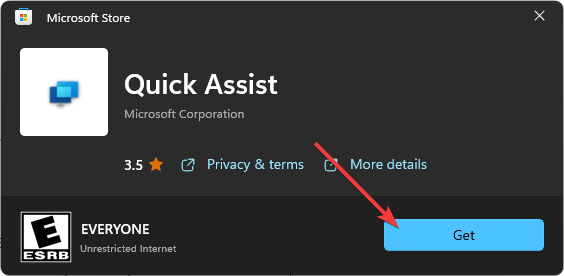
Alternatively, you can directly search for this app on the Microsoft Store.
2. Open the application
- Open the Start Menu and search for Quick Assist.
- Click on the app to open it.

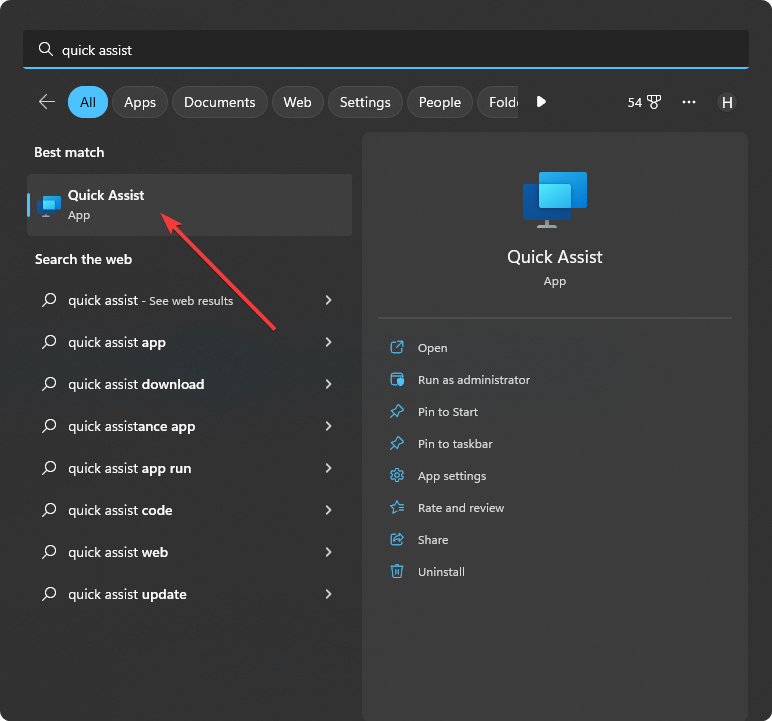
If you pin this app in the Start Menu or Taskbar, you also can open it from there.
3. Get the code
- Click on Assist another person to generate a code for connecting to a remote PC.

- Log in with your Microsoft Account.
- The code will be displayed.
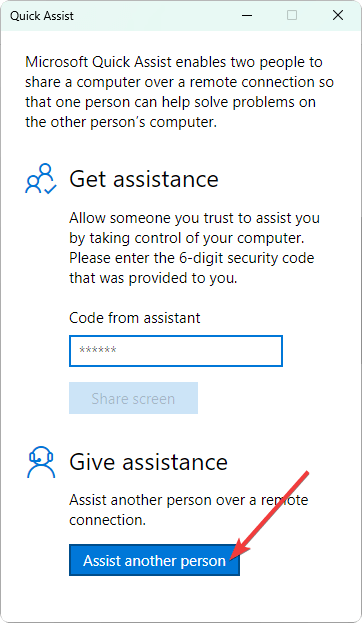
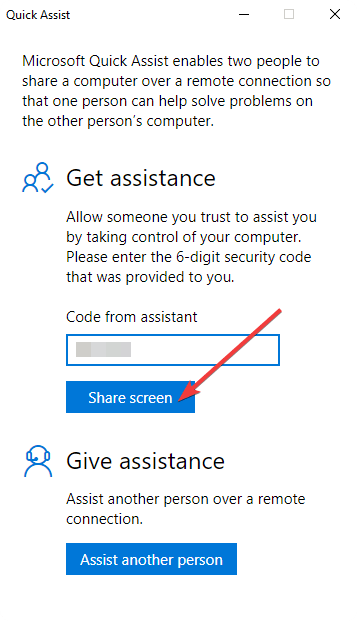
4. Allow connection
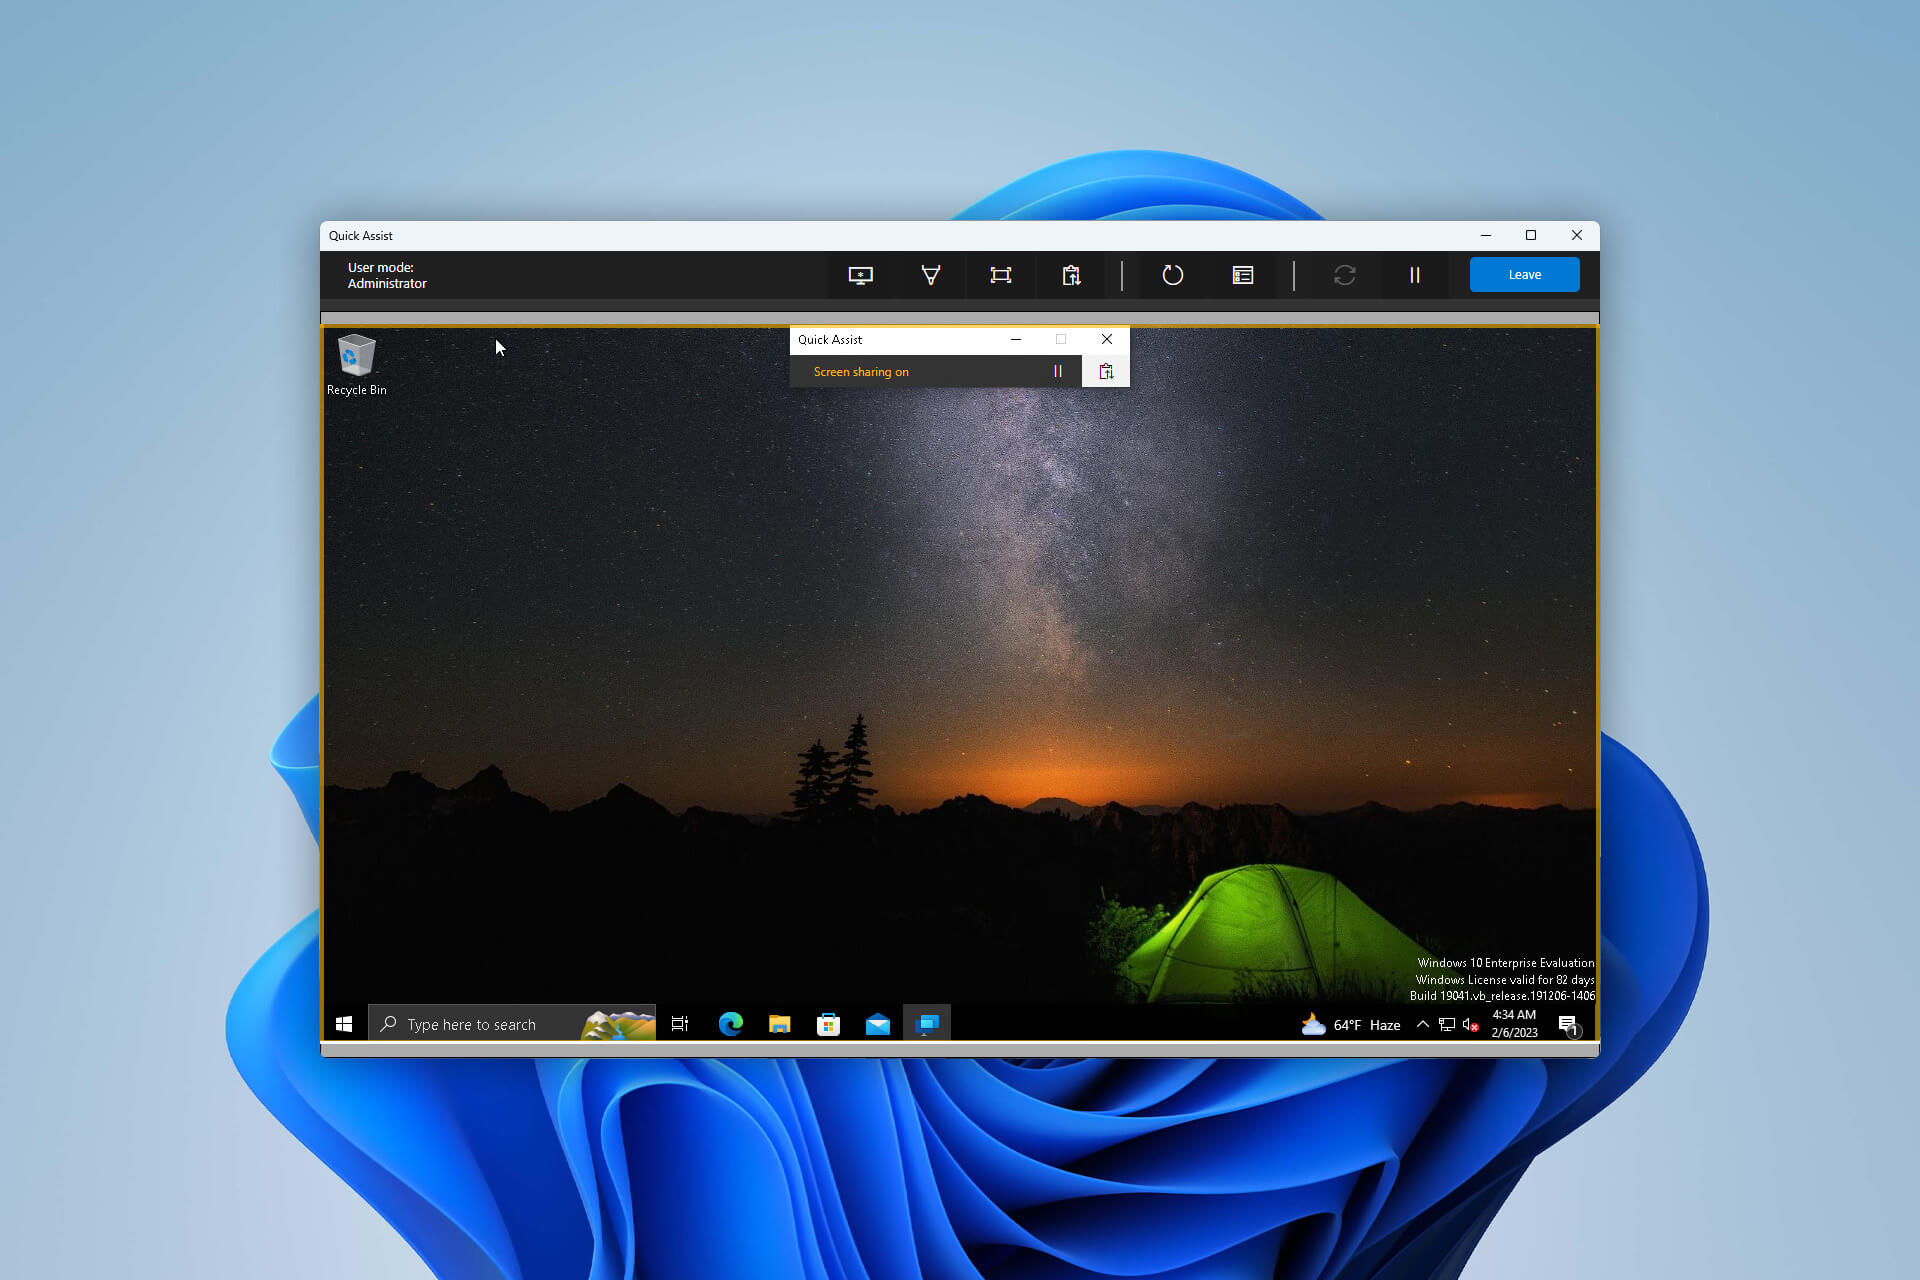
- If you want help or to share your screen with another person, type the provided code and click on the Share screen.

- After the first initial connection with a person, you must click on Allow.
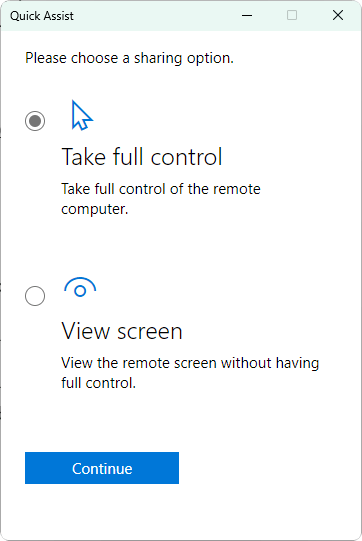
5. Choose what you want to do
- If you are accessing a remote PC, select between Take full control or View screen, depending on what you want to do.

- Click on the Continue button.
6. Add annotation
- Click on the Pen icon from the top bar.

- Choose a color if you don’t want to use the default red color.
- Add annotation by using a smart pen or your mouse.
7. Select monitor
- Click on the monitor icon.
- Then, choose which monitor screen you want to see in case the remote PC has multiple monitors.
8. Send instruction
- You also can click on the Instruction channel icon.
- Then, type any message you want and click on Send.
- The remote PC user also can reply if necessary.


9. Leave or close
- Simply click on the Leave or close button.
- Wait for a few seconds.

You can now use the Quick Assist app on Windows 11 in the ways mentioned above. It has these few but very useful features. In the future, we may see additional functionalities.
This app is not a direct alternative to TeamViewer or AnyDesk. It is very Windows-oriented and has very specific use cases, which is very helpful for a class of users.
If necessary, learn how to solve Quick Assist not working problem.
This article has explained how you can use the Quick Assist app effectively on Windows 11. If you are already using this app, feel free to share your experience in the comment box.
Still experiencing issues?
SPONSORED
If the above suggestions have not solved your problem, your computer may experience more severe Windows troubles. We suggest choosing an all-in-one solution like Fortect to fix problems efficiently. After installation, just click the View&Fix button and then press Start Repair.