Fix Windows Resource Protection Could not Start Repair Service
You need to run the SFC scan in Safe Mode to get past this issue
- If you are getting the windows resource protection could not start the repair service error, it might be due to a third-party app.
- A quick and effective way to get past this issue is to run the SFC scan in Safe Mode.
- You can also solve this problem by running the CHKDSK command to repair bad disk sectors.

windows resource protection could not start the repair service is an error message displayed while SFC is running on your Windows 10 computer. Since SFC is a tool for repairing and restoring system files, finding a quick fix for this system bug is imperative.
In this guide, we will show you quick ways to fix this issue and restore normalcy on your PC.
How to fix the Windows resource protection SFC error?
1. Run SFC in Safe Mode
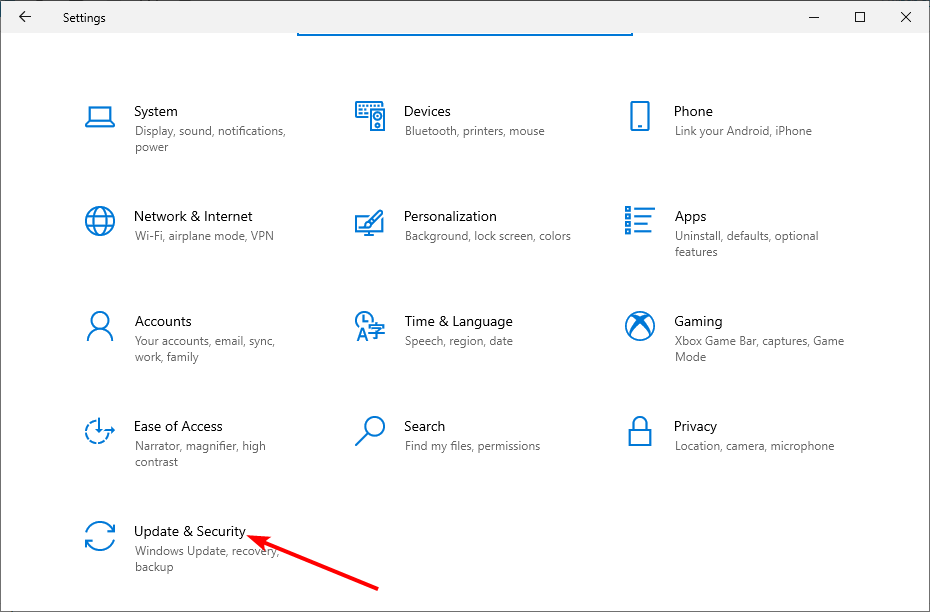
- Press the Windows key + I to open the Settings app and select the Update & Security option.

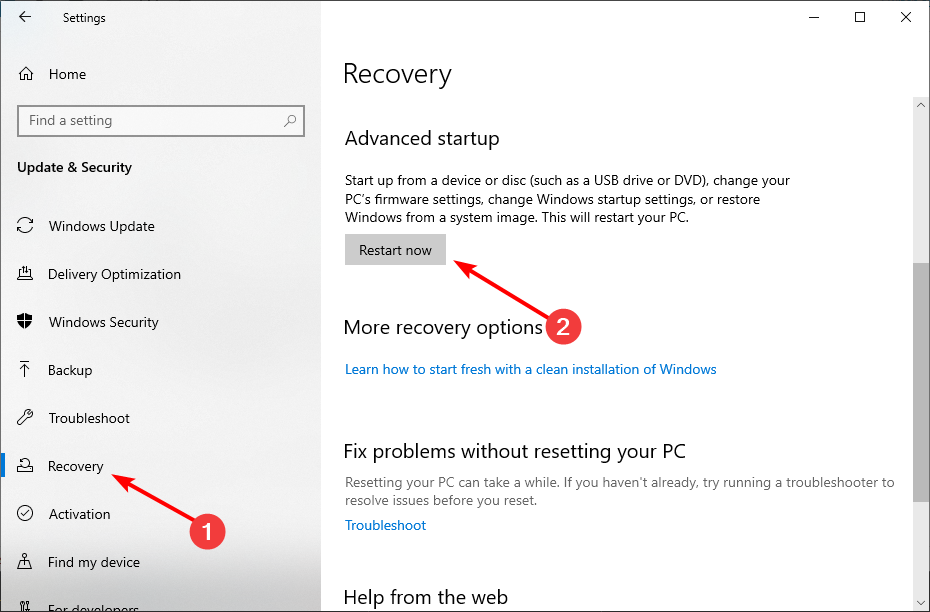
- Select the Recovery option in the left pane and click the Restart now button under Advanced startup.
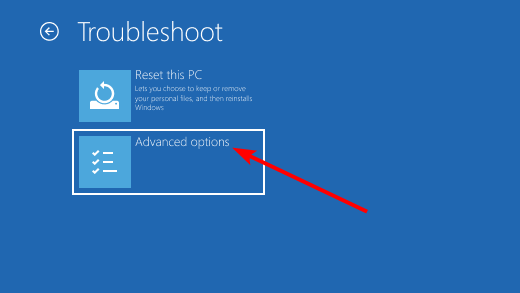
- When your PC restarts, choose Troubleshoot > Advanced options.

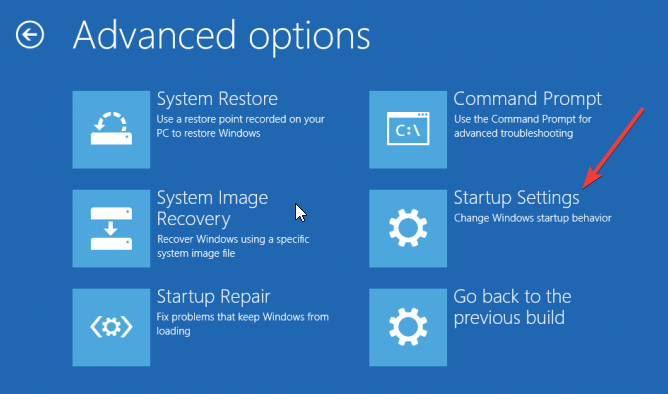
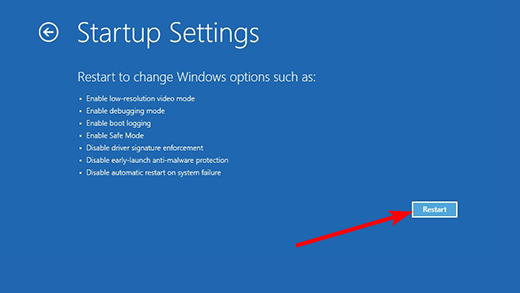
- Now, select the Startup Settings option.

- Click the Restart button.
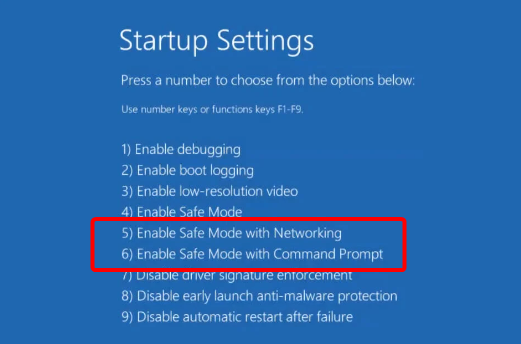
- Once your PC restarts, press the corresponding key to Enable Safe Mode or Safe Mode with Networking.

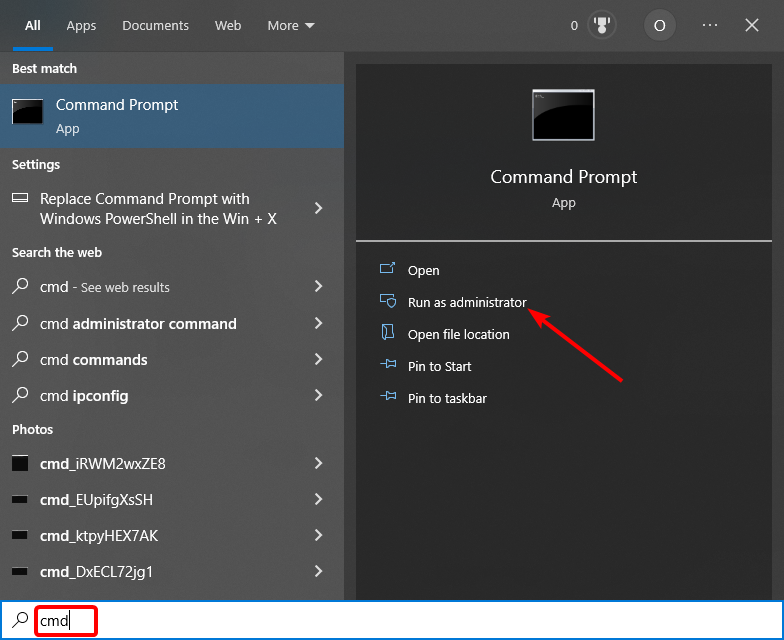
- Next, when your PC boots up, press the Windows key, type cmd, and select Run as administrator under Command Prompt.

- Finally, copy and paste the SFC command below and hit Enter to run it:
sfc/scannow

If you are getting the Windows resource protection could not start the repair service error while trying to run the SFC scan on normal boot, you might need to run the scan in Safe Mode.
If the scan works normally, the problem could be due to a third-party app or process.
2. Make some security changes
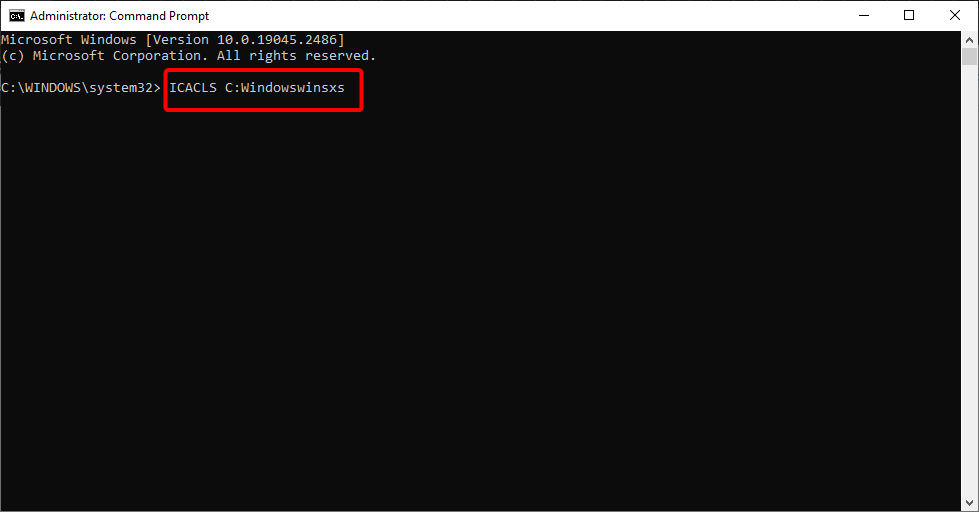
- Press the Windows key + S, type cmd, and click Run as administrator under Command Prompt.
- Type the command below and hit Enter:
ICACLS C:Windowswinsxs - Finally, wait for the command to finish running and restart your PC.
SFC might be interrupted if the winsxs folder cannot be accessed for some reason. The might be why you are getting the Windows resource protection could not start the repair service error.
You can fix this by modifying security descriptors for that folder.
3. Run CHKDSK from Command Prompt
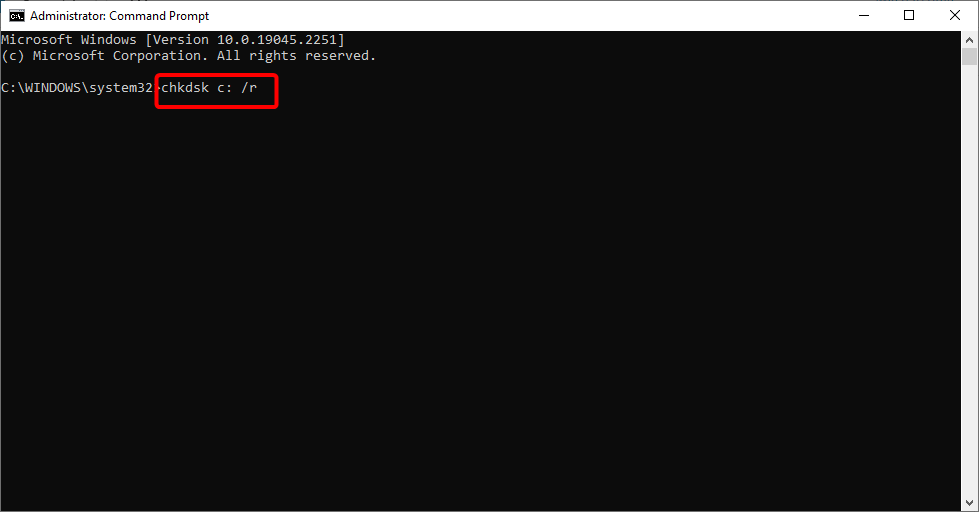
- Launch Command Prompt as an administrator.
- Type the command below and hit Enter:
chkdsk c: /r - Now, press Y when you are prompted.
- Finally, restart your PC and the scan will begin automatically when your PC boots up.
Another reason for the Windows resource protection could not start the repair service is related to hard disk errors. The easiest way to fix this is to run the CHKDSK command.
The three methods detailed in this tutorial should help you solve the Windows resource protection could not start the repair service error on Windows 10. It means that now you can run the SFC scan without any sort of problems.
If the SFC scan is still not working on your PC, check our detailed guide to fix it quickly.
Let us know which of the methods worked best for you by leaving us a message in the comments below.