How to Delete Temporary Files on Windows 11 [Safe Steps]
Boost your PC performance by removing temporary files
- Considering they can take up a lot of storage space, you should constantly delete temporary files in Windows 11.
- You can easily do it through the System Settings menu.
- Disk Cleanup will also help you clear the Windows 11 temporary files.
- Read our article to find out all the possible methods you can use to get rid of these files.
![How to delete Temporary Files in Windows 11 [Complete Guide]](https://cdn.windowsreport.com/wp-content/uploads/2021/08/DELETE-TEMPORARY-FILES-1-1.jpg)
Your OS has to store a lot of files, which are stocked across different folders. But some of these files are not linked to any critical processes.
In addition, your operating system may get temporary files from application data, error logs and data, browsing data, window updates, and installation files, amongst others.
Keep in mind that they lay around occupying space on your computer, and the chances of you ever using these are bleak.
To boost your system’s performance and to make sure of efficiently functioning, it is recommended to clear them periodically. In these terms, today’s article will deliver some valuable options to delete Temporary Files in Windows 11.
For those who are running low on storage and it has started to affect the system’s performance, our guide will surely make a huge difference.
Which are the most common temporary files?
There are multiple examples of temporary files, but we have listed the most common types.
- Windows Update Cleanup – These files are related to the previous Windows updates. They are stored in your system in case you want to revert to the previous version. However, if the current OS version works fine, you can go ahead and delete them to free up storage space.
- Upgrade Log Files – The log files appear when you upgrade Windows. They are used to identify and troubleshoot issues during servicing or installation.
- Temporary Files – We refer to these as the ones created by apps while executing a task. In general, the apps clear these files by default. However, it can happen that they are not automatically deleted, so you can manually do it.
- Temporary Internet Files – This category refers to the cache files for the websites you access on Microsoft Edge. Temporary Internet Files help your browser loading websites faster the next time you visit them. You can choose to delete them. However, the browser will create them all over again the next time you visit the website. Also, keep in mind that deleting these files may harm your browsing speed. Note that you’re also allowed to reset the temporary Internet files location to default.
- Thumbnails – These ones support your system to quickly load the thumbnails for the various stored pictures, videos, and documents. Since Windows will automatically create new ones when needed, it is always safe to delete them.
- Device Driver Packages – The last category refers to the drivers’ copies, that were installed on your system previously. You can choose to delete them, without worrying about affecting the currently installed drivers.
How can I delete temp files in Windows 11?
1. Use the Settings menu
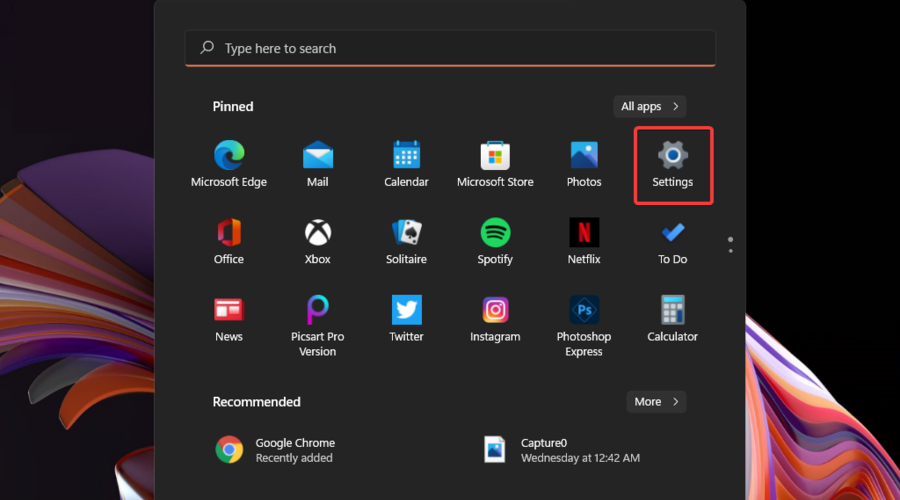
- Hit the Windows key, then open the Settings menu.

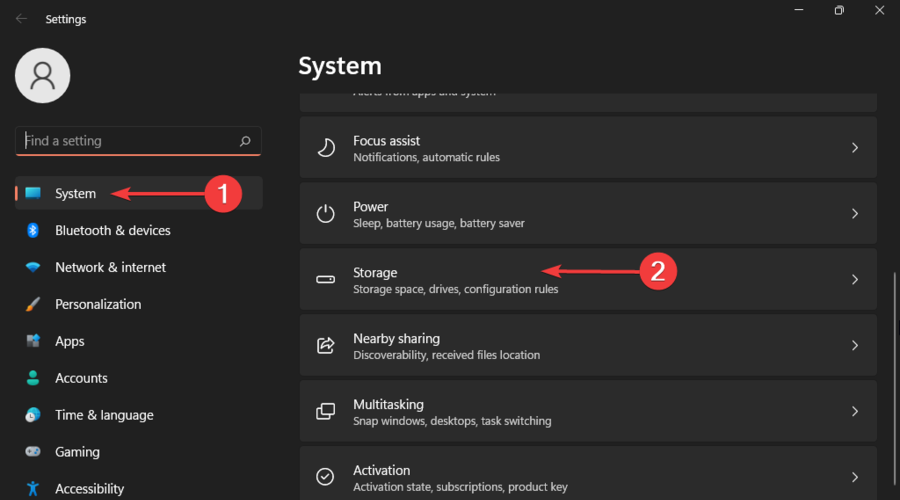
- Select the System section, then navigate to Storage.
- Click on the Temporary files section.
- Checkmark all the files you want to delete, then click on the Remove files button.


2. Try Disk Cleanup
Disk Cleanup represents a Windows built-in utility, that allows you to clear up storage by removing unneeded temporary files. It is safe and easy to use on your device.
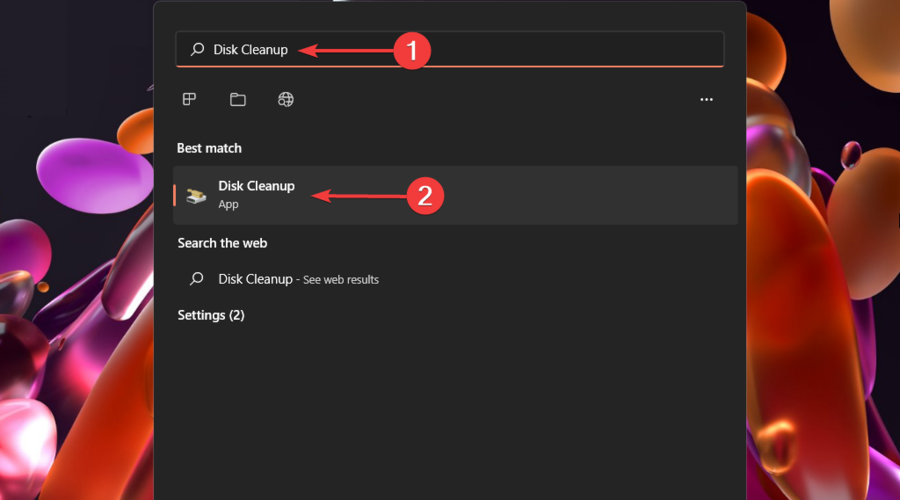
1. Press the Windows key on your keyboard.
2. Type Disk Cleanup in the search box that opens, and click on the result to open the app.
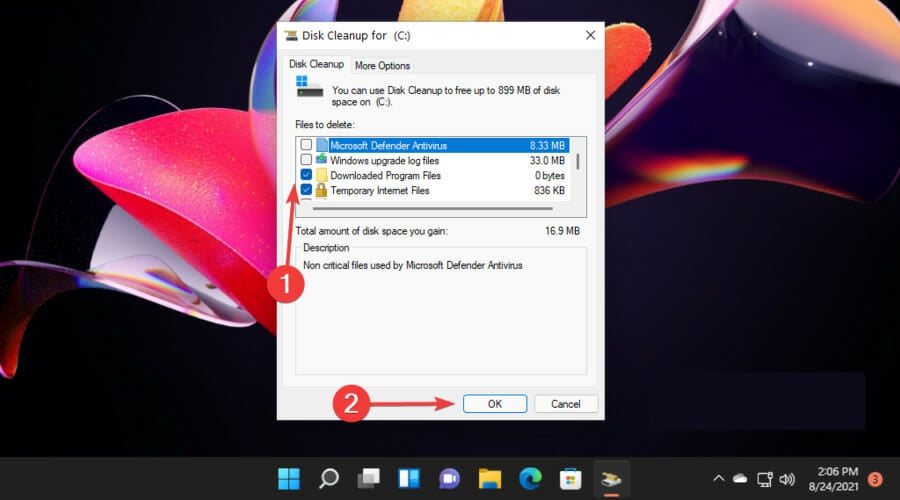
3. Checkmark the files you want to delete, then click on OK.
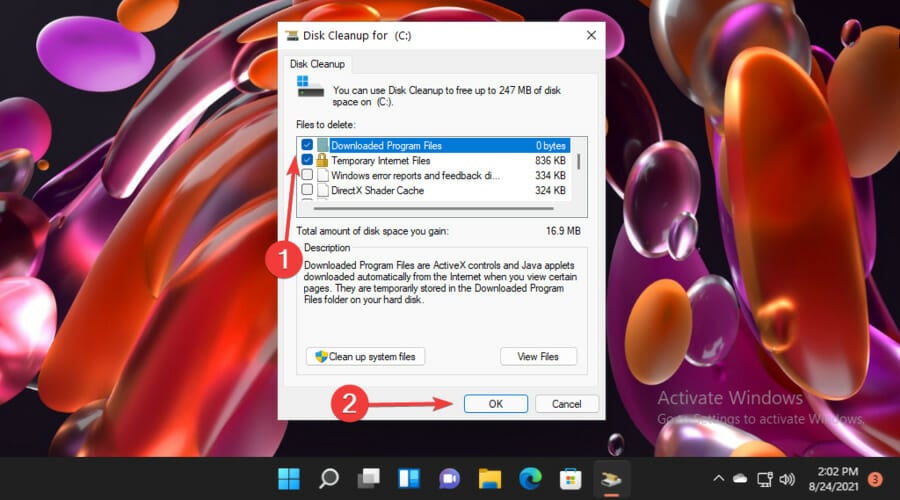
4. After, click on the Clean up system files button.

5. Select the files you want to delete, then click on OK.
Expert tip:
SPONSORED
Some PC issues are hard to tackle, especially when it comes to missing or corrupted system files and repositories of your Windows.
Be sure to use a dedicated tool, such as Fortect, which will scan and replace your broken files with their fresh versions from its repository.
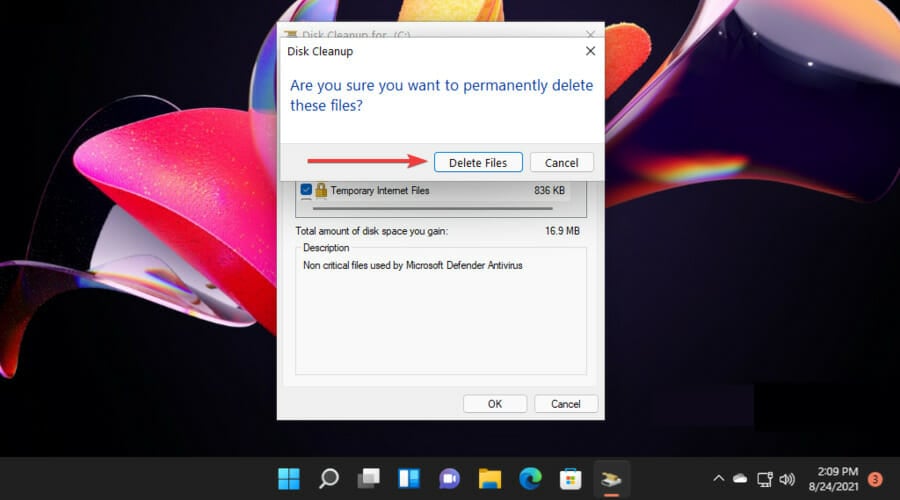
6. To confirm the changes, click on the Delete Files button.
Keep in mind that you don’t risk deleting Downloads with Disk Cleanup. Check out how is this possible by giving a try to our dedicated guide.
You can also try an automatic alternative, like Fortect, as it can easily scan your PC and erase temporary files.
Plus, you can erase junk files, and other unnecessary files from your folders, disk, and hard drive with just a few clicks.
3. Delete files from Temp Folder
3.1 With File Explorer
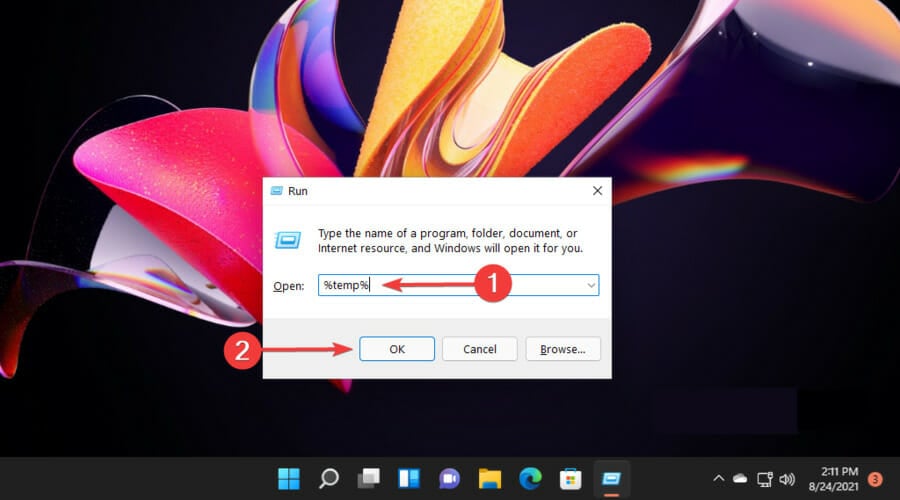
- Use the following keyboard shortcut: Windows + R.
- In the Run dialog box, type %temp%, then click OK.
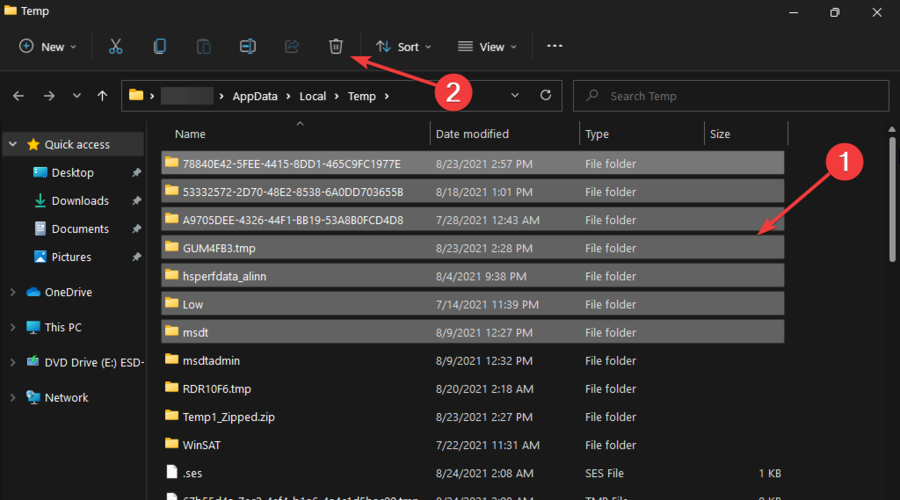
- Select the files you need to delete, then click on the Delete icon, marked as a trash.
3.2 With Command Prompt
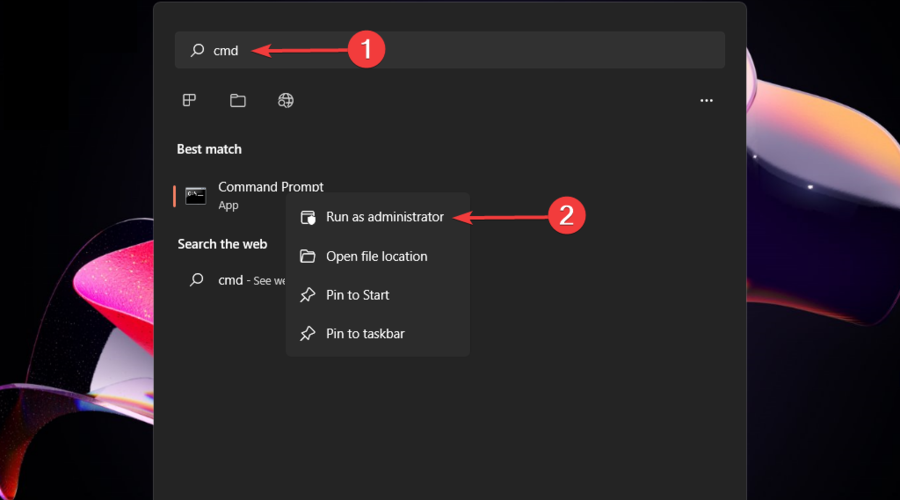
- Press on the Windows key, type cmd, then choose to Run as administrator.
- Copy and paste the following command, then hit the Enter key:
del /q/f/s %TEMP%\* - Now all the temporary files that don’t require additional permissions will be deleted.

These two ways support you in deleting the files in the Temp folder. Consider the first one the manual representation, while running Command Prompt creates a more automatic result.
4. Automatically clear Temporary Files with Storage Sense
- Navigate to the Storage page, from the Windows Settings menu.
- Look at the Storage Sense section, then make sure the toggle button is set on On.
- Now click on the Storage Sense section to customize various options.
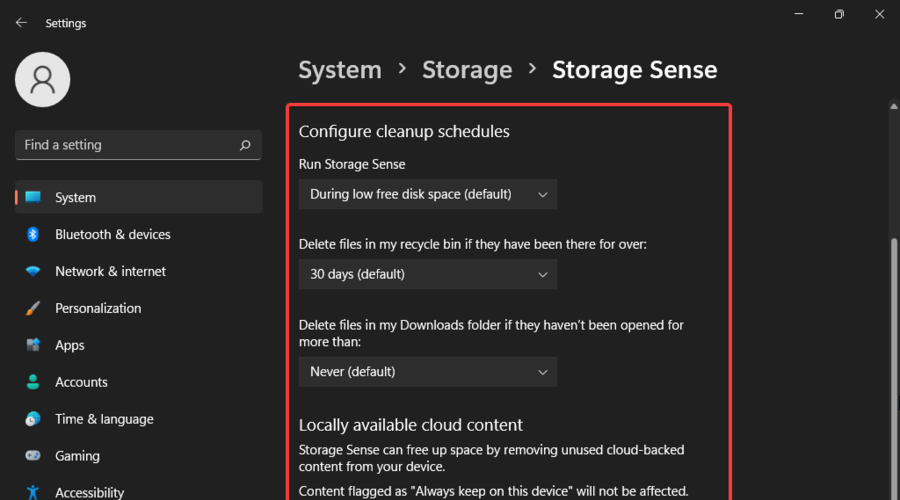
- In the opened window, under Configure cleanup schedules, select the drop-down menus for each section, then select the desired options.
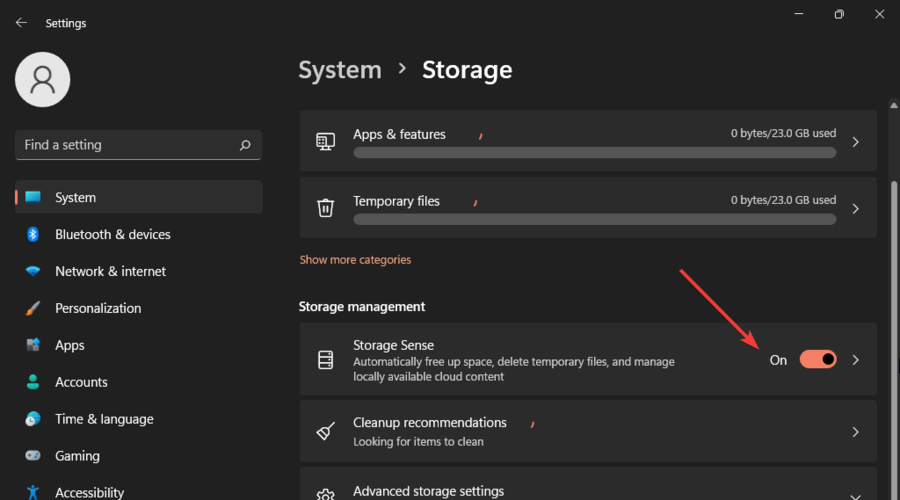
Storage Sense represents a Windows feature, which automatically deletes the temporary files on your PC. You can configure the Storage Sense settings according to your requirements and necessities.
After the Storage Sense configuration, your temporary files will be automatically cleaned on your system as per the set schedule.
Multiple tools will also support you in deleting these kinds of files, and most of them are available on Microsoft Store.
Because it is important to have a clear perspective about your system’s activity, we also recommend checking some ways to view Hidden Folders and Files in Windows 11.
So, as you can notice, there are multiple easy solutions to get rid of Temporary Files in Windows 11. Most of the time, it is safe and even recommended to perform this action. However, you should select only those that affect your PC performance.
For any additional questions or thoughts, do not hesitate to leave a comment in the section below.
Still experiencing issues?
SPONSORED
If the above suggestions have not solved your problem, your computer may experience more severe Windows troubles. We suggest choosing an all-in-one solution like Fortect to fix problems efficiently. After installation, just click the View&Fix button and then press Start Repair.