Fix: PC not Booting After New CPU Install
Switch from UEFI to CSM or Legacy mode to troubleshoot the issue
- PC not booting after a new CPU install indicates an issue with the installation process or the process isn’t complete.
- Incompatibility issues between the CPU and the mother and CMOS interference can prevent the PC from starting up after upgrading the CPU.
- Clearing CMOS and Switch from UEFI to CSM (Compatibility Support Module) can fix the issue.
Upgrading your computer CPU to a new and better version helps improve system performance and increase speed and multitasking capabilities. However, users complained about PCs not booting after installing the new CPU. This guide will outline the fixes for the problem.
Alternatively, you can read our detailed article about low FPS after CPU upgrade and what to do if you experience it on your PC.
Can a CPU cause a computer not to turn on?
Yes, it is possible for a new CPU installation to cause a computer not to turn on. There are several reasons why this could happen, and some are listed below:
- If the new CPU is incompatible with the motherboard, the PC won’t boot.
- In cases where the new CPU is not seated properly in the socket, the thermal paste is not applied correctly, or any CPU pins are bent or damaged, the computer won’t turn on.
- If the existing power supply wattage is insufficient to handle the power requirements of the new CPU, the computer may fail to turn on.
- Sometimes, a motherboard may require a BIOS update to support a new CPU.
Fortunately, the problem is fixable, and we’ll take you through some basic steps to get around it later in this post.
Moreover, you can check out our article about Windows 11 not booting and how to force start it.
How long should a new CPU take to boot?
- In general, the boot time for a new CPU can range from a few seconds to a couple of minutes.
- The time varies depending on the specific hardware configuration and the OS used.
- The speed of the storage device, the RAM, and the complexity of the BIOS settings can all influence the boot time.
Moreover, during the boot process, the computer performs several tasks, such as initializing hardware components, running the power-on self-test (POST), and loading the OS. Hence, all these determine the time taken to boot.
What do I do if the PC won’t boot after a new CPU install?
Before trying any fixes, observe the following preliminary checks:
- Ensure the new CPU is compatible with your motherboard.
- Confirm that the motherboard BIOS supports the new CPU.
- Verify if the CPU is correctly seated in the socket and the CPU cooler is securely attached with thermal paste.
- Ensure any necessary power connections to the CPU are connected correctly.
- Disconnect all unnecessary components, such as additional hard drives, graphics cards, and external devices, to see if it works.
If the PC still doesn’t boot after trying the preliminary checks, proceed with the solutions below:
1. Clear CMOS
- Turn off your computer and unplug the power cable from the power outlet.
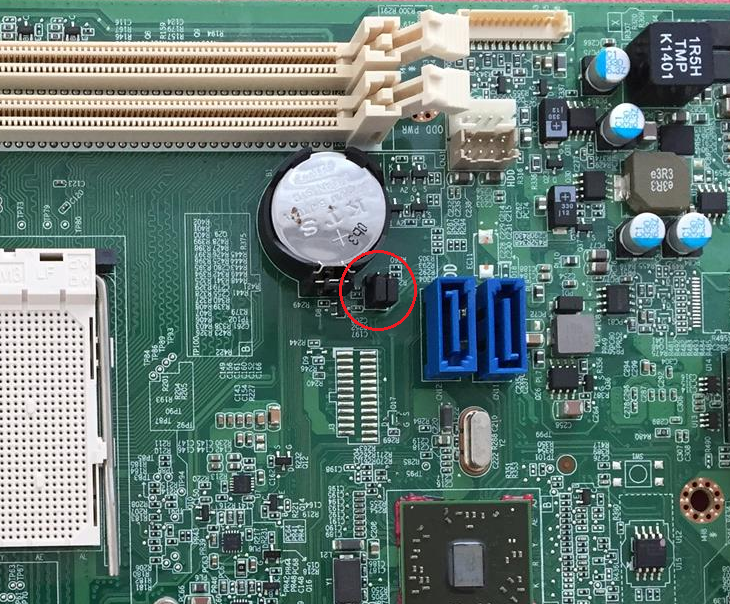
- Locate the CMOS jumper on your motherboard. It is usually a set of three pins with a plastic jumper cap covering two pins. The CMOS jumper is typically labeled CLR_CMOS, CMOS, or Reset BIOS.

- Please take note of the CMOS jumper cap’s current position, then remove it from its current position.
- Move the jumper cap to cover the other two pins. For example, if it covered pins 1 and 2, move it to pins 2 and 3.
- Leave the jumper cap in this position for about 10-15 seconds. It will clear the CMOS settings.
- After the specified time, remove the jumper cap from pins 2 and 3.
- Move the jumper cap back to its original position, covering the original pins it was on (either pins 1 and 2 or pins 2 and 3).
- Reconnect the power cable to your computer and turn it on.
Following these steps, you have effectively cleared CMOS (complementary metal-oxide-semiconductor) settings on your motherboard. It is essential to do this as it activates any recent hardware changes to the motherboard.
2. Switch from UEFI to CSM (Compatibility Support Module)
- Restart your computer.
- As the computer restarts, then press F2, F10, F12, Del, or Esc (depending on your PC) repeatedly during startup until the BIOS or UEFI setup utility opens.

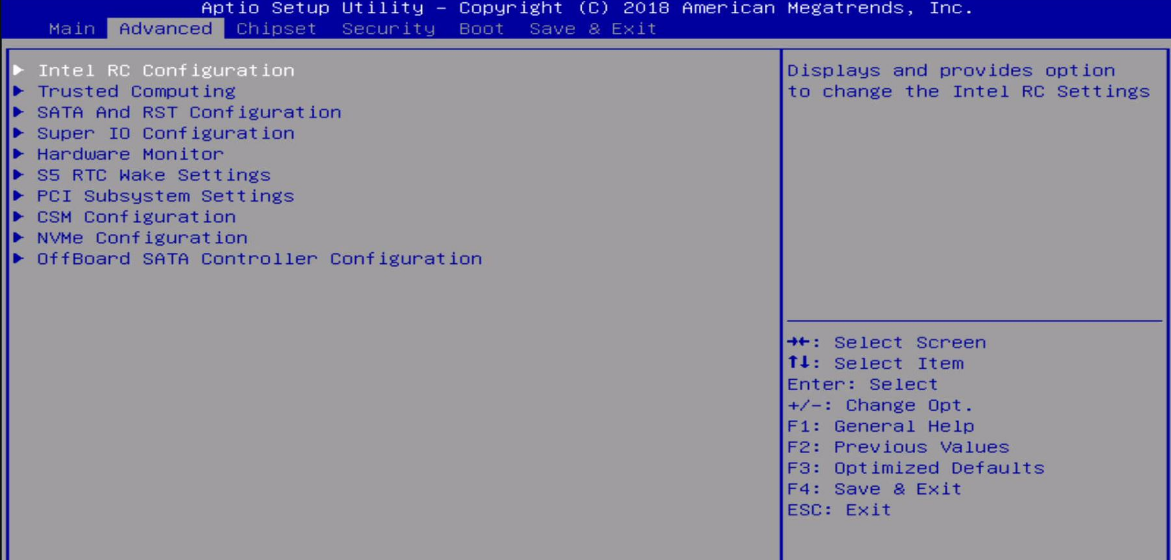
- Navigate to the Boot or Boot Options section using the arrow keys on your keyboard.
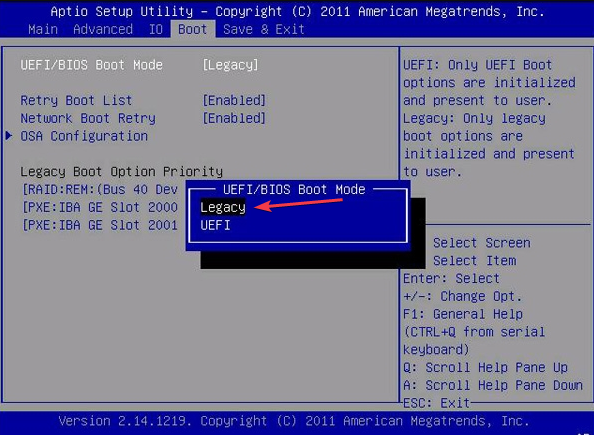
- Look for an option related to Boot Mode, Boot Type, or Boot Protocol.
- Depending on your motherboard and BIOS/UEFI version, you may have different options, such as UEFI, Legacy, and CSM. Select the option that enables CSM or Legacy boot mode.

- Save the changes and exit the BIOS setup utility.
- Your computer will restart, and the system should boot in CSM or Legacy mode.
Note that these steps vary depending on your computer’s manufacturer and BIOS/UEFI version. Hence, you can consult your motherboard’s manual or the manufacturer’s website for detailed instructions for your system.
In addition, you may be interested in our post about installing Windows 11 on an unsupported CPU and the easiest way to go about it.
Likewise, you can check our article about ways to fix slow boot issues on your Windows 11 PC and make it faster.
Should you have further questions or suggestions regarding this guide, kindly drop them in the comments section.
Still experiencing issues?
SPONSORED
If the above suggestions have not solved your problem, your computer may experience more severe Windows troubles. We suggest choosing an all-in-one solution like Fortect to fix problems efficiently. After installation, just click the View&Fix button and then press Start Repair.