How to Enable Memory Saver in Google Chrome
Follow the easy steps to enable this Chrome feature
- Upon activation, the memory saver automatically begins monitoring all open tabs in Chrome.
- The memory saver feature is not available on all versions of the Google Chrome browser.
- You can add exceptions for certain websites, preventing the feature from functioning on such addresses.
Google Chrome is one of the best browsers on Windows. However, the browser is known to be very resource hungry. To this effect, Google released the memory saver feature to help free up space.
This article will briefly overview the Chrome memory saver and the steps to enable the feature.
What is Chrome memory saver?
Chrome memory saver is a feature designed by Google to help free up space while using the app.
If you have a bunch of tabs opened up which are currently inactive, the memory saver feature swoops in and hibernates such tabs, thereby freeing up memory so you can browse other websites.
The feature is handy for memory-intensive activities like video editing or gaming. Once the memory saver feature is enabled, inactive tabs will be hibernated and only refreshed when needed.
How can I enable the memory saver in Chrome?
It’s important to note that the memory saver feature is not available in all versions of Chrome. However, here are the steps to enable memory saver in Chrome:
- Press the Windows key, type in Chrome, and hit Enter.
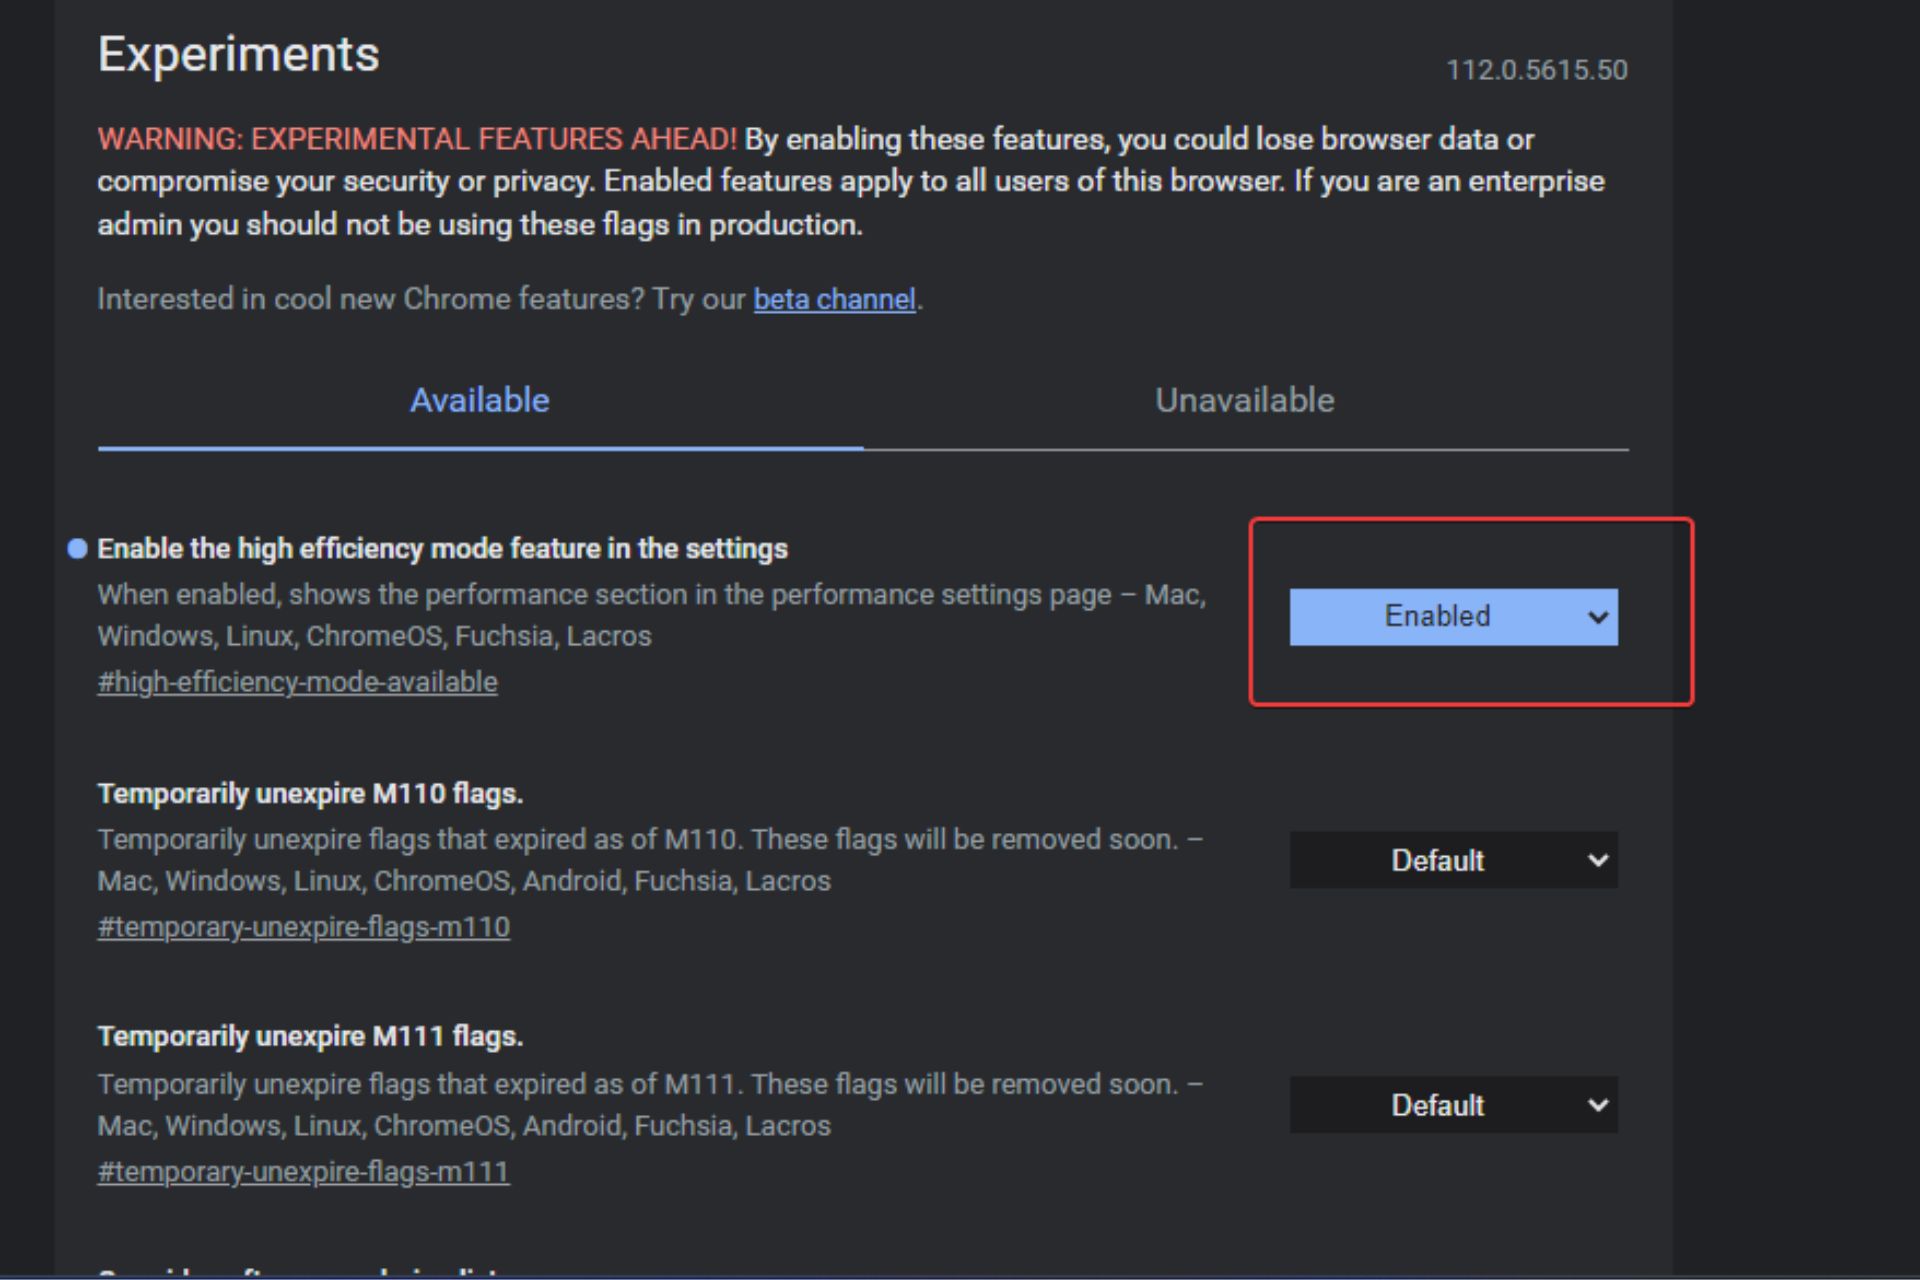
- In the search bar, type in chrome://flags and hit Enter.
- In the Search Flags search box, type in efficiency, and select Enabled from the dropdown next to the Enable the high-efficiency mode feature in the Settings option.

- Click the Relaunch button at the bottom right corner to refresh the window.


Once you’ve enabled the High-Efficiency Mode, proceed with the following steps:
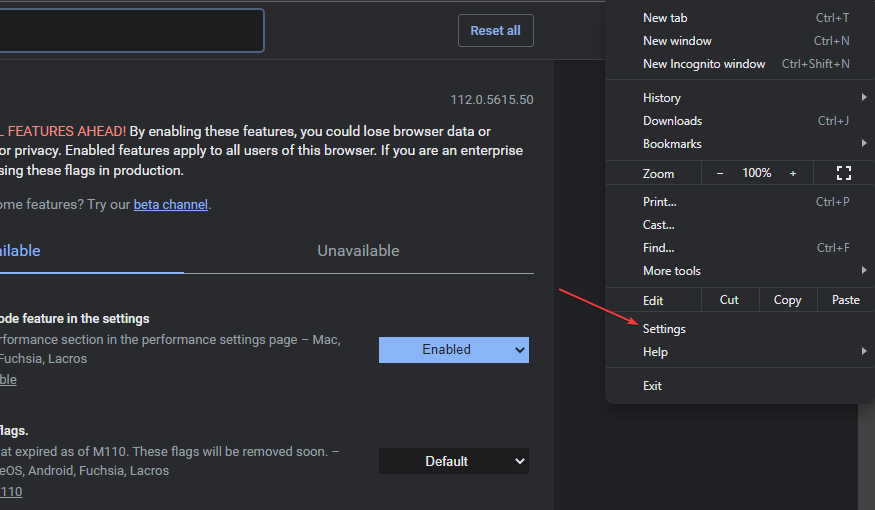
- In the Chrome window, click on the three vertical ellipses at the window’s top right corner, and select Settings.

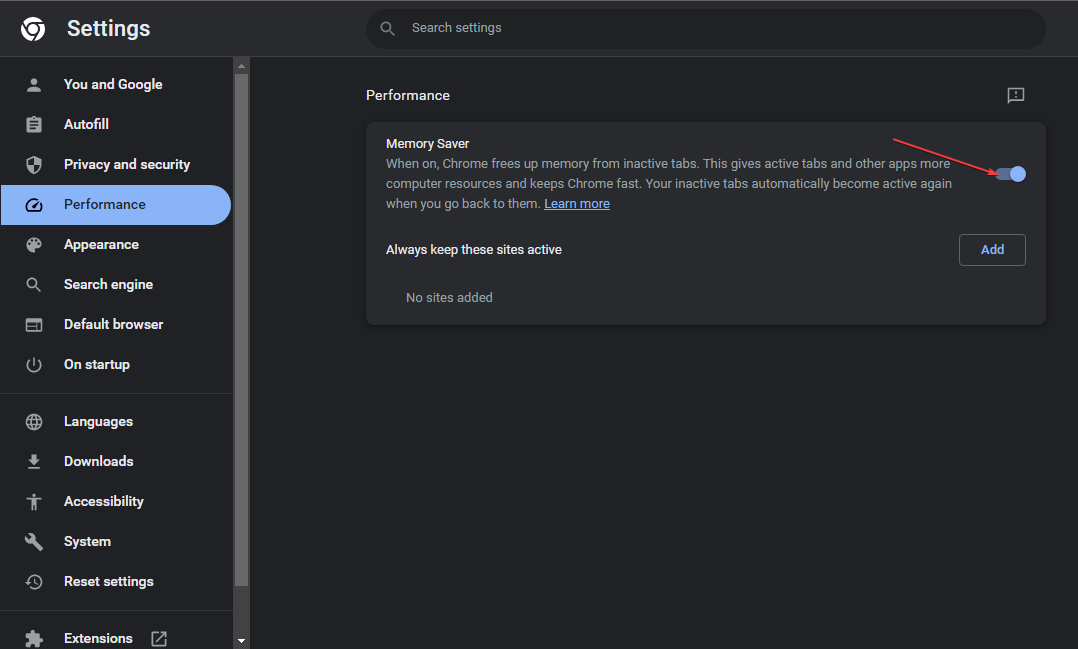
- In the next window, click on Performance on the left pane. Click and enable the Memory Saver toggle.

- Close the Settings tab.
Once done, Chrome will automatically free up memory from inactive tabs. This will help free up space for the active tabs to run efficiently.
Add Exceptions to Memory Saver
In some cases, you’ll want to enable the memory saver feature but exclude specific sites from being included in the memory saving.
To do this:
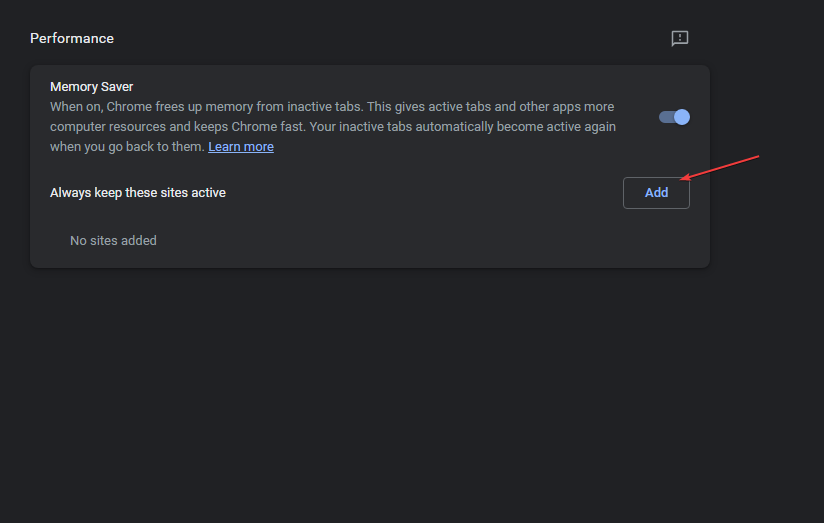
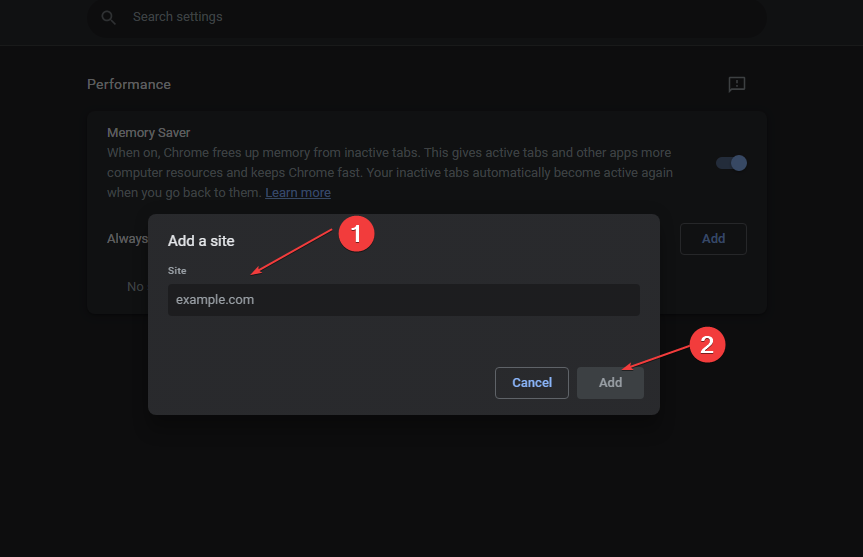
- While in the Memory Saver section, click the Add button next to the Always keep these sites active option.

- Type in the website URL in the window that appears, and click the Add button.

- Once you’ve added the website to this list, it’ll be automatically excluded from any of the memory saver’s functionalities.
The Memory Saver feature helps free up space while using the Chrome browser. It’s a handy feature that can help smoothen your browsing experience.
By the end of this article, you should be able to enable and disable the memory saver feature in Chrome.
Still experiencing issues?
SPONSORED
If the above suggestions have not solved your problem, your computer may experience more severe Windows troubles. We suggest choosing an all-in-one solution like Fortect to fix problems efficiently. After installation, just click the View&Fix button and then press Start Repair.