External Monitor Not Showing BIOS? 4 Ways to Force it
Check if the connection the source is correctly selected or not
- If the external monitor is not showing BIOS, then it could be because the external monitor cable is faulty.
- You should also try updating the BIOS file on your PC to avoid any compatibility issues.
One of the situations where you make use of the external monitor is when your primary monitor is not working. You can also use an external monitor to extend your display.
Some users have reported that the external monitor is not working and not showing BIOS. Basically, not allowing them to tweak it.
In this guide, we will share with you some solutions that will possibly help you out with the external monitor not showing BIOS issue. Let us check it out.
Why does the external monitor fail to show BIOS?
There are multiple reasons why the external monitor that you have connected fails to show the BIOS. Some of the most common reasons are listed below.
- Connection issue – The connection cable that you are using might be at fault or the type of cable that you are using to connect the external monitor isn’t supported.
- Wrong input source – You might have not selected the appropriate input source in the external monitor which is why you are not seeing BIOS on it.
- Incompatible display settings – The display settings on the external monitor should not exceed its limitations.
- Graphics driver is outdated – Some bugs in the outdated version of the graphics driver are not allowing you to connect or show content on your external monitor.
- BIOS issue – You may need to reset the BIOS as there could be some underlying problems that are causing this problem.
Let us now check the different solutions that will help you to resolve the external monitor not showing the BIOS menu problem.
How can I fix the external monitor not showing BIOS issue?
Here are a few things that you can do before applying the advanced solutions to resolve the external monitor not showing BIOS issues.
- Check if the cable that you are using to connect the external monitor is healthy and not worn out.
- Ensure that the external monitor is in working condition.
- Make sure to power up the external display, if it requires it.
- If you are connecting the external monitor using an HDMI cable, then you should try using the VGA port or the DisplayPort to connect it to the primary monitor.
If none of the above solutions work, let’s apply advanced solutions to resolve this problem.
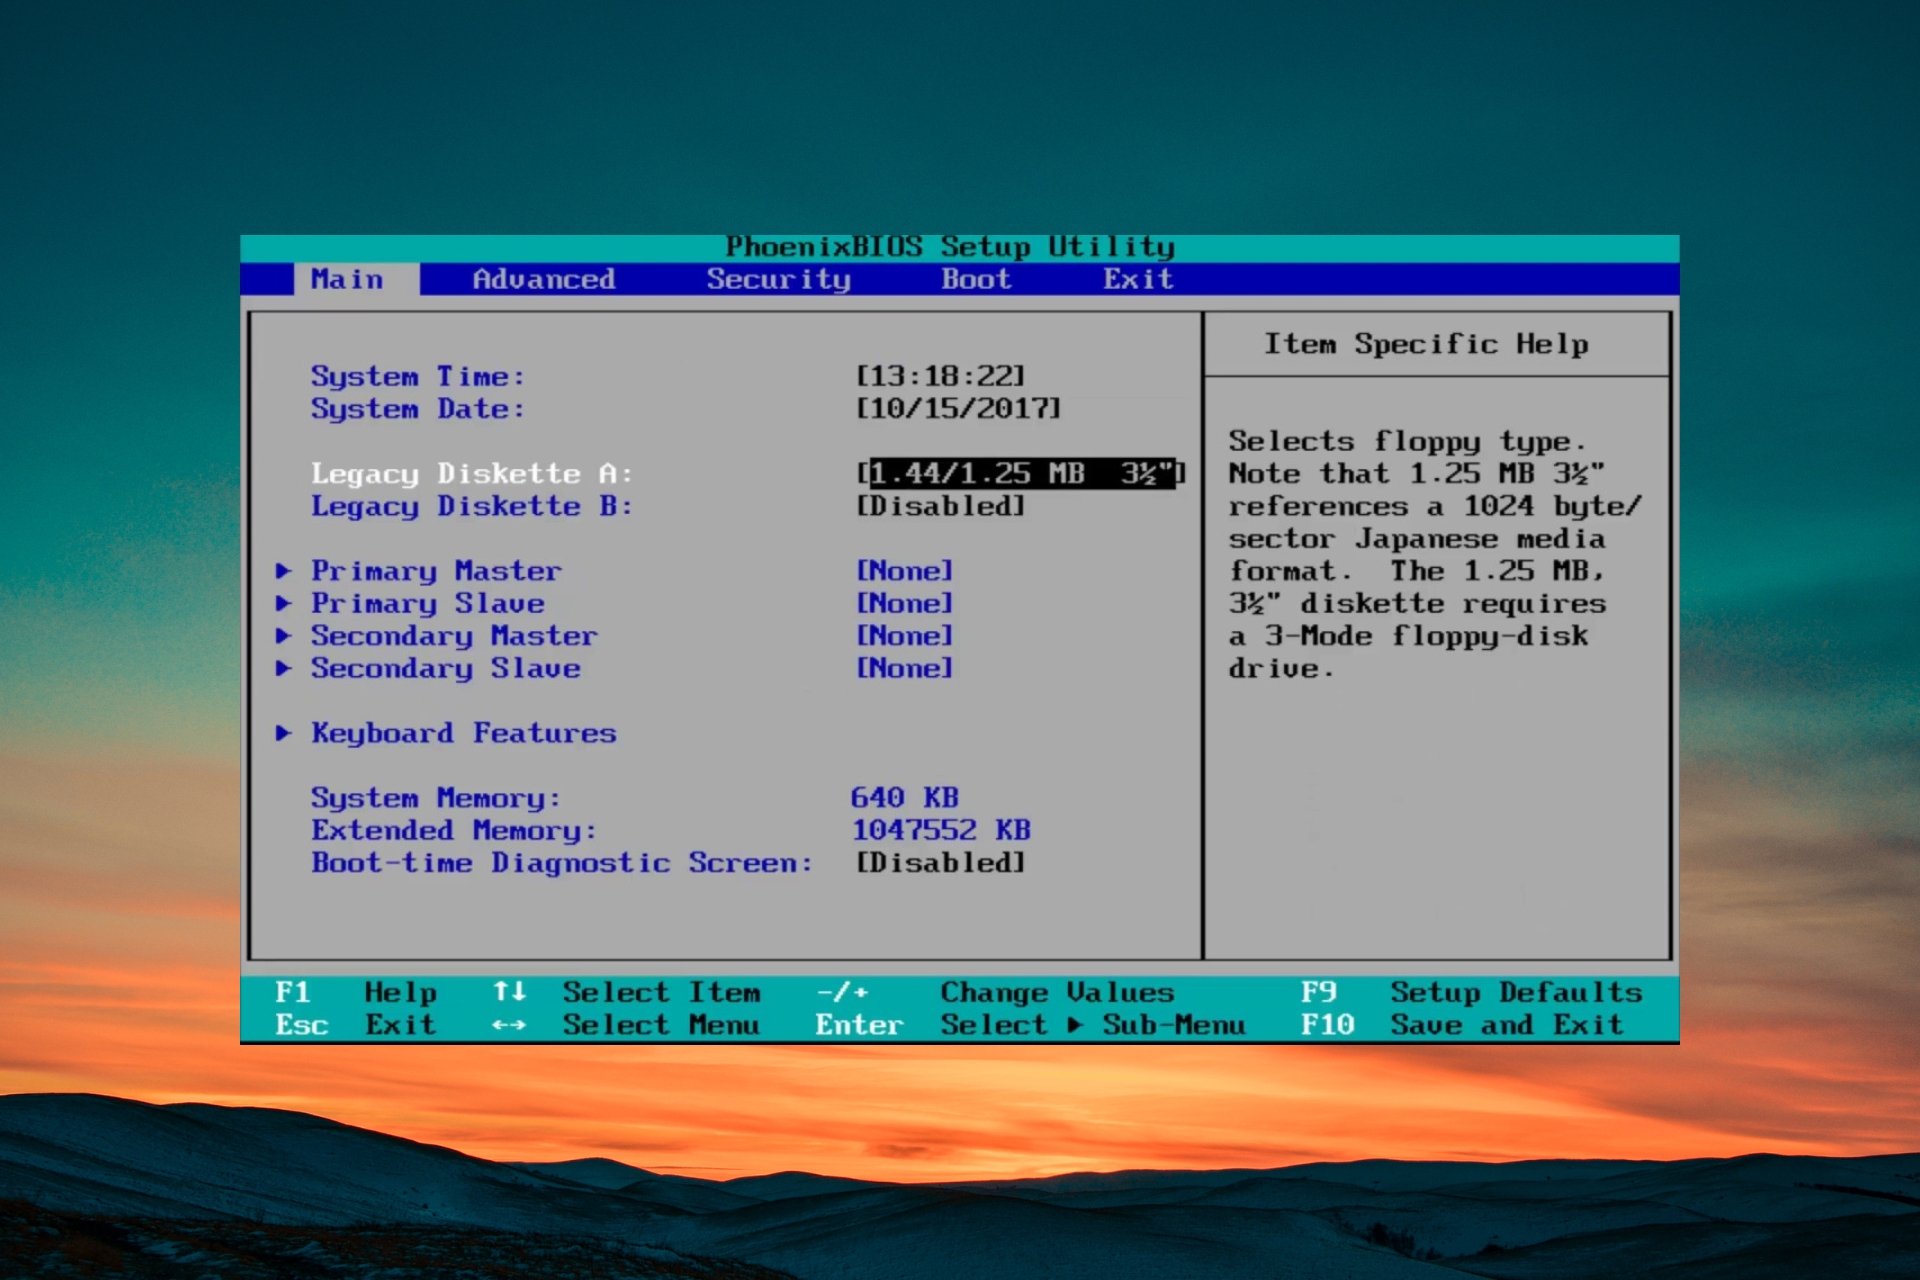
1. Check the BIOS settings
Some monitors have specific settings that prevent or enable them to display the BIOS menu. One working solution to fix the external monitor not showing the BIOS menu would be to press the Fn + F1 or simply the F1 key.
This will switch on the external monitor and display the BIOS menu on it instead of the primary monitor of yours. This method has helped several users resolve the problem.
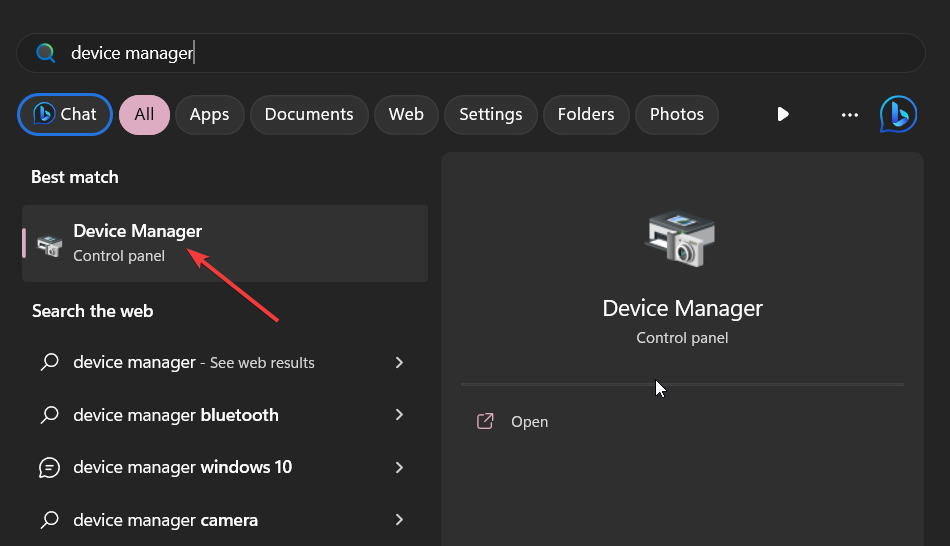
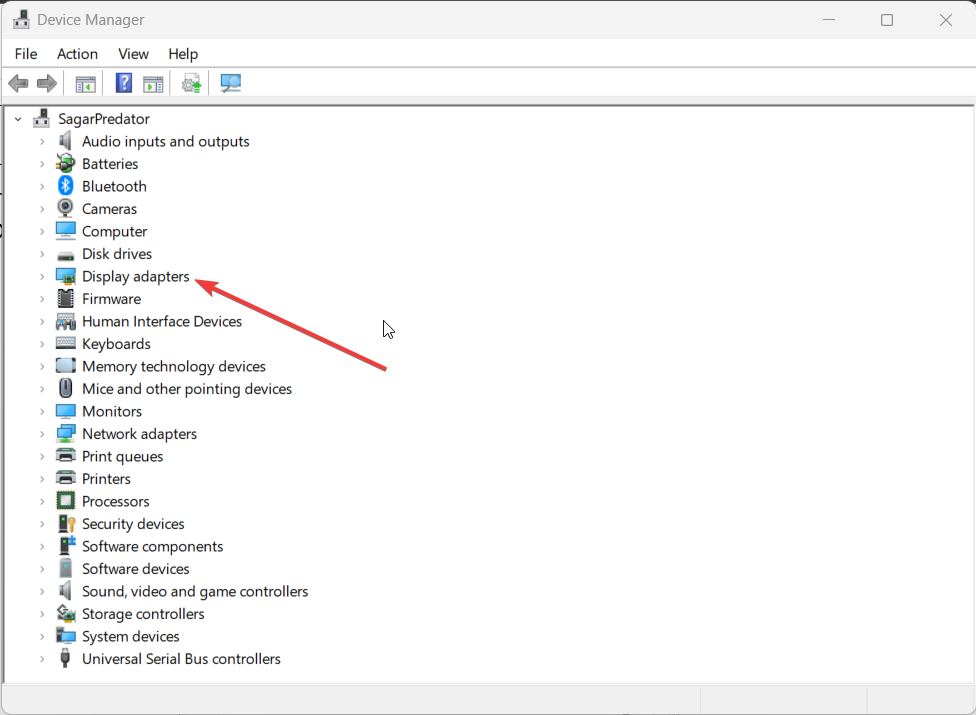
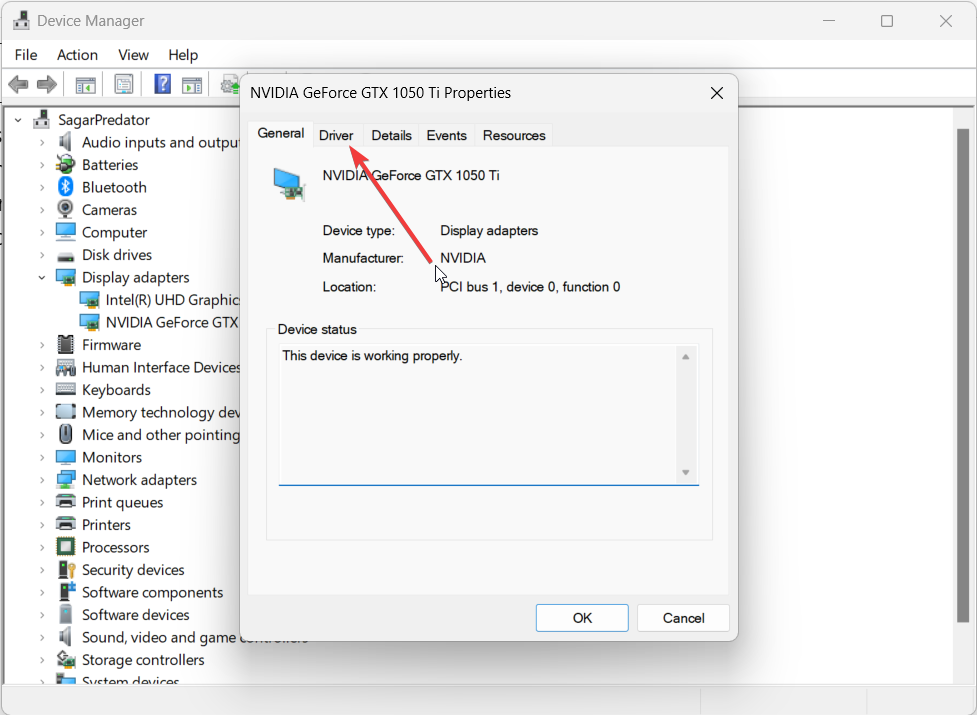
2. Update the graphics driver
- Press the Win key to open the Start menu.
- Type Device Manager and open it.

- Expand the Display adapters section.

- Double-click on your graphics driver to open it.
- Switch to the Drivers tab.

- Click on the Update driver option.
- Select Search automatically for drivers option.

You should ensure that your primary and external computer’s graphics drivers are up to date as this will prevent any compatibility issues that might occur. You can check out our guide that explains the different ways to update drivers on Windows 11.
- Download and install the Outbyte Driver Updater app.
- Launch the software and wait for the app to detect all incompatible drivers.
- Now, it will show you a list of all faulty drivers to select the ones to Update or Ignore.

- Click on Update & Apply Selected to download and install the newest versions.
- Restart your PC to ensure the applied changes.


OutByte
Keep your GPU in a flawless state without worrying about possible driver issues.3. Update the motherboard BIOS
3.1 Check the BIOS version
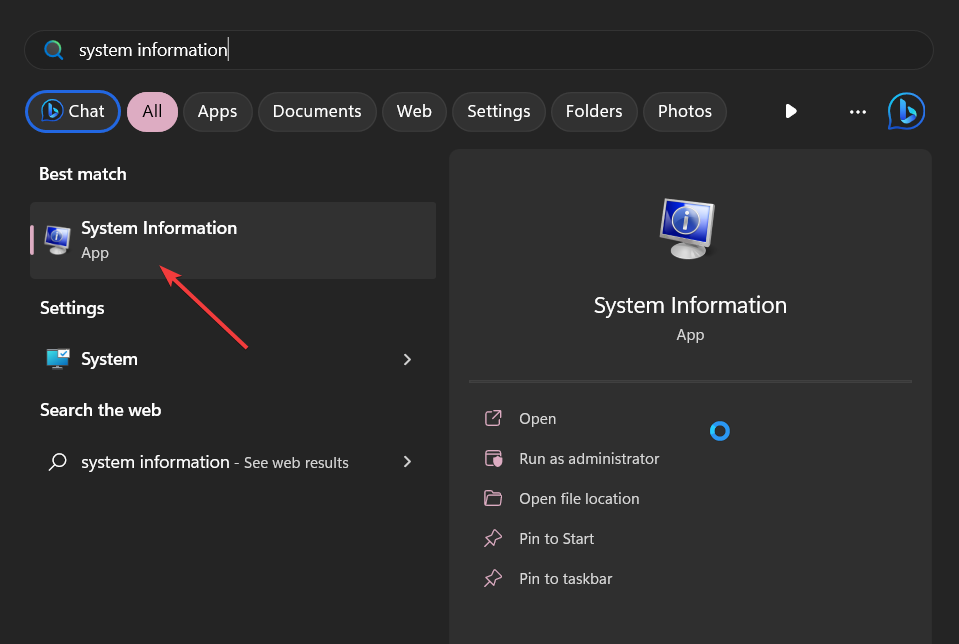
- Open the Start menu by pressing the Win key.
- Type System Information and open it.

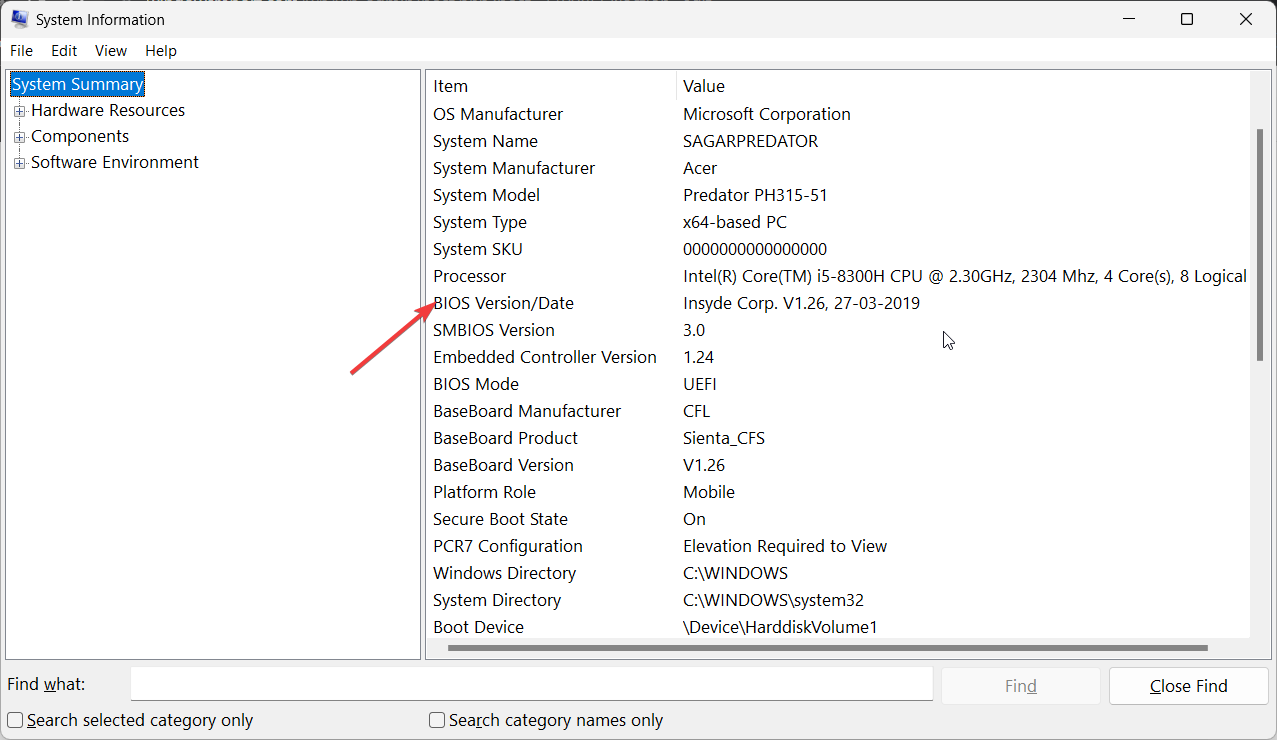
- Locate BIOS Version/Date section on the right side.

- Note down the BIOS version that you are running.
3.2 Format the USB drive to FAT32
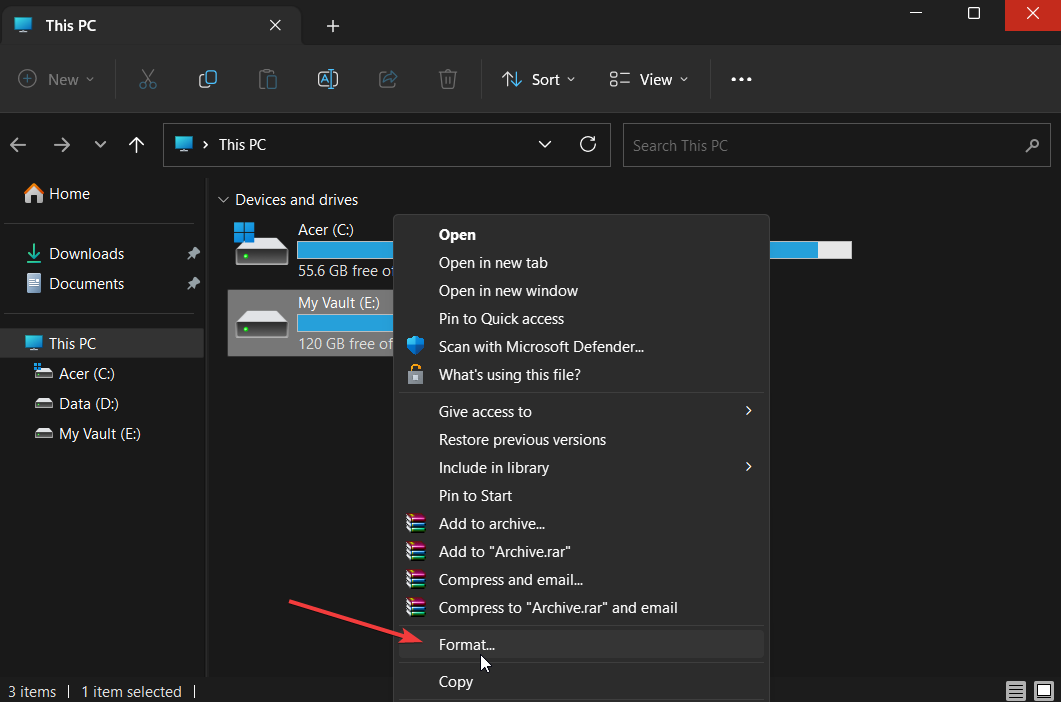
- Insert the USB flash drive into your PC.
- Press Win + E to open the File Explorer.
- Right-click on your USB drive and select Format.

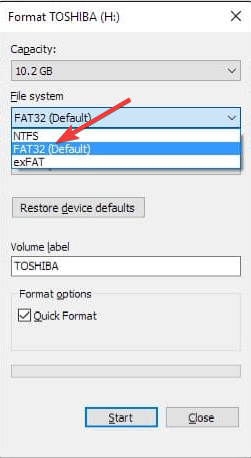
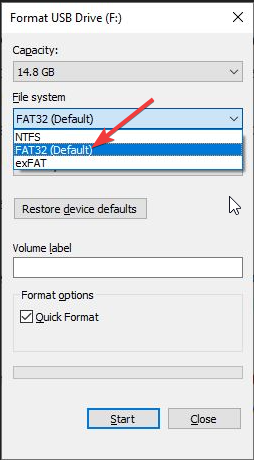
- Choose FAT32 from the File system dropdown menu.

- Click on the Start button.
3.3 Update the BIOS
- Visit the official website of the motherboard manufacturer and download the BIOS file.
- Place the BIOS file into the formatted USB drive.
- Insert the USB drive containing the BIOS update file into any USB port on your PC.
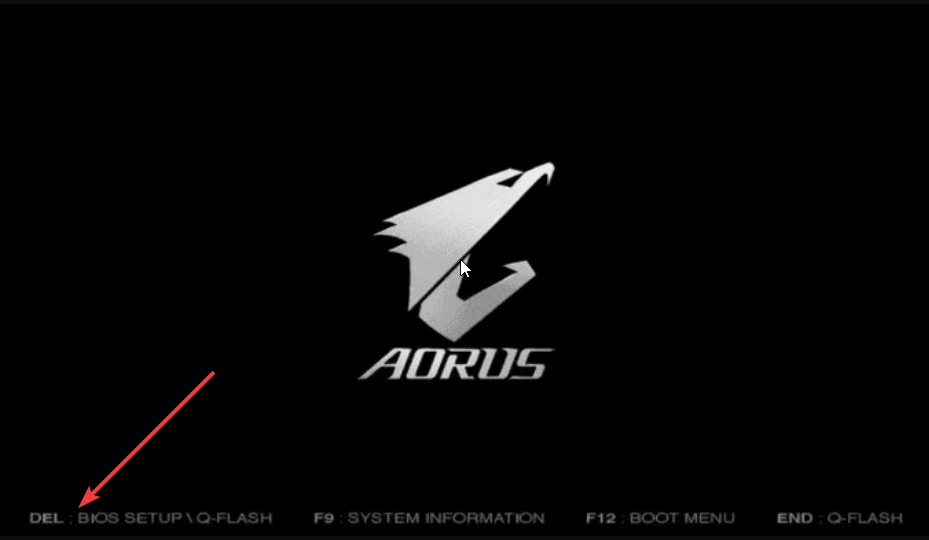
- Restart your PC and when it is booting up enter the BIOS menu by pressing the Del key.

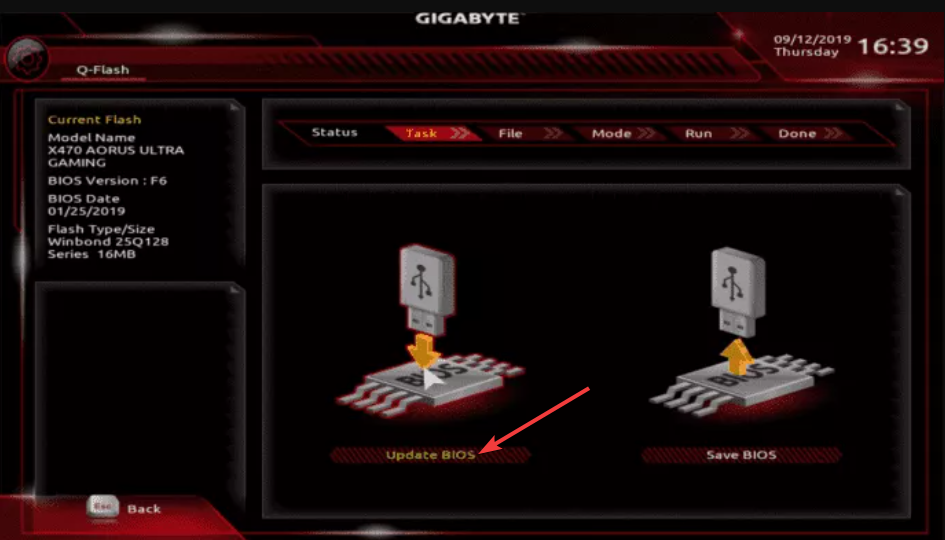
- Choose the Update BIOS option.

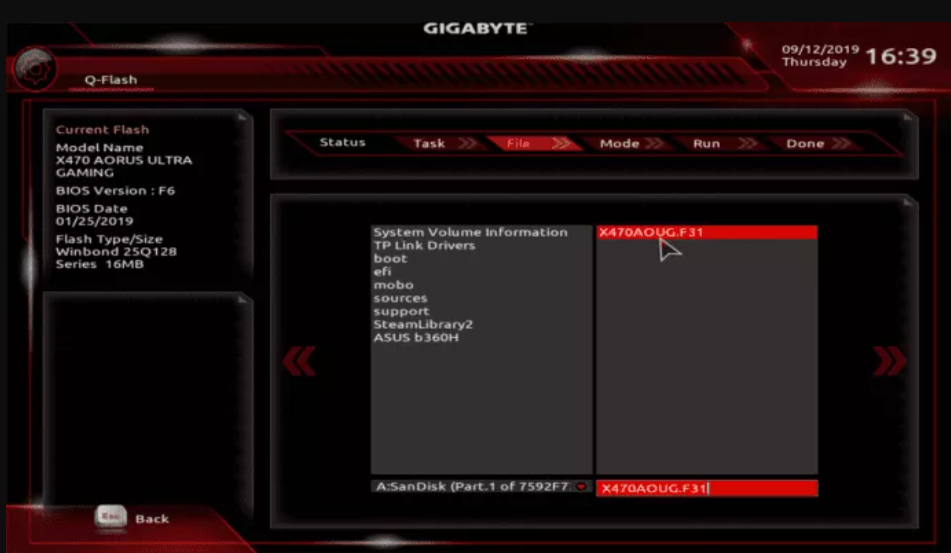
- Locate the BIOS update file and select it.
- Start the BIOS update process.
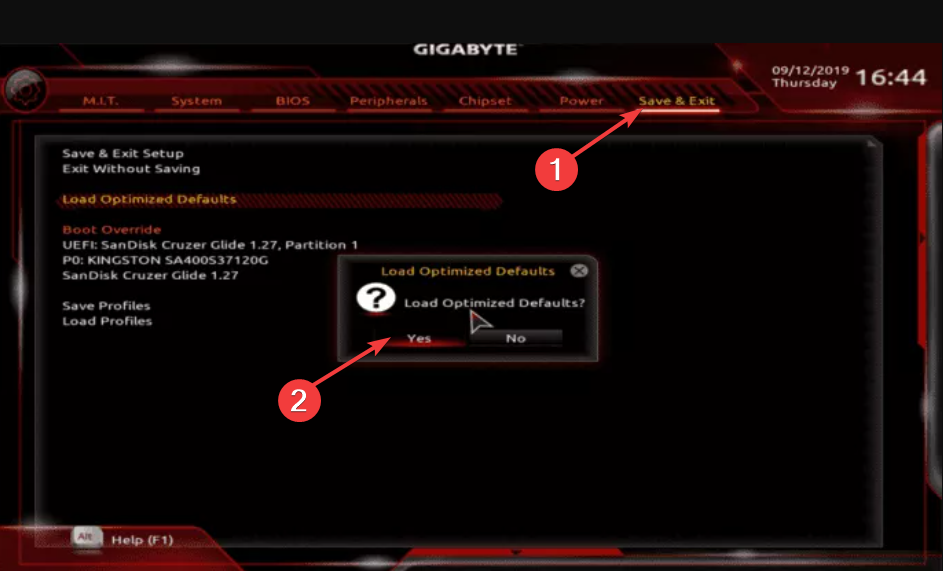
- Save & Exit and reboot your PC.
Updating the BIOS can also help you remove the compatibility issues that you could have with the external monitor.
That is it from us in this guide. We would suggest you check out our guide that will help you resolve if the second monitor is not detected in Windows 11.
Feel free to drop a comment below and let us know which one of the above solutions fixed the external monitor not showing BIOS problem.
Still experiencing issues?
SPONSORED
If the above suggestions have not solved your problem, your computer may experience more severe Windows troubles. We suggest choosing an all-in-one solution like Fortect to fix problems efficiently. After installation, just click the View&Fix button and then press Start Repair.