How to Use PCPartPicker to Build a PC [Beginner’s Guide]
Build your own PC from scratch in no time
- PCPartPicker makes it easier to build a custom computer by providing all the information you need in one place.
- It is a great platform for PC enthusiasts, gamers, and anyone looking to build their own custom computer.
- If you don't know anything about building, PCPartPicker offers two great starting points - Build Guides and Completed Builds.
If you’re building a PC for the first time, it can feel daunting and time-consuming to find PC parts compatible with each other, fit your budget, and meet all your needs.
Fortunately, finding the right components and planning the ideal PC build for your budget has become easier than ever. With PCPartPicker, anyone can plan their own PC builds and easily purchase the necessary parts.
PCPartPicker simplifies the process of building your own PC by letting you select the best compatible PC parts, check specifications, compare pricing across several different retailers, and make informed purchases.
What is the PCPartPicker?
PCPartPicker is a popular online platform that can help you select compatible components and plan your PC build.
PCPartPicker has a database of all the different components, like the processors, graphics cards, motherboards, and memory, and it tells you which parts are compatible.
It also shows you the prices and reviews of the parts so you can make an informed decision. It also allows you to create a parts list, add custom notes, and estimate the total cost of the build.
Expert tip:
SPONSORED
Some PC issues are hard to tackle, especially when it comes to missing or corrupted system files and repositories of your Windows.
Be sure to use a dedicated tool, such as Fortect, which will scan and replace your broken files with their fresh versions from its repository.
You can save your build and share it with others and see what other people have built for inspiration.
How can I build my PC on PCPartPicker?
1. Create an account
 NOTE
NOTE
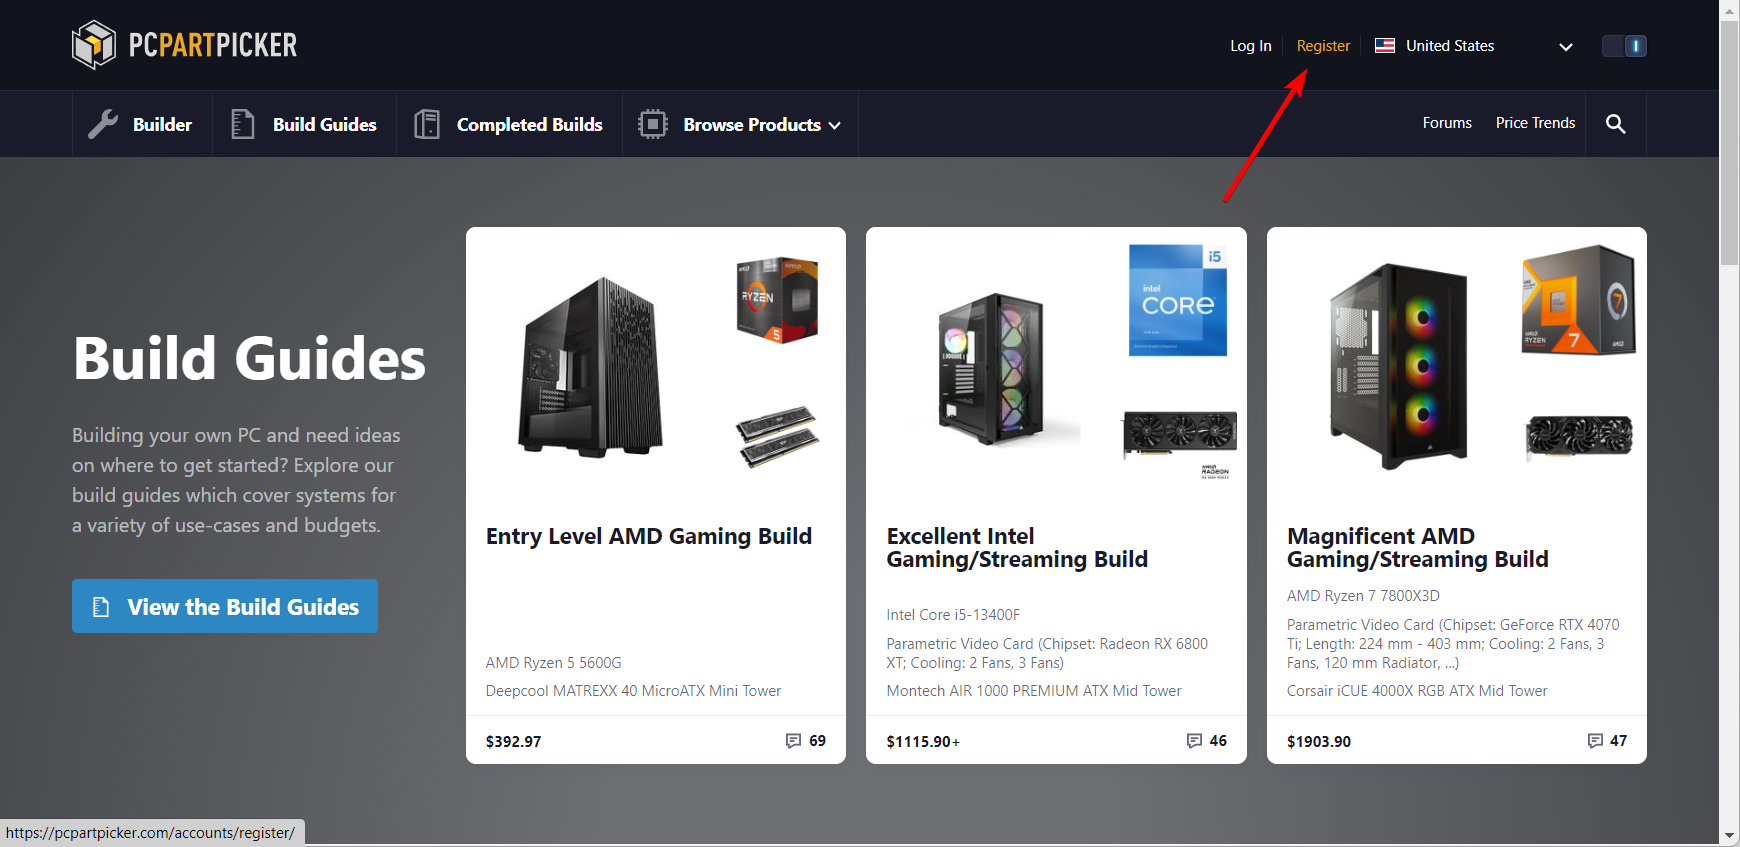
- Visit the PCPartPicker website and click the Register option.

- Fill in the details, such as username, email, and password, and then click Register.

- After that, open the email account that you used to create the PCPartPicker account and click the link to activate your account.
- Now, go back to PCPartPicker and log in to your account.
- Once you are logged in, select your country from the drop-down menu at the top right.


Before you start using the PCPartPicker, it’s essential to have some knowledge about building a PC. This means understanding the different parts like the CPU, GPU, motherboard, RAM, and storage that make up a computer.
It’s also important to have a clear idea of what you want to do with your PC (like work, gaming, etc.), as it will help determine the specific components you’ll need.
2. Get started
 Tip
Tip
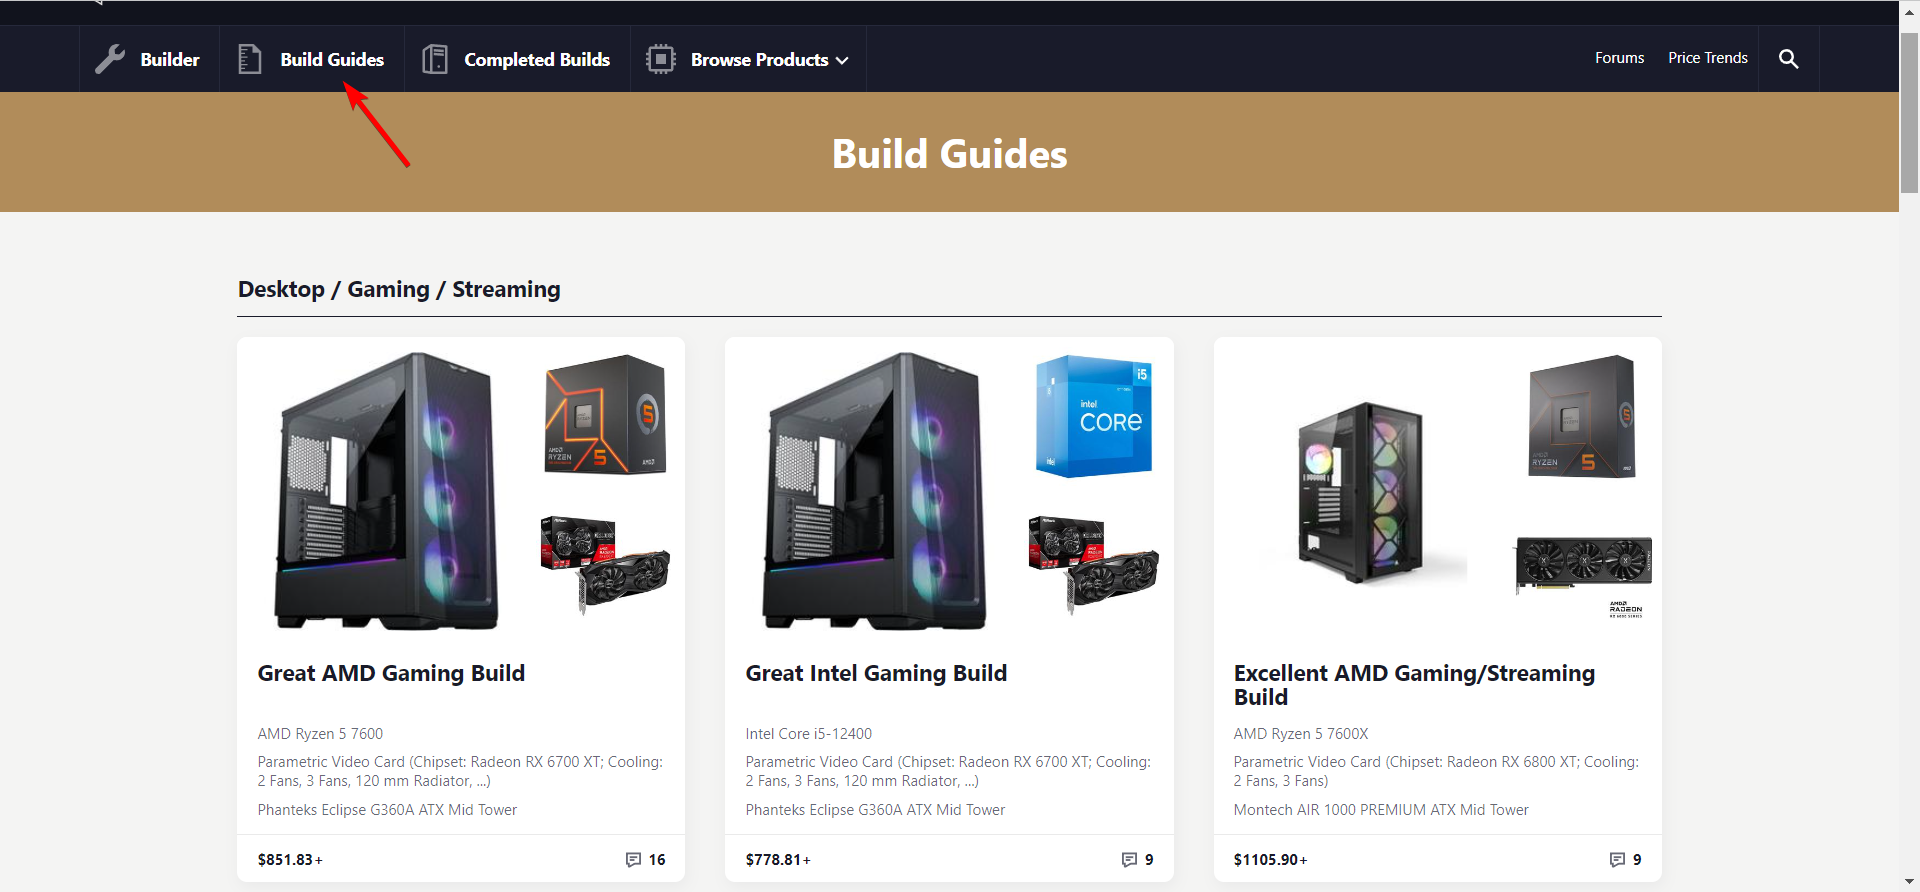
- To get recommendations and instructions for building a custom PC, go to the Build Guides section on the site. These guides, designed by the PCPartPicker team, cover different types of PC builds, ranging from budget-friendly computers to high-end gaming PCs.

- To explore the builds created by other users like you, head to the Completed Builds page. You can see the included parts, pricing breakdowns, and even post comments and questions.
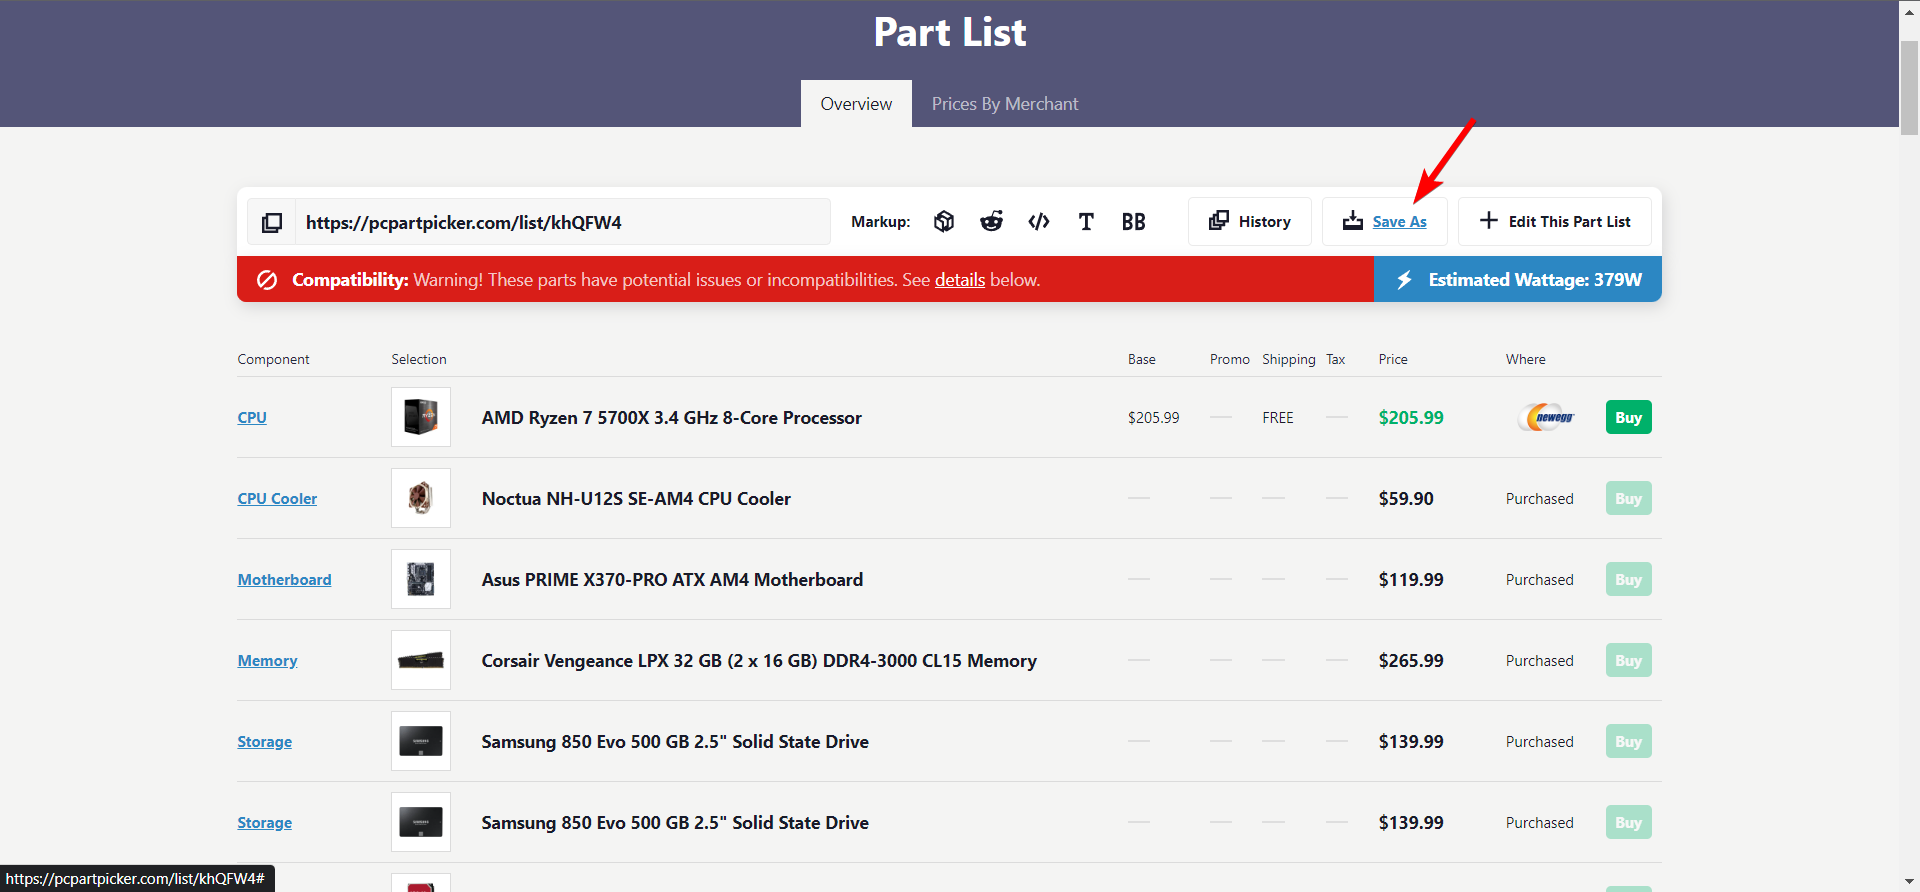
- You can also edit and save these builds in your account as your own builds. To do that, open a particular completed build page, and click the View full price breakdown link on the left panel.
- Then, click the Edit This Part List button and edit the parts as you desire.
- Click Save As to save that build in your account.


3. Select the parts
3.1 From the selection
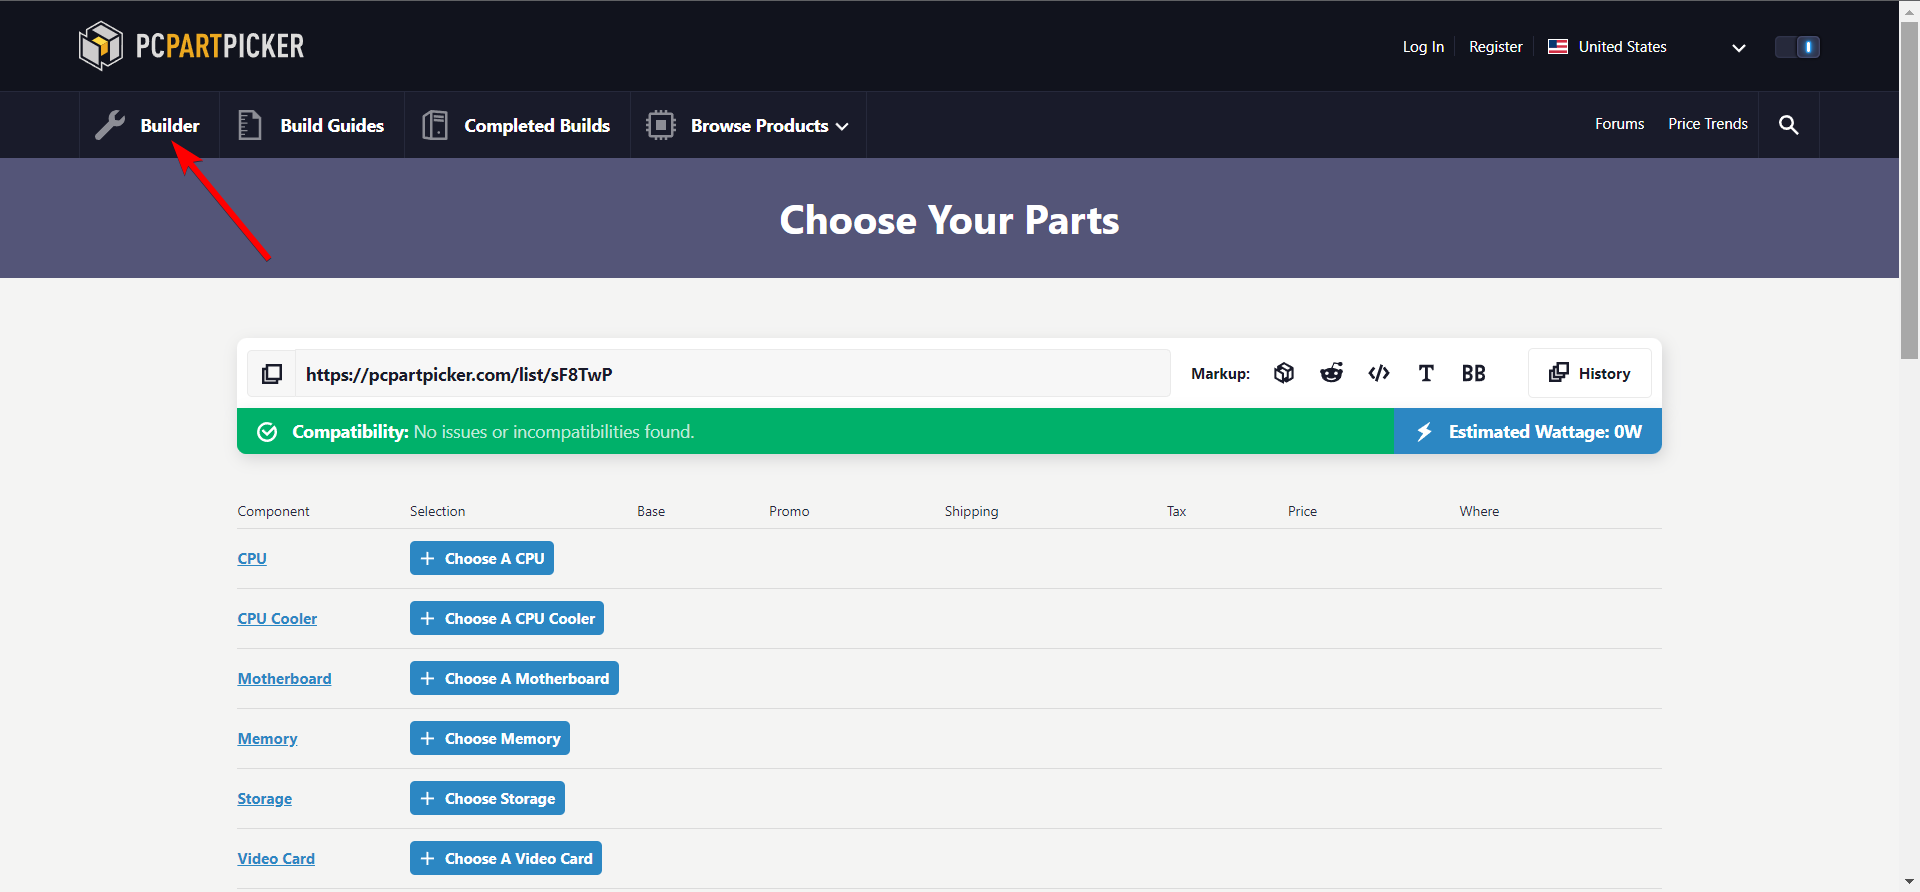
- To create your PC build, go to the Builder section on PCPartPicker’s website.

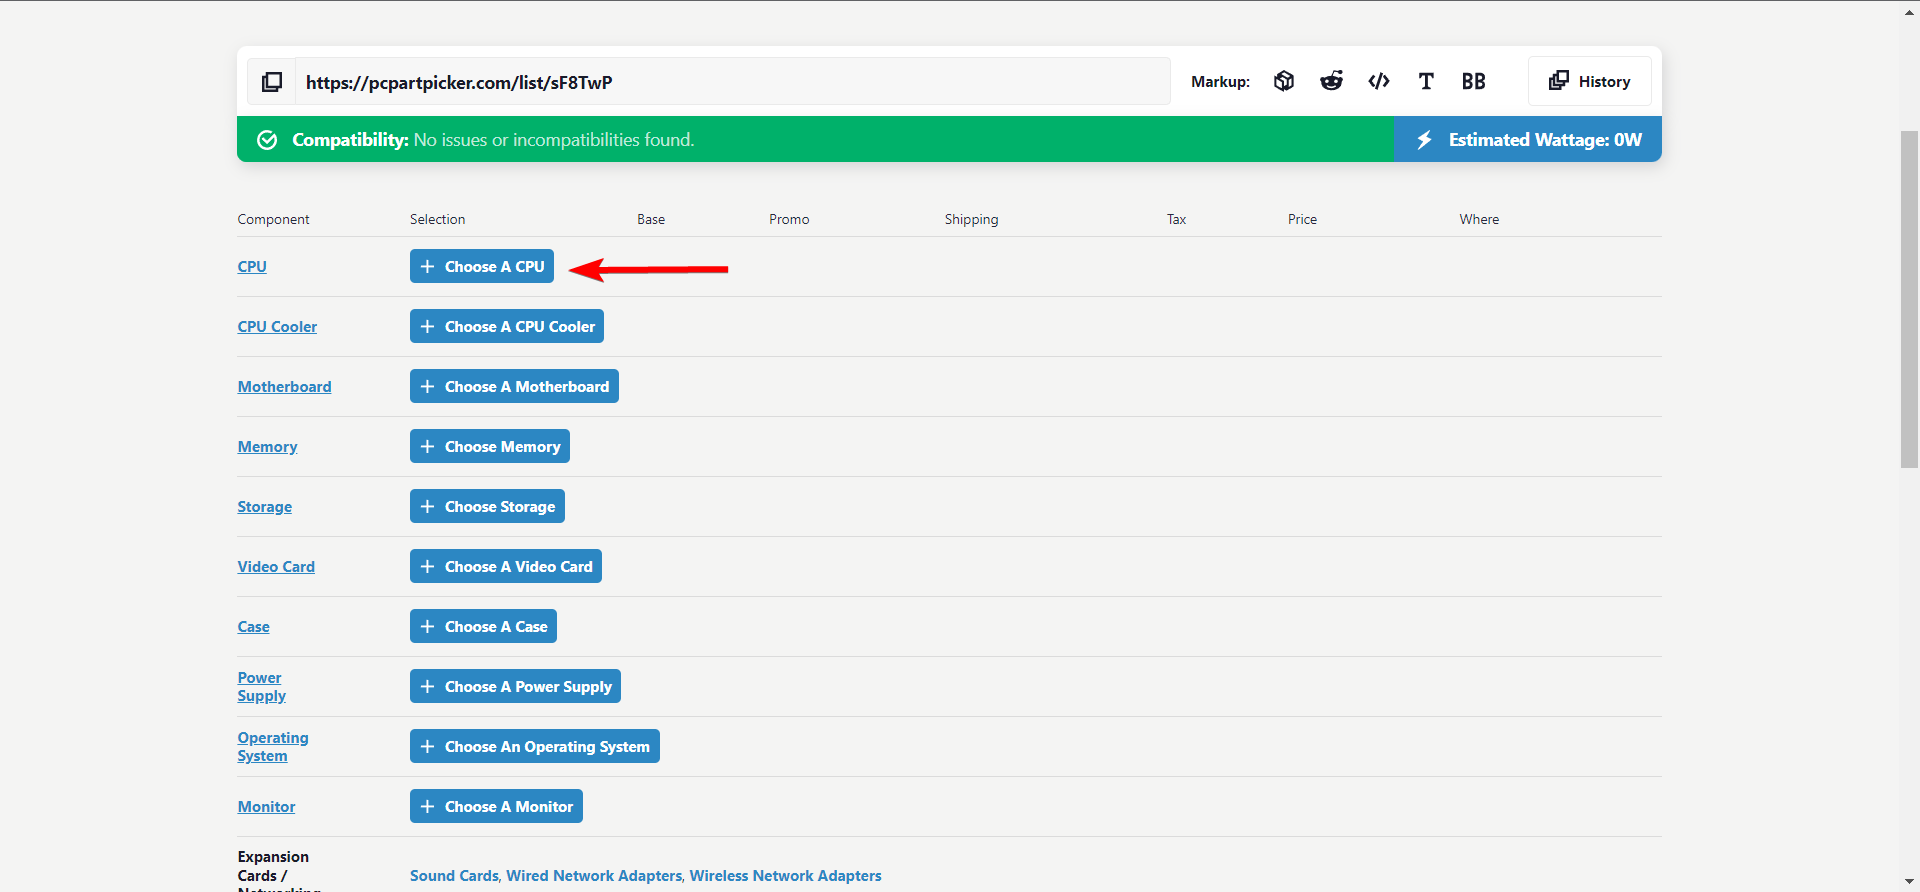
- PCPartPicker organizes components into categories. To select a specific component, such as a CPU, navigate to the category and click on the + Choose A CPU button next to it.
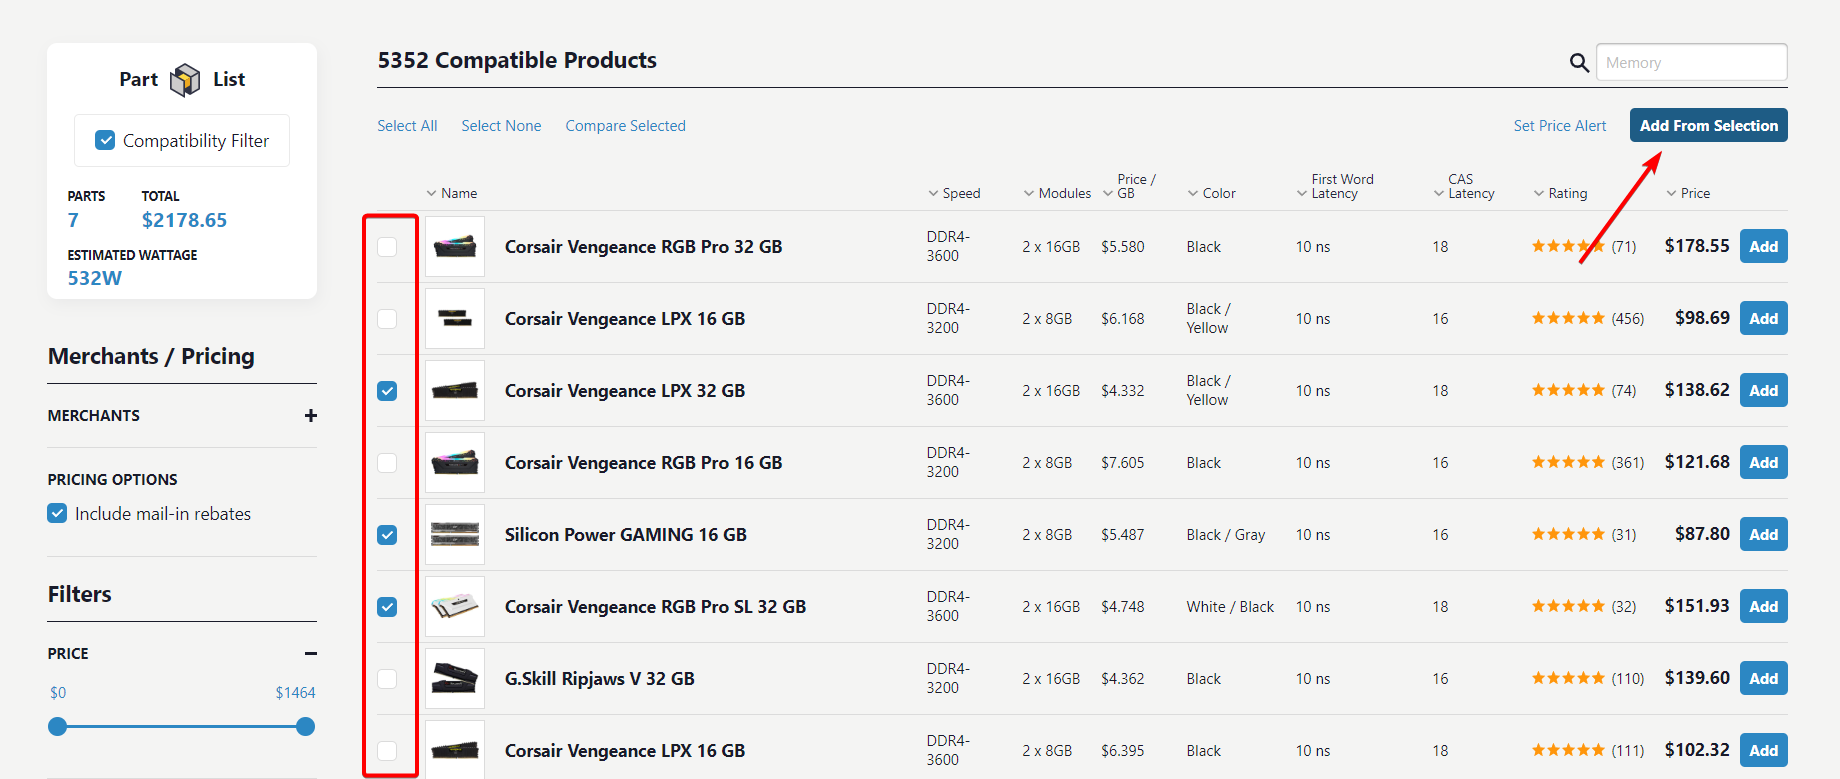
- Then, click the Add button next to the product you want to include.
- To add multiple items, select the products and click Add From Selection.

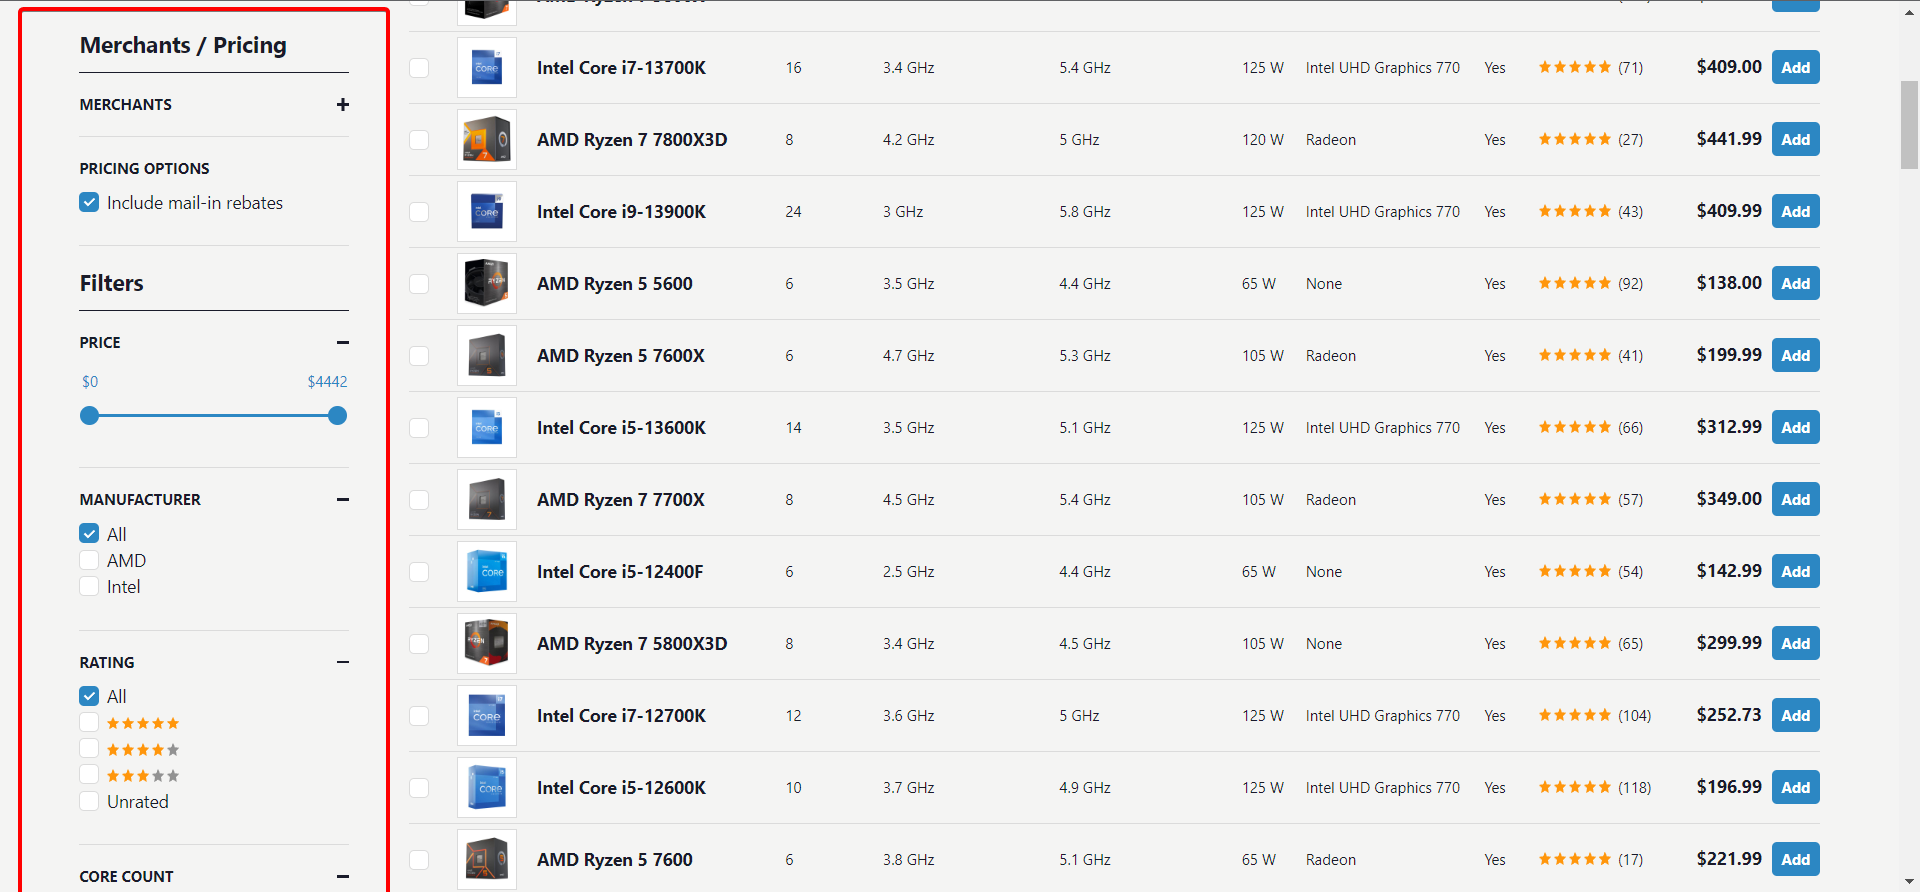
- Make use of the Merchat/Pricing and Filters sections on the left panel to narrow down your search.
- To view only compatible parts with the components you’ve already selected, enable the Compatibility Filter option. This will filter out the incompatible parts and show you the one that will work well with your existing selections.
- To compare multiple products side-by-side, select the products and click the Compare Selected option at the top.
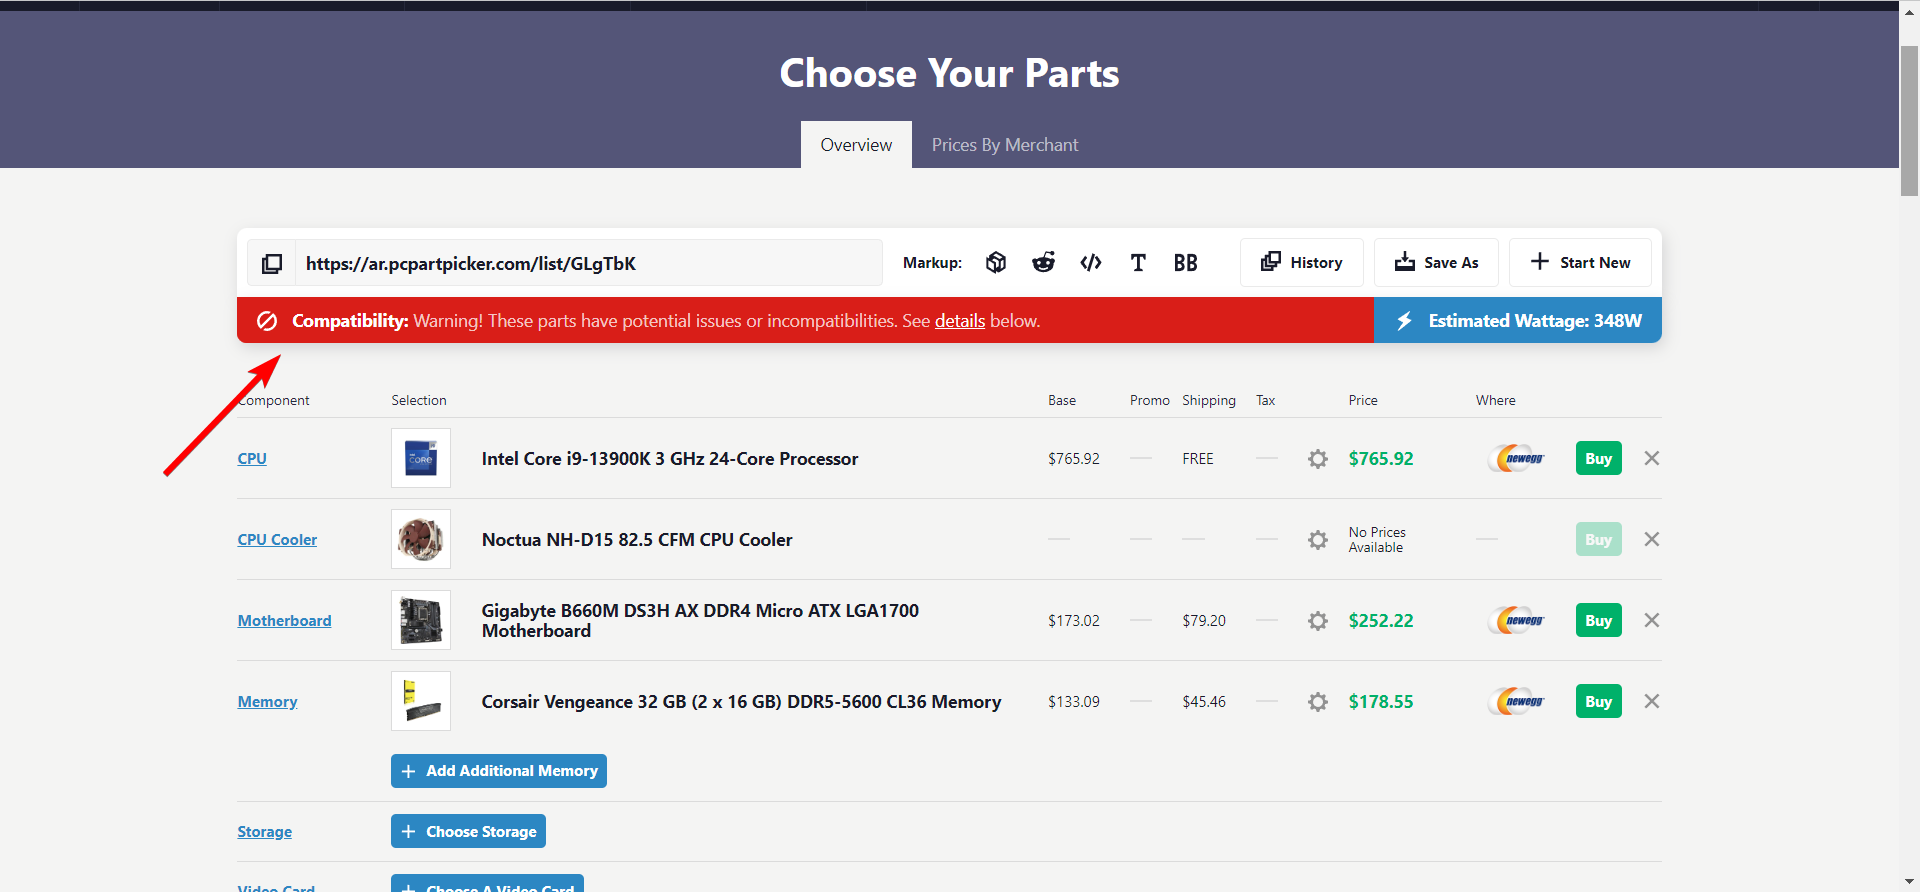
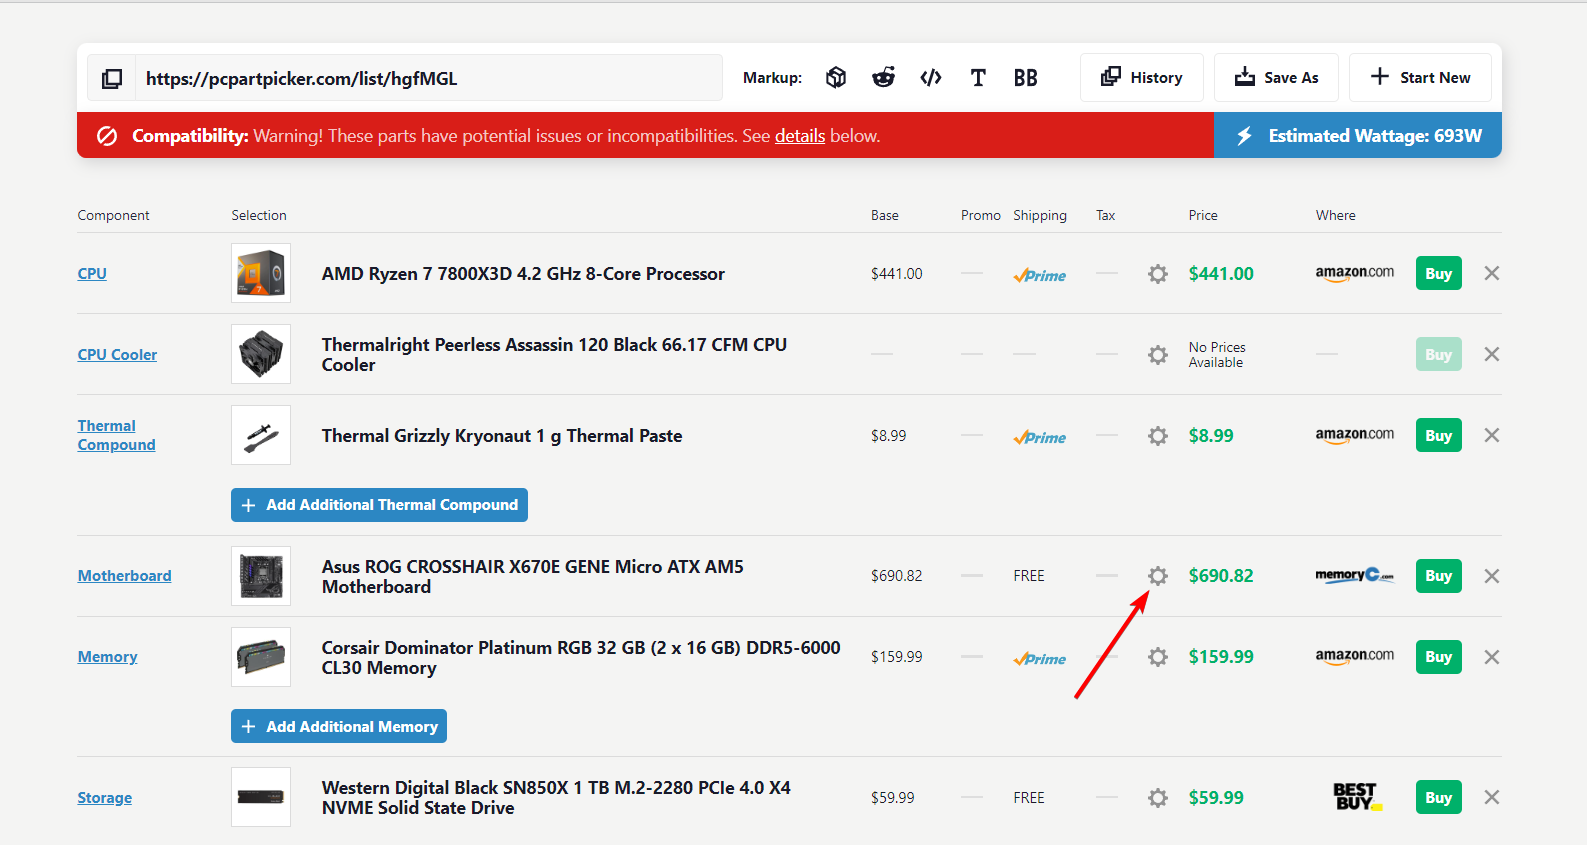
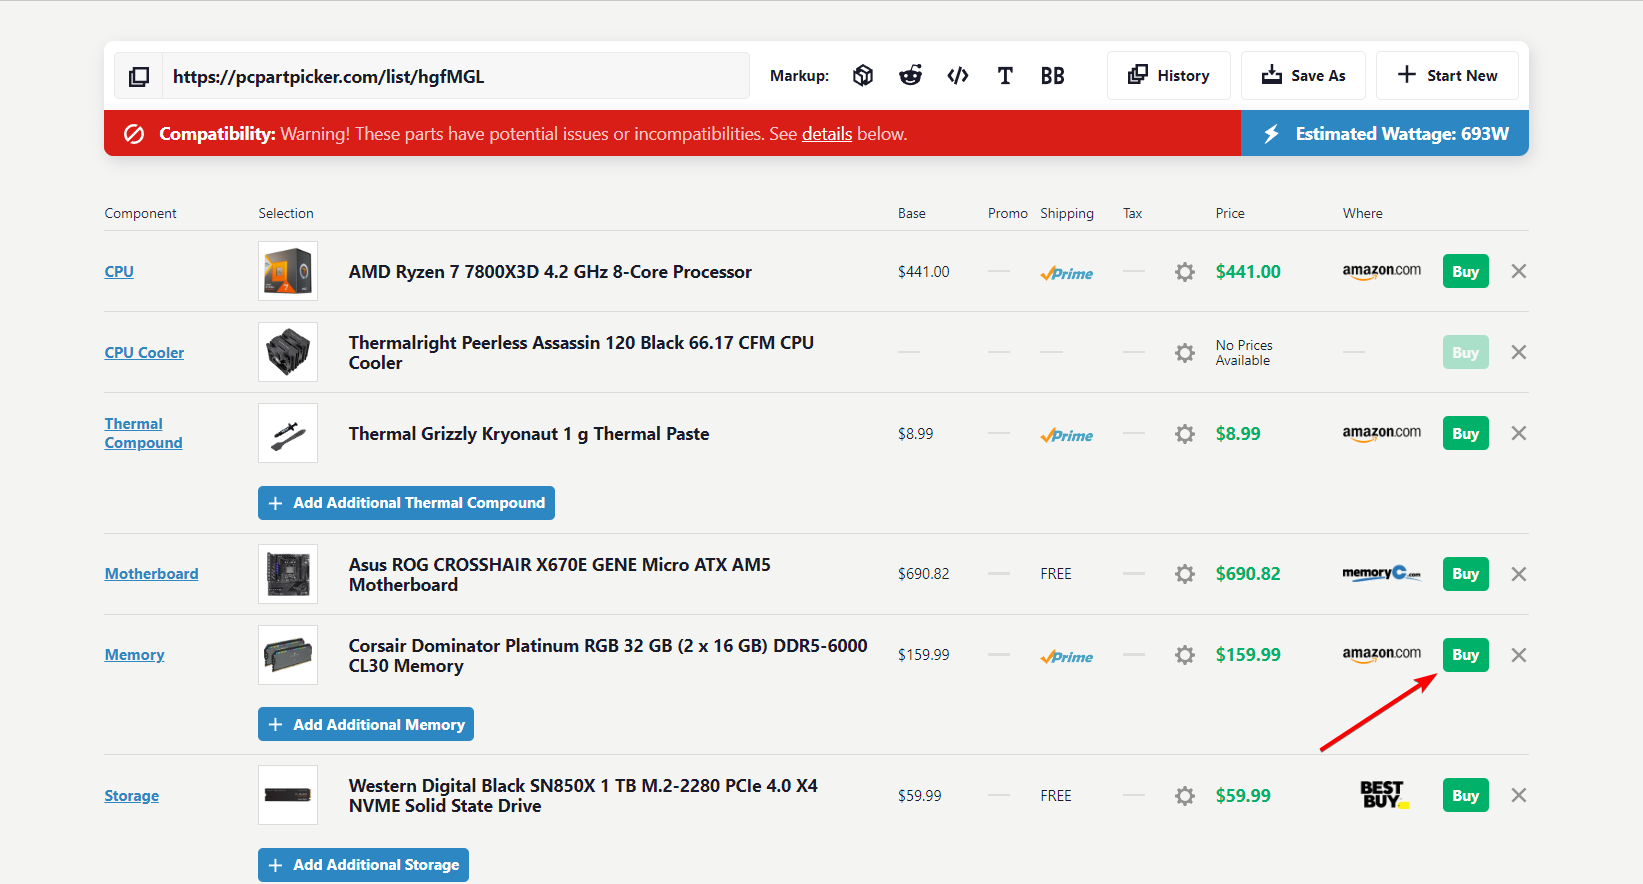
- As you select parts, the site will show you Compatibility: Warning if any component you select is incompatible with your build.
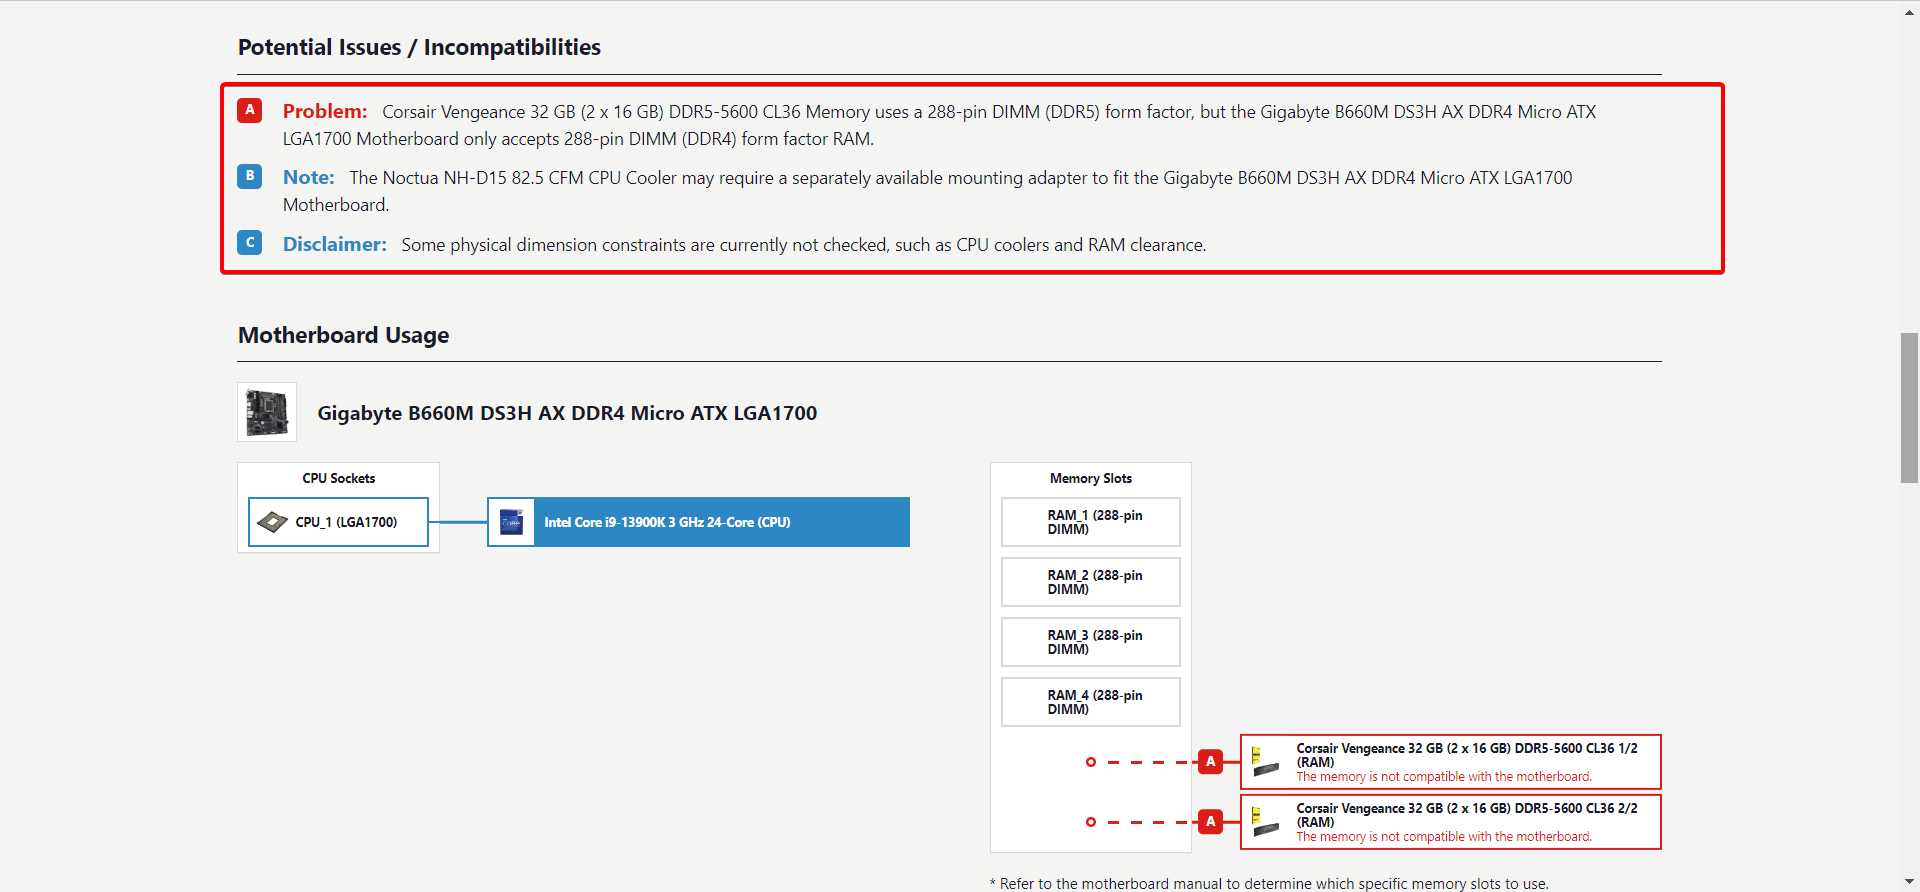
- Scroll down to the Potential Issues / Incompatibilities section to check for compatibility issues between components. This section will highlight which parts are incompatible and explain the specific compatibility problems.
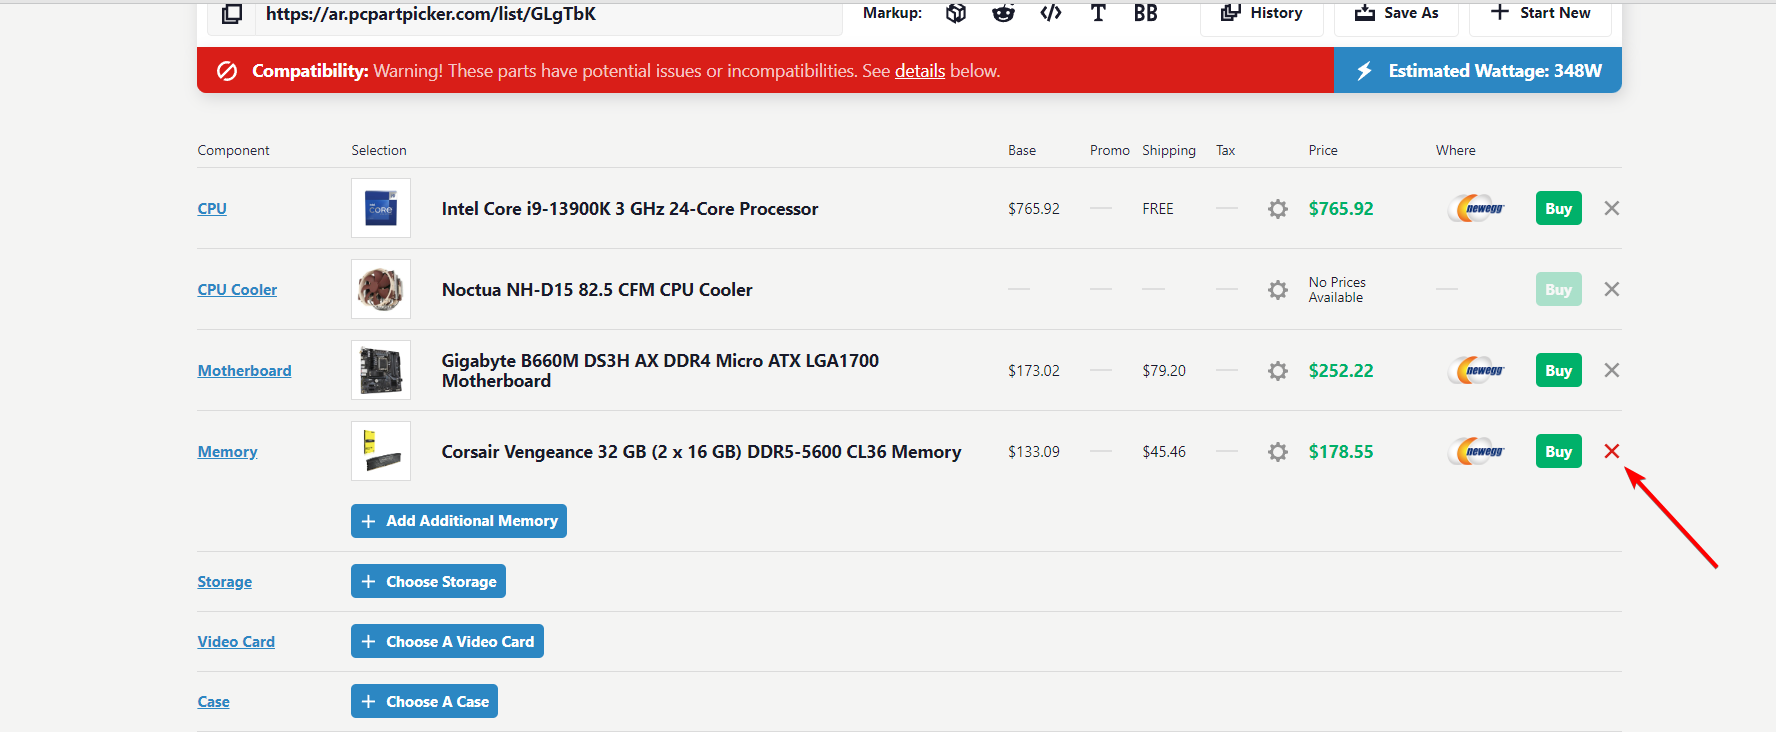
- You can then choose to remove the incompatible parts by clicking the X button beside it and replacing it with a suitable alternative.


3.2 Add additional parts
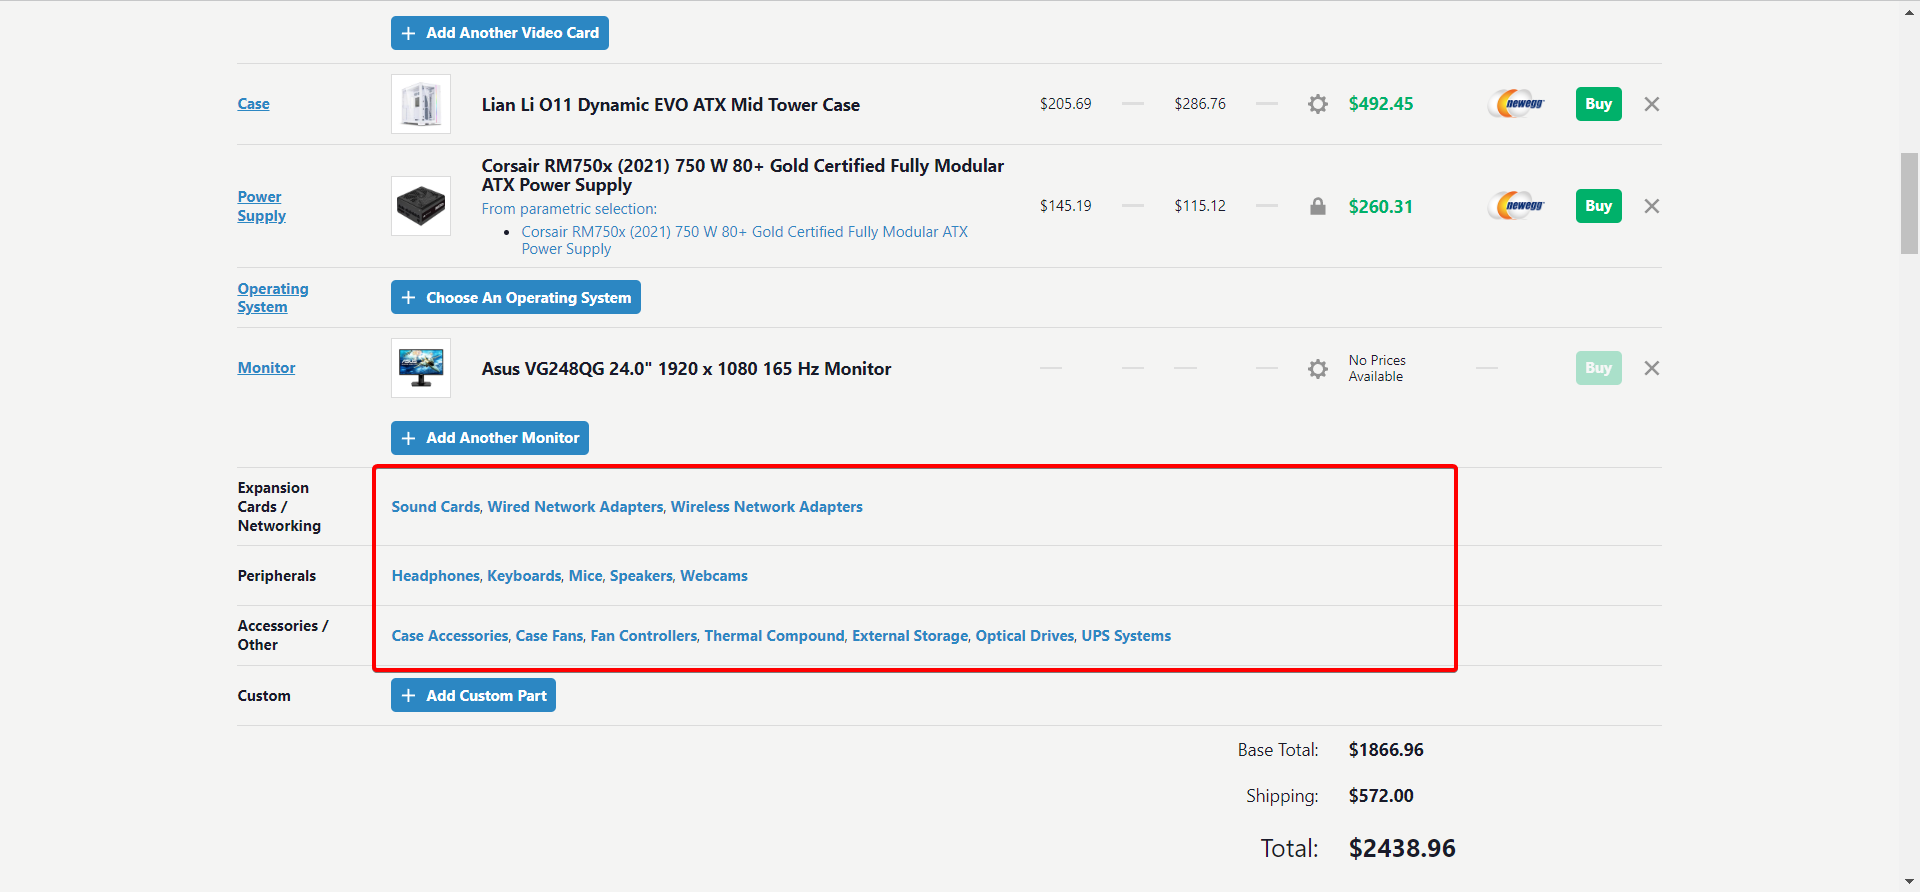
- Alternatively, click the + Add Additional… button to additional parts.

- You can add additional parts, peripherals, and accessories using the links below.
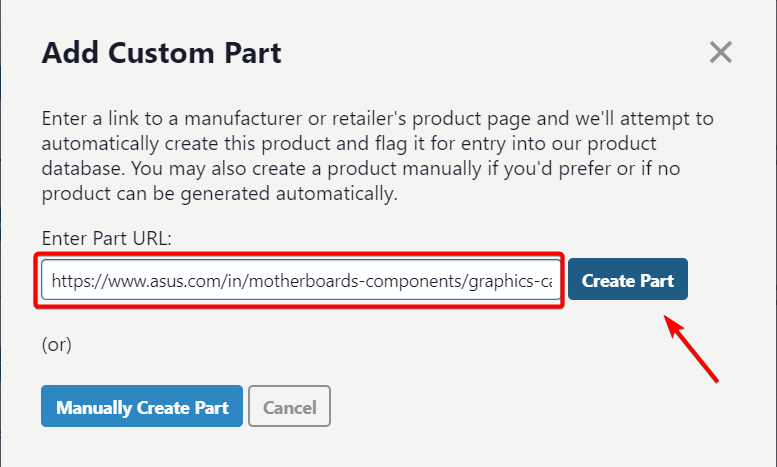
- If the particular product is not available on the site, click the + Add Custom Part button.

- Then, enter the URL of the manufacturer or retailer product page and click the Create Part button. PCPartPicker will try to automatically create the part and add it to the database.

- Alternatively, click the Manually Create Part to manually add the product to the list.
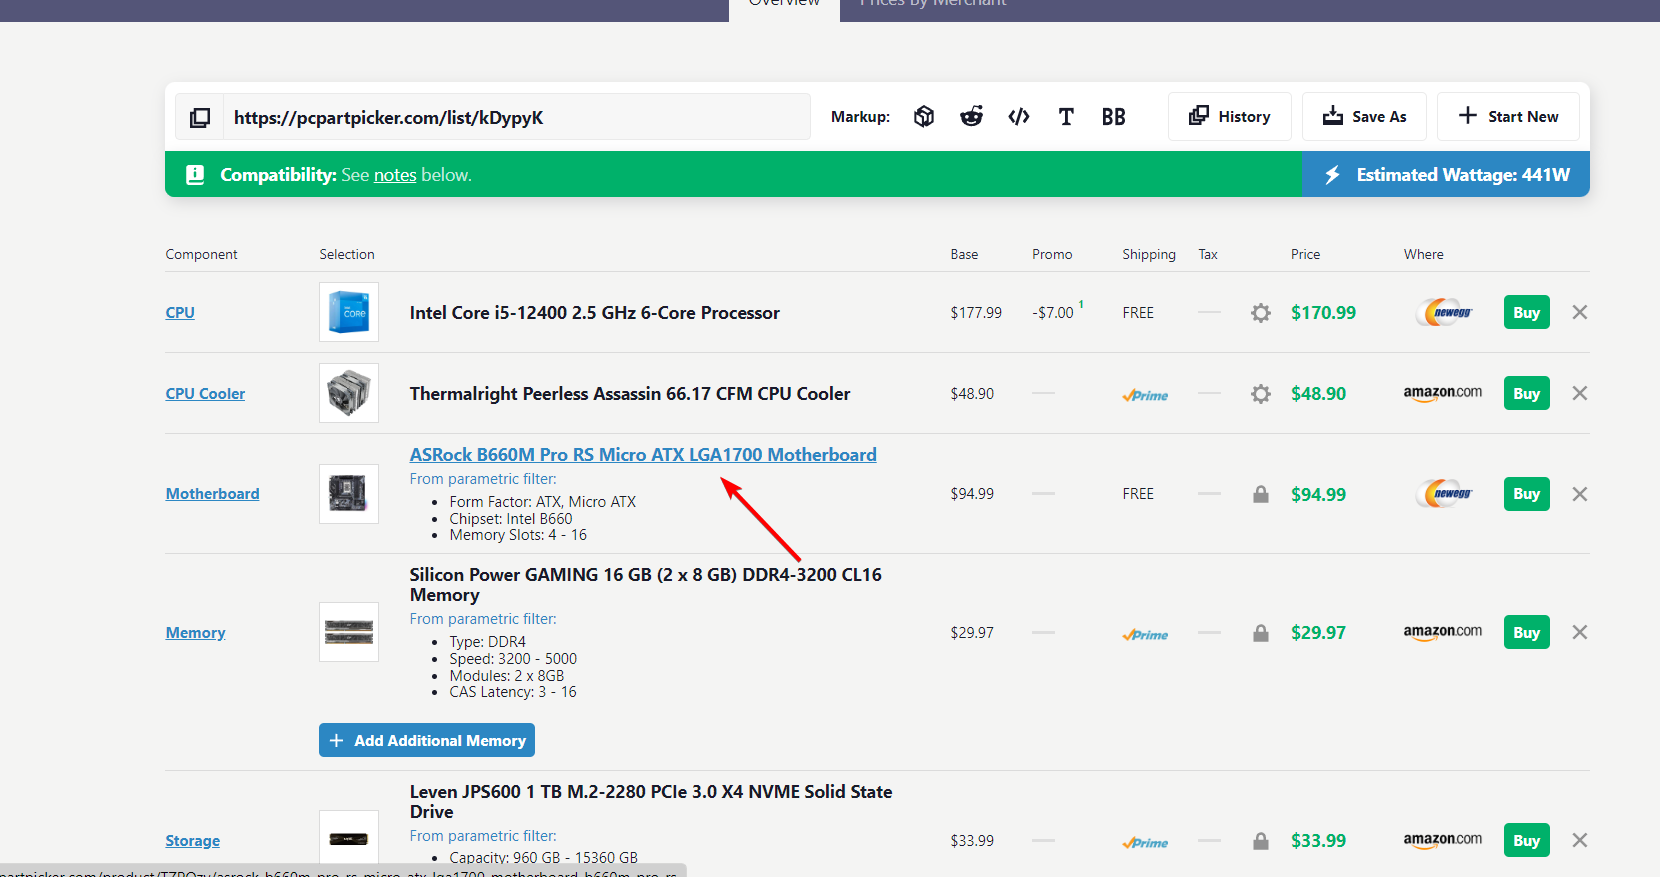
- The site will automatically choose the cheapest option for each component when selecting parts.
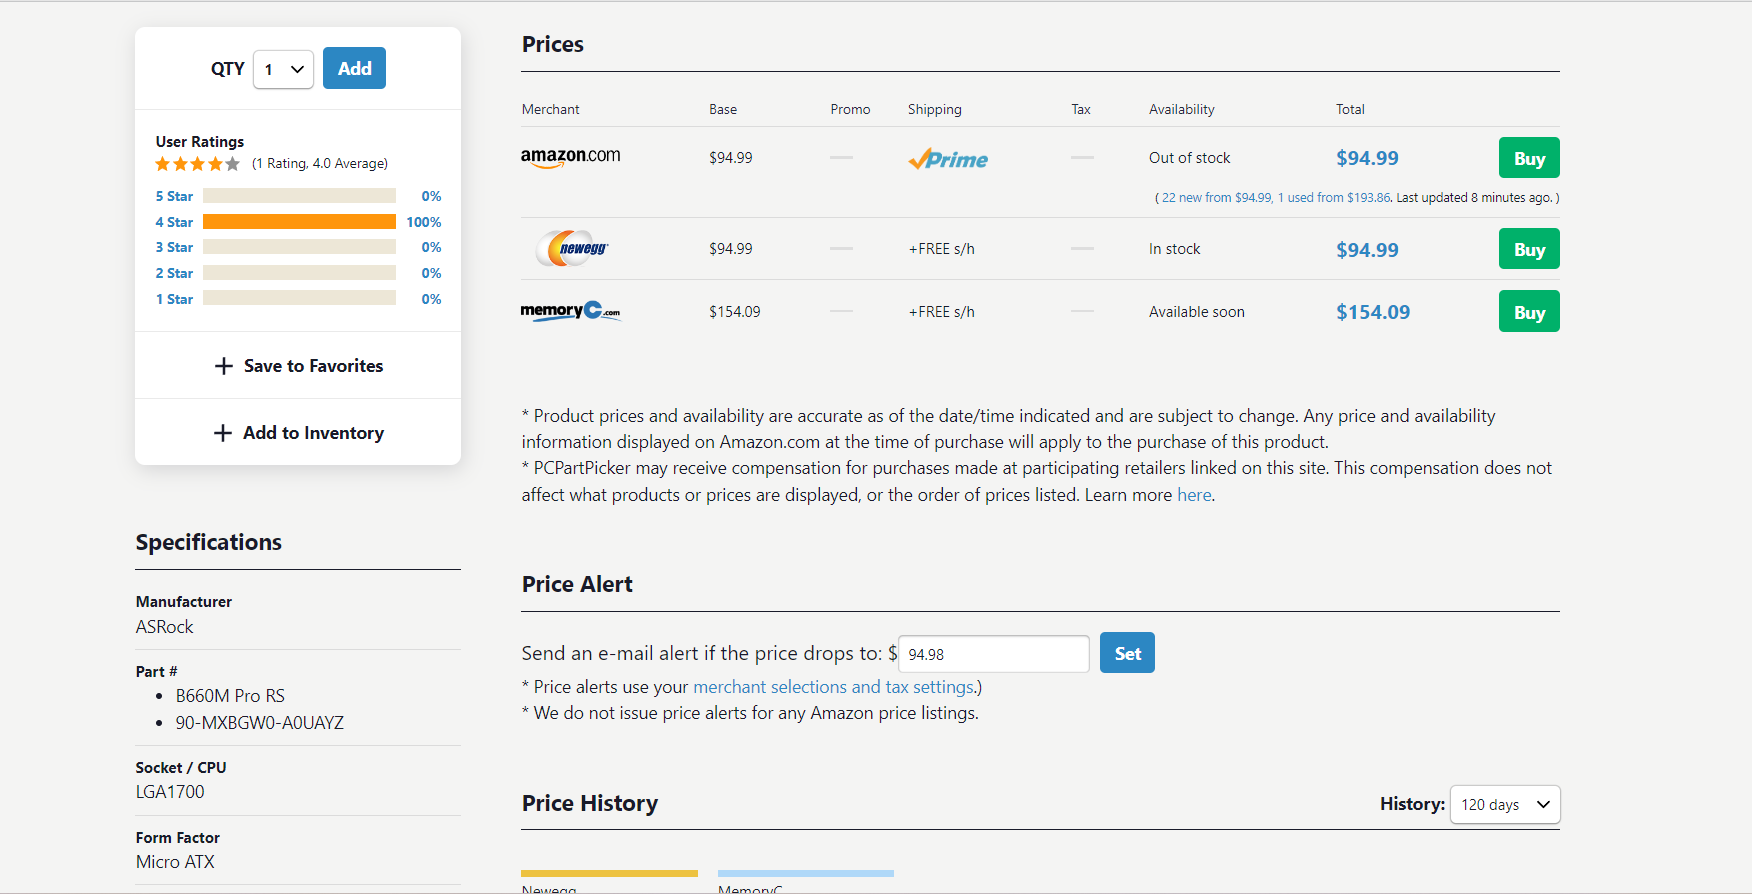
- To view current prices from different retailers, product reviews, product images, and price history, simply click on the product name on PCPartPicker.

- Here, you can compare prices from different retailers, review price history, read product reviews, and set price alerts for your products.

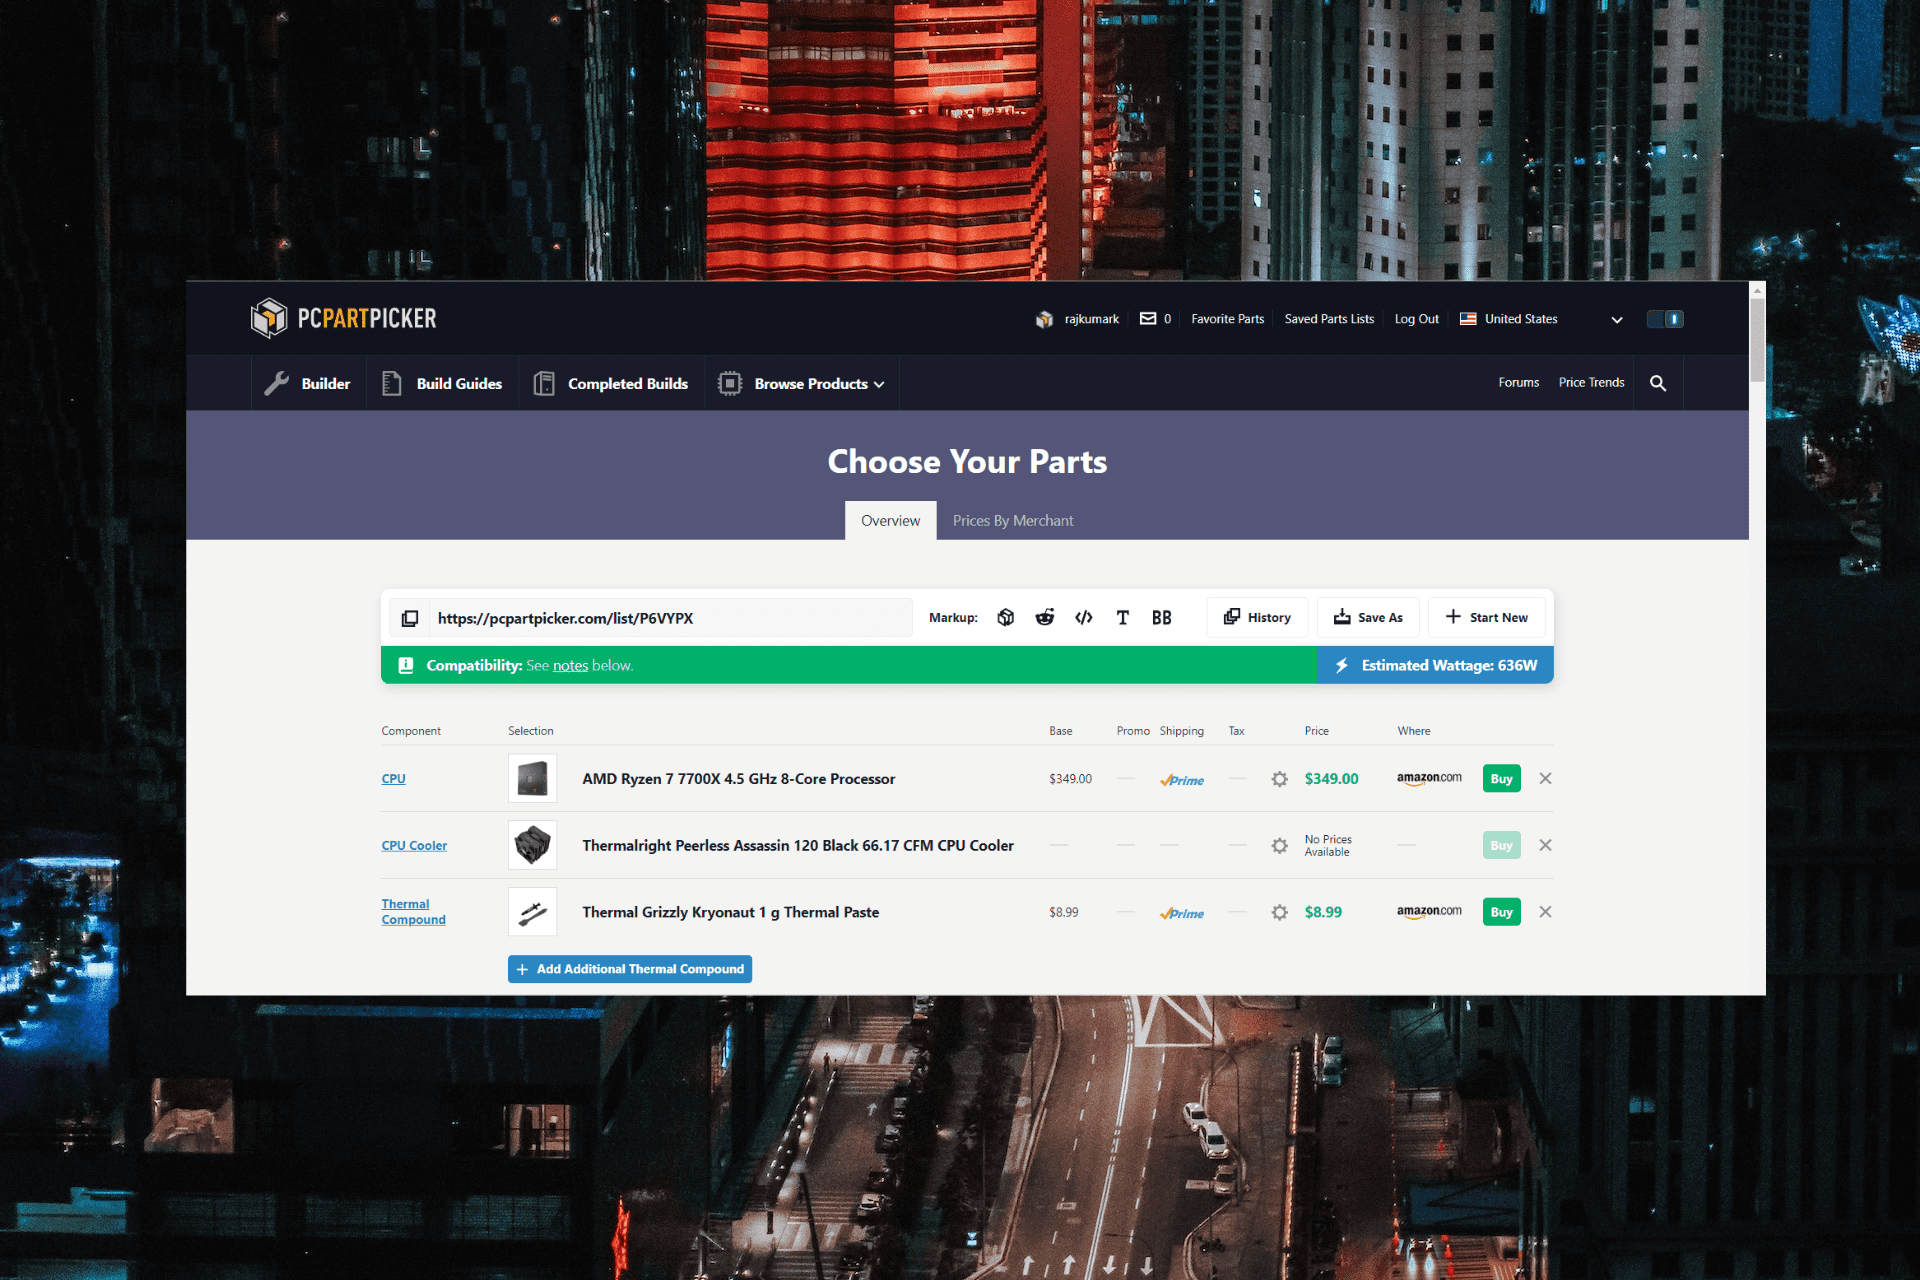
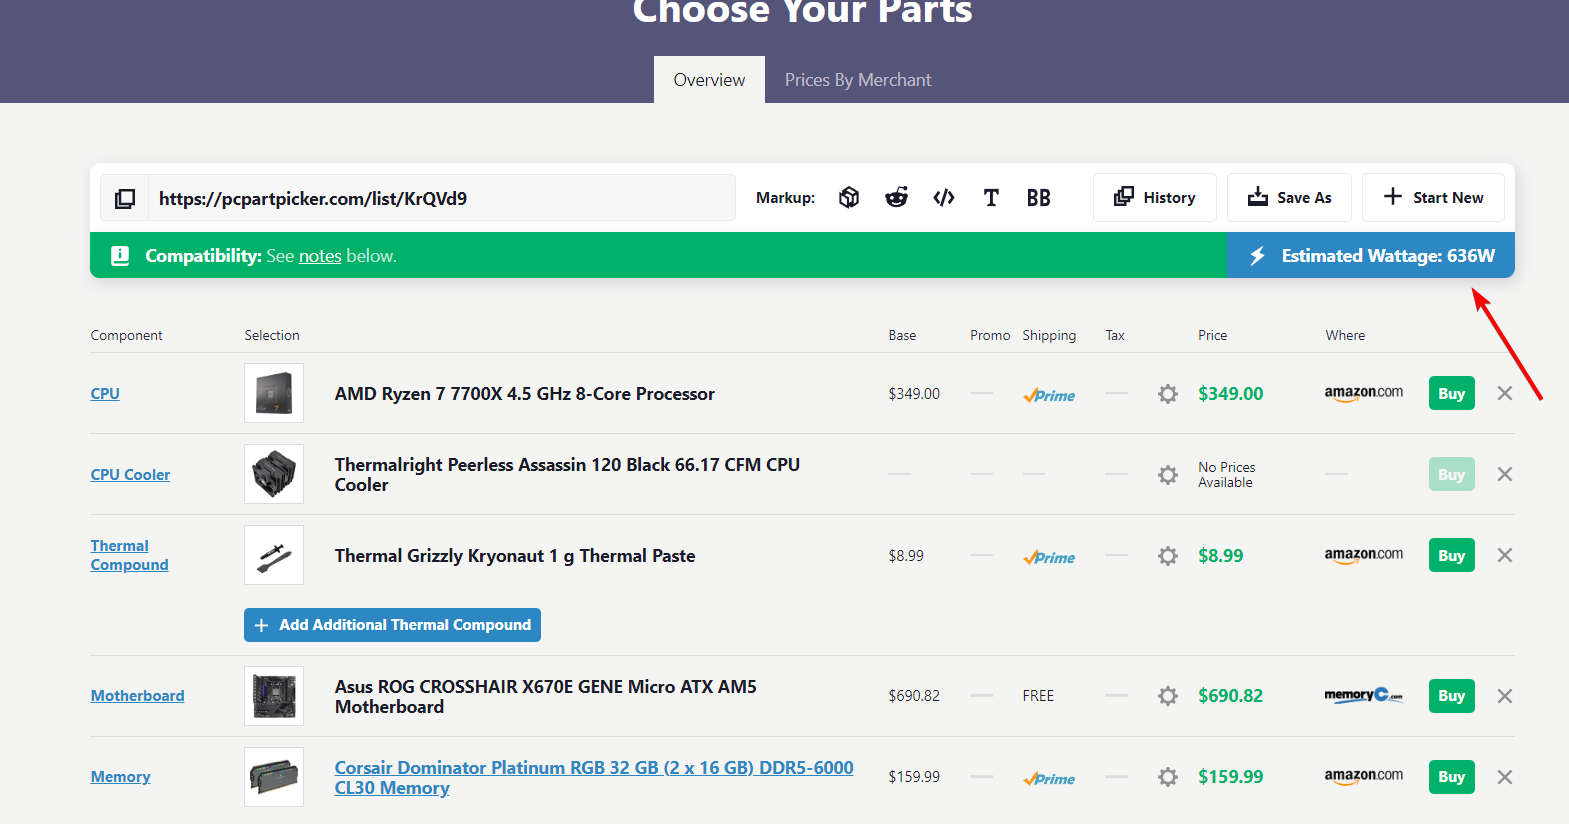
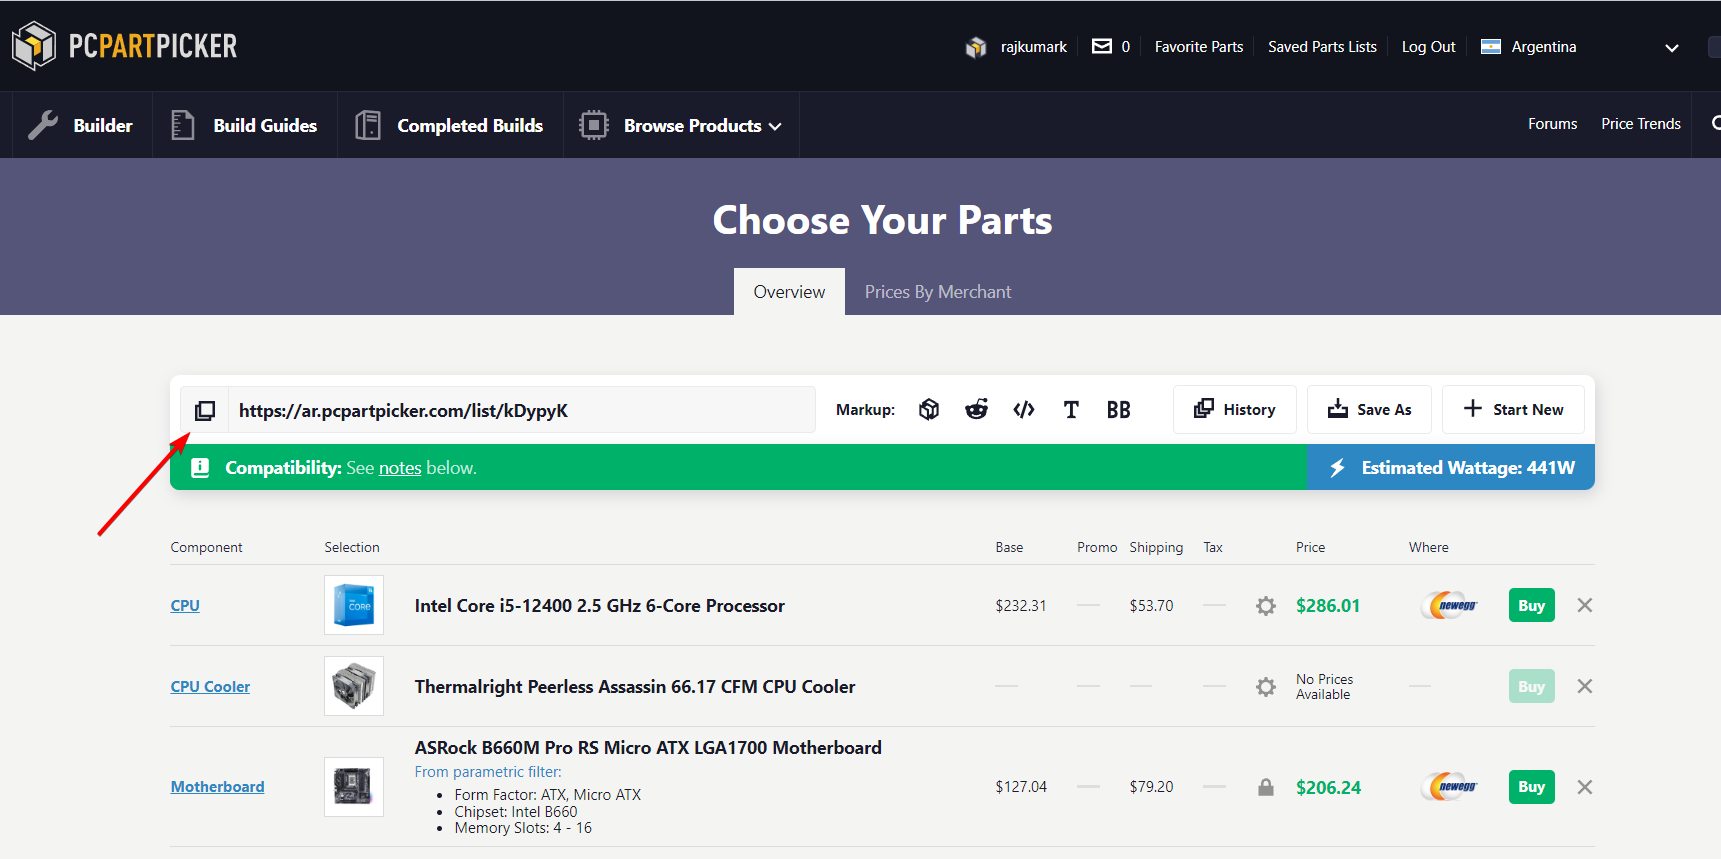
- As you add components to your list, it’s important to keep an eye on the Estimated Wattage displayed at the top. When selecting a power supply, make sure to choose one with a wattage that’s higher than the estimated power usage.

- It’s also good to have some extra power for future upgrades.
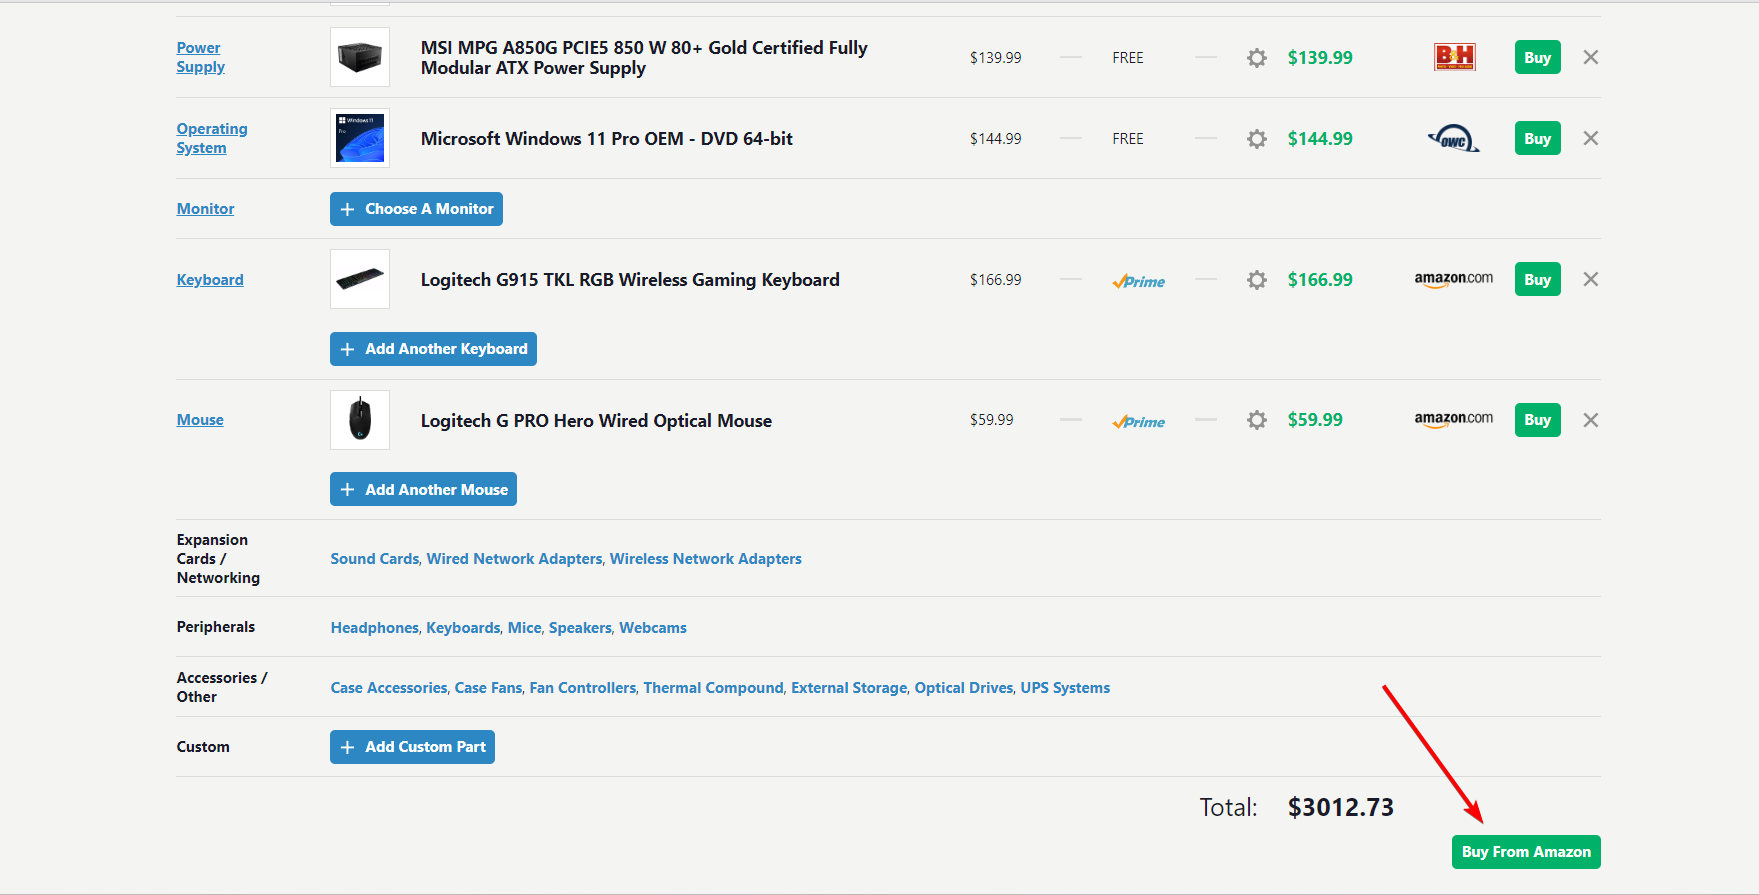
- Similarly, keep an eye on the Total price at the bottom to ensure that your PC build stays within your budget.

- Ensure that you add all the essential components for your PC build, such as a compatible CPU, a matching motherboard, sufficient RAM, storage options, a graphics card, power supply, a compatible PC case, and any additional components based on your specific needs and budget.


4. Save and share your builds
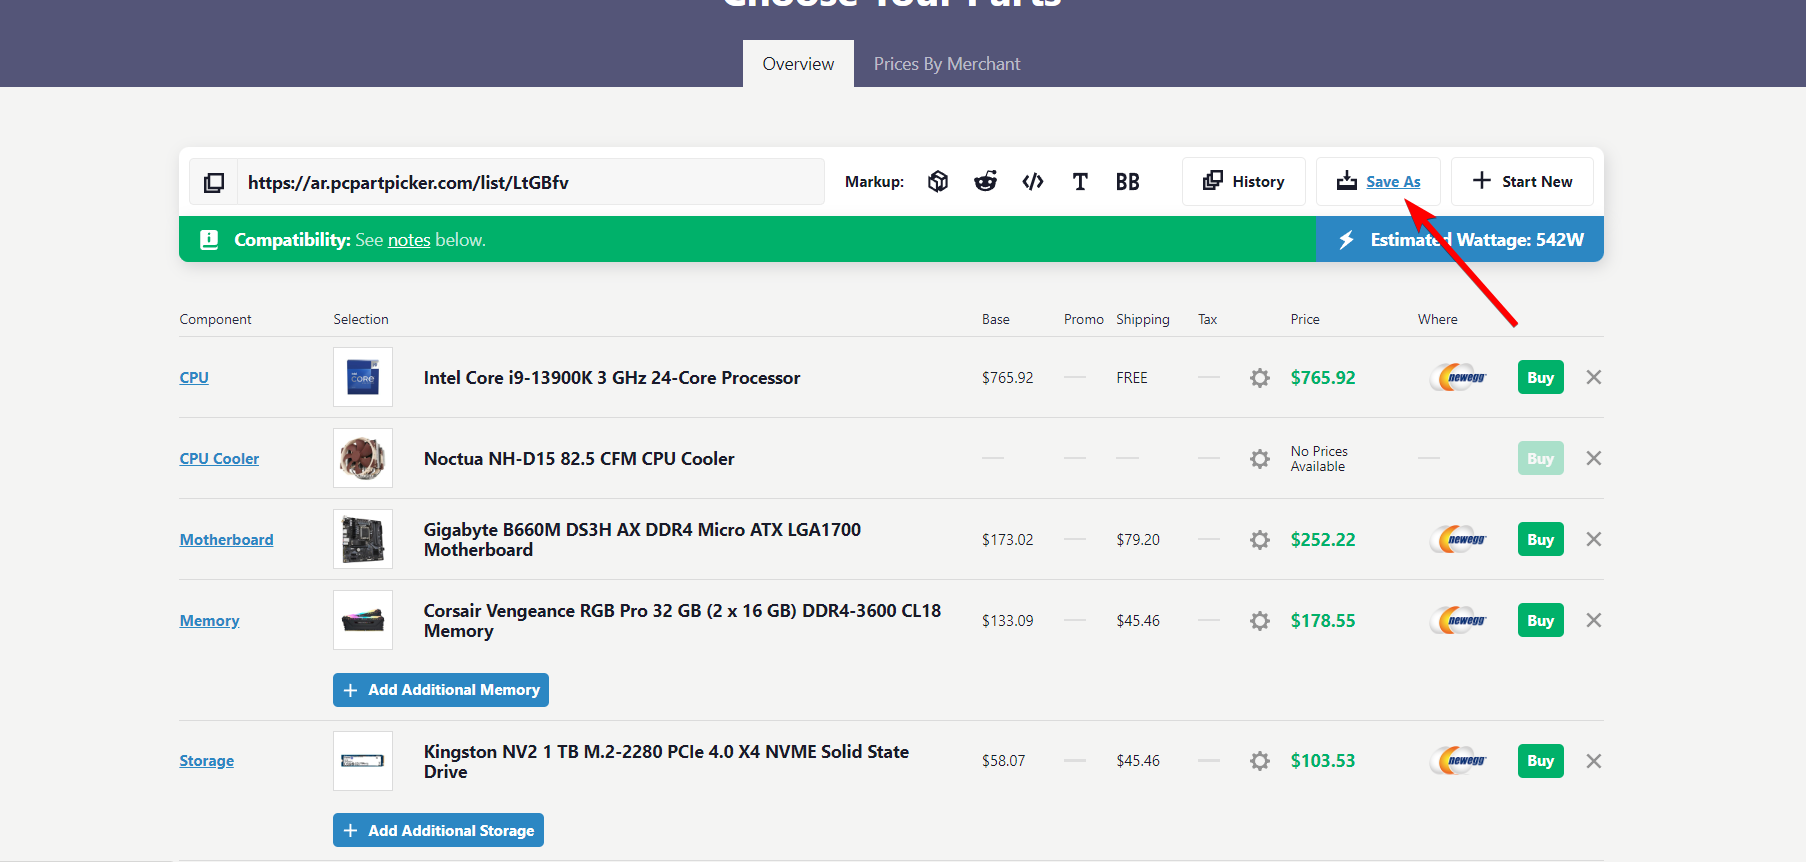
- Once you’ve added all the components, you can purchase your parts or save your build for later by clicking Save As at the top of the page.

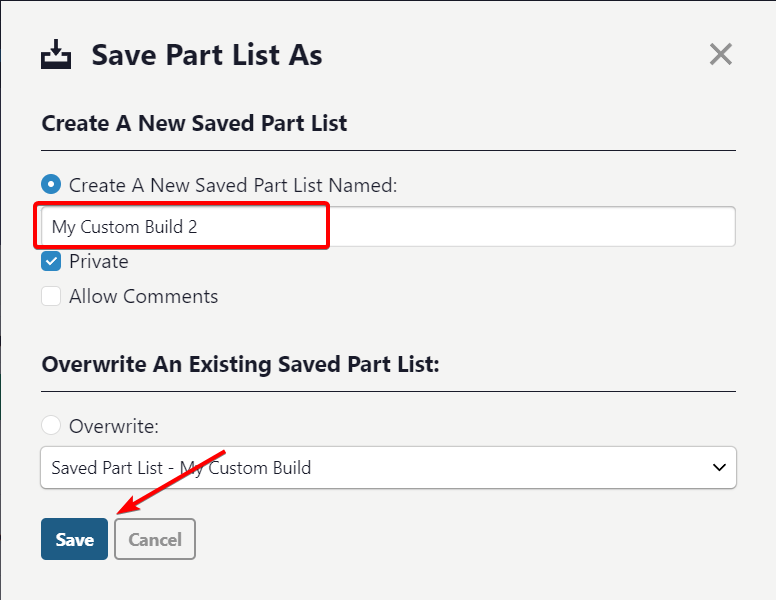
- Then, select Create A New Saved Part List Named option, enter a name for the list, and click Save. If you wish to save the part list as a public list, uncheck the Private option before saving.

- Alternatively, select Overwrite and choose an existing list from the account and click Save to overwrite an existing list.
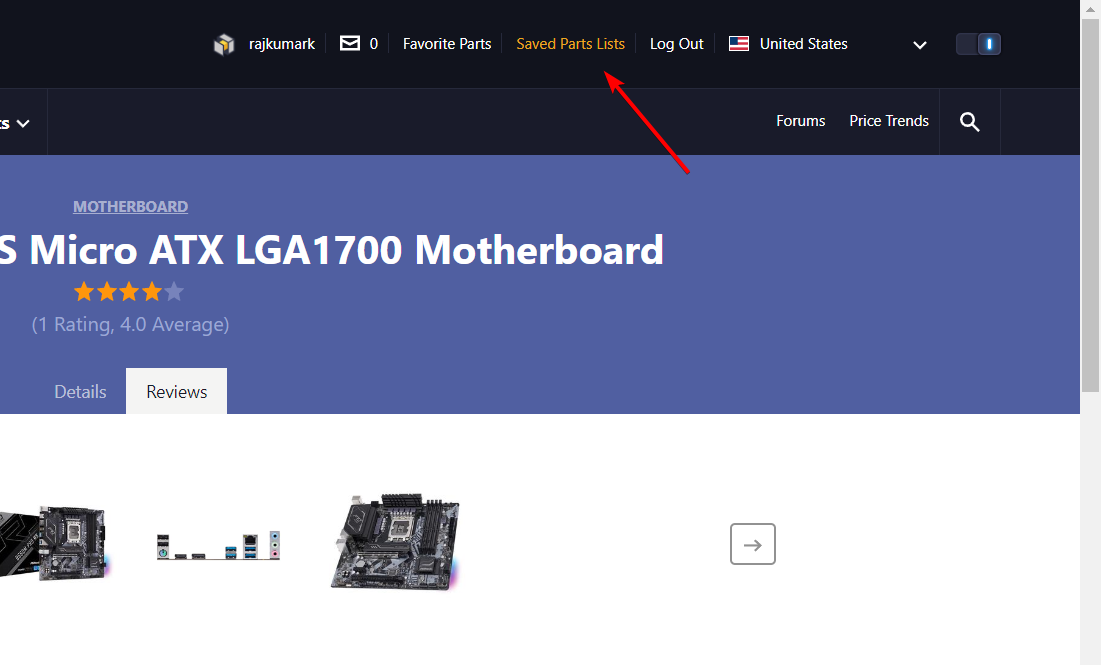
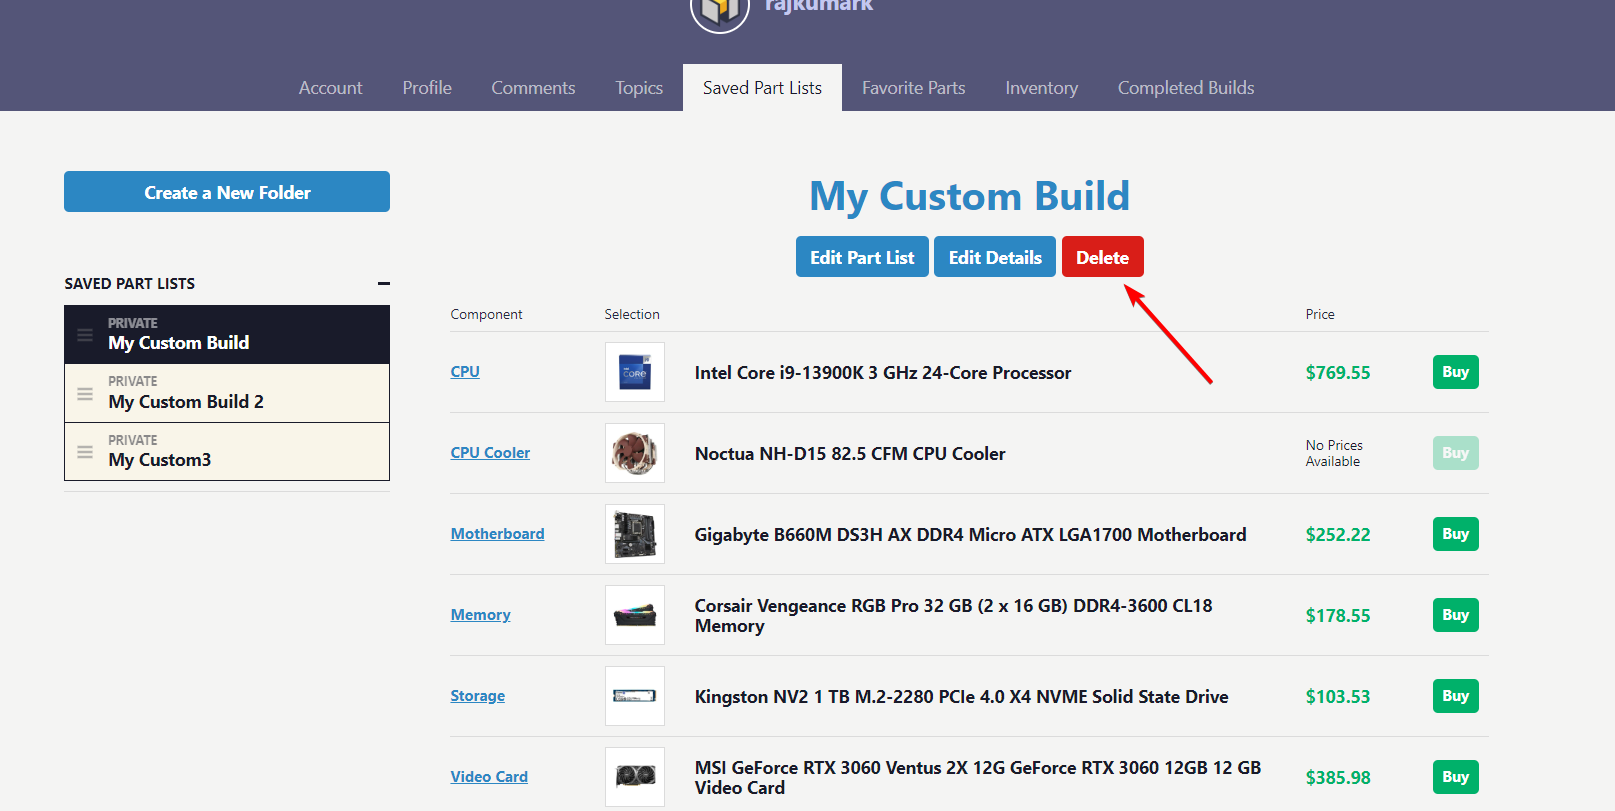
- To view all your saved lists, click the Saved Parts Lists link at the top of the page.

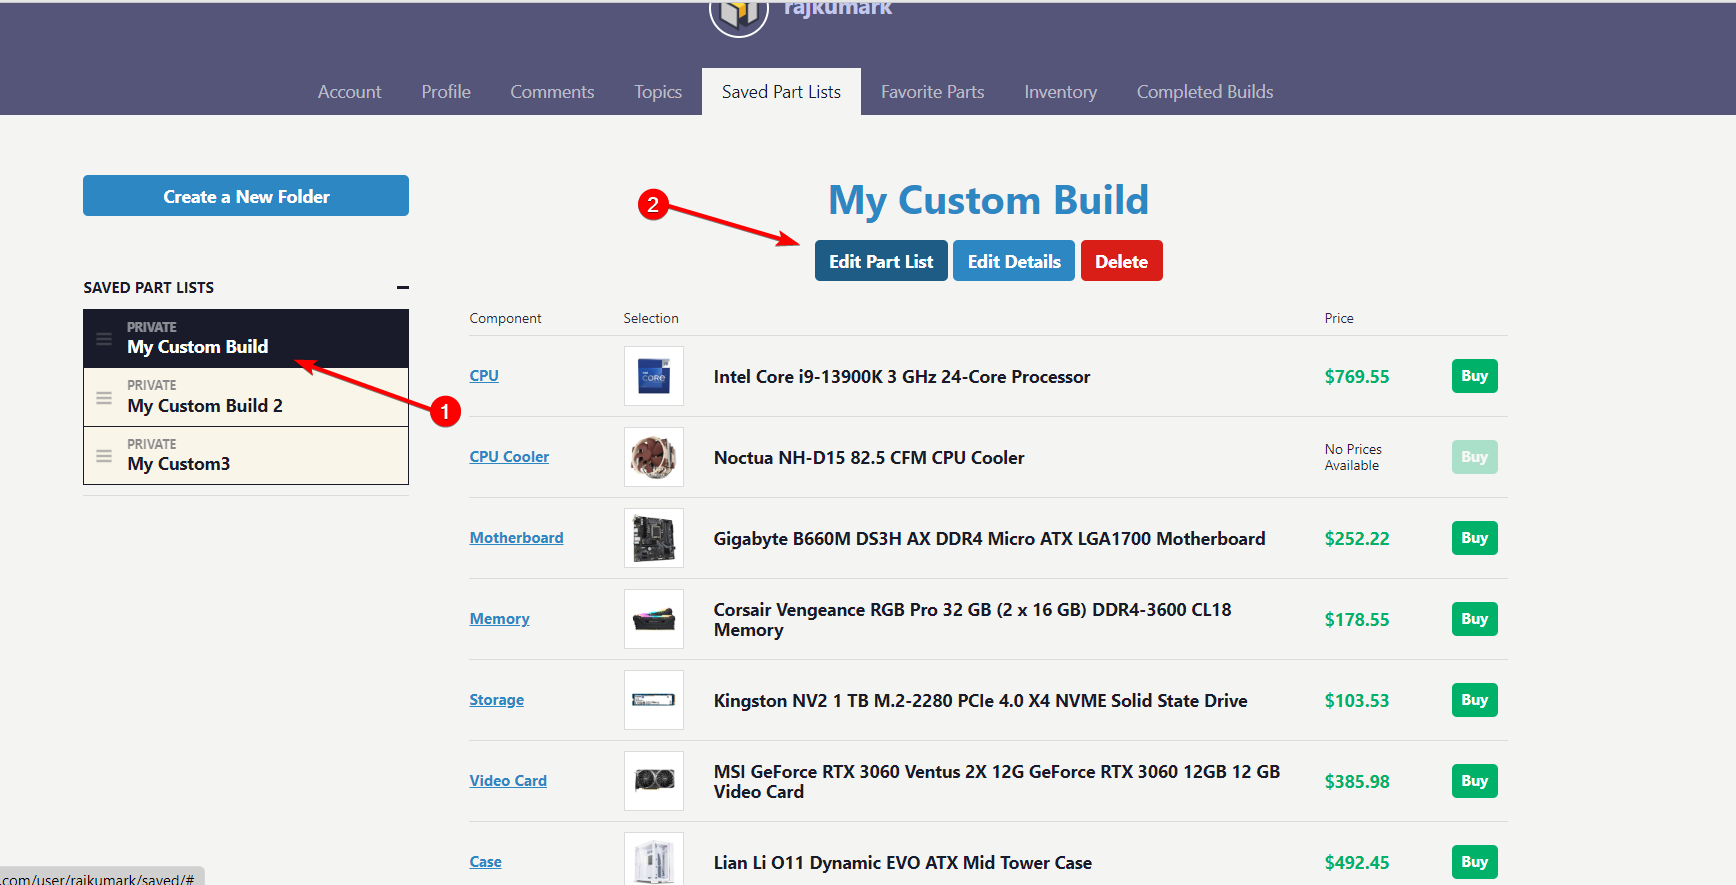
- If you wish to edit a saved part list, select a list from the left pane and click Edit Part List.

- To add or edit build details, click on Edit Details.
- If you want to remove a part list entirely, click Delete to remove it from your saved builds.

- You can copy the unique URL from the Choose Your Parts page to share your build with others for feedback or reference. You can also export the parts page to Reddit or PCPartPicker forums for additional opinions.

5. Buy your parts
Tip
- As mentioned earlier, PCPartPicker automatically selects the merchant with the lowest price available. If you wish to purchase from a different merchant, you can click on the Settings icon next to the price on the Choose Your Parts page.

- Next, choose the Use Current Price From Specific Merchant option and select the merchant from the drop-down menu.

- Then, click Save Part Price Settings to save the price settings.

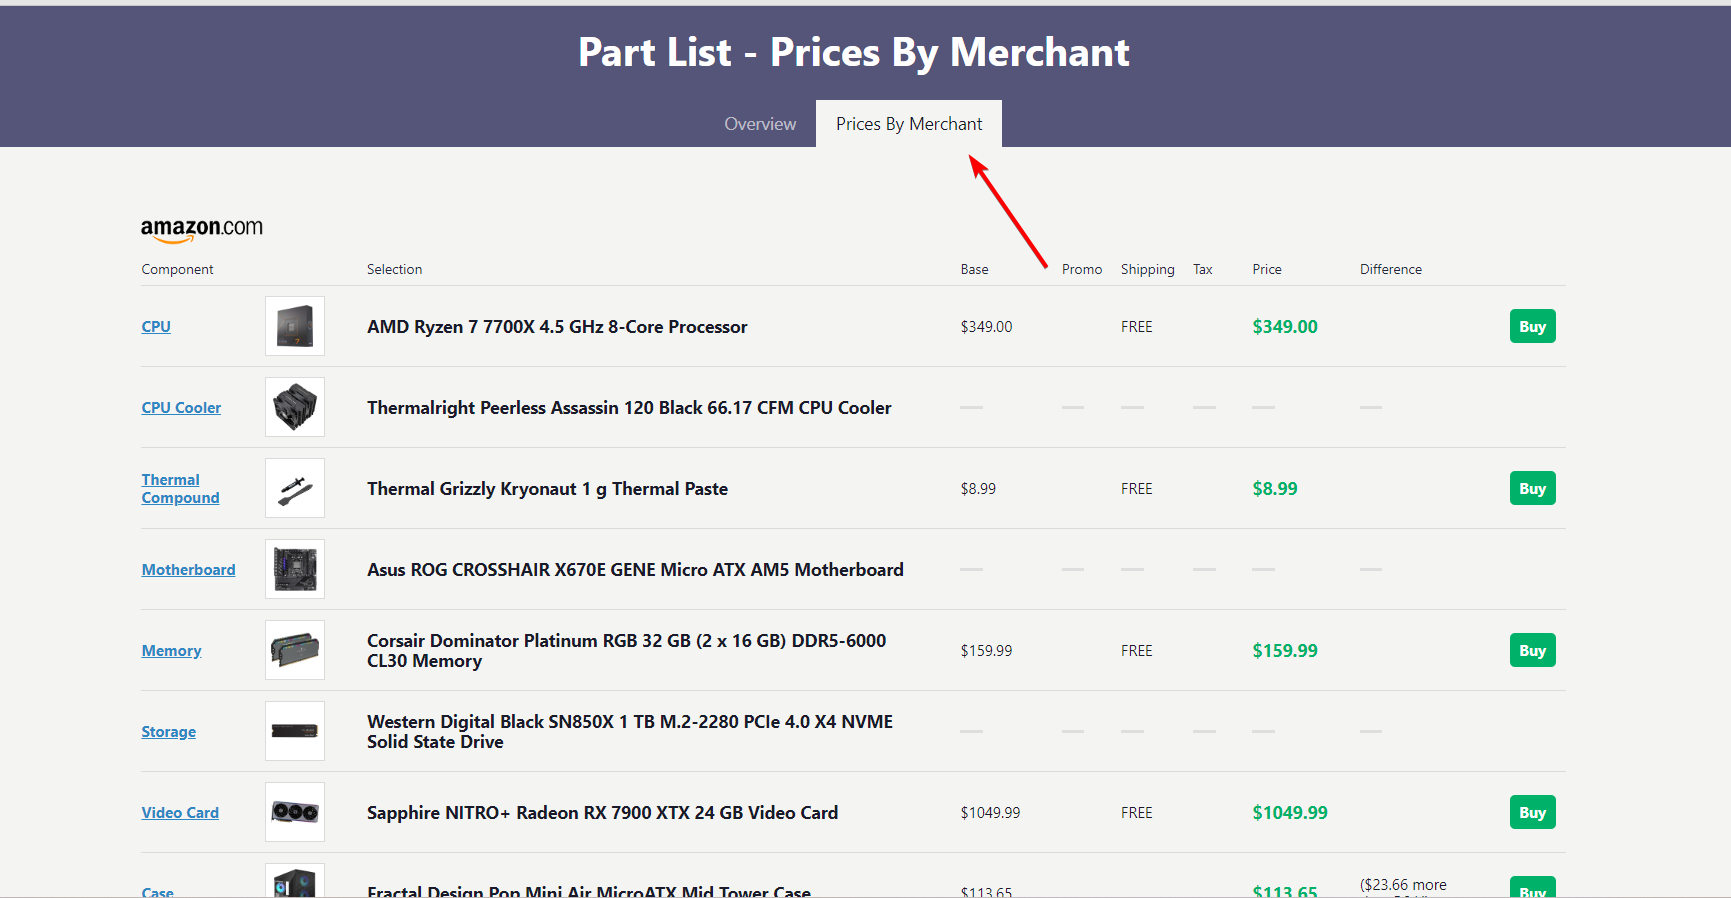
- Click on Prices By Merchant to check the availability and prices offered by various retailers.

- To purchase a specific part, simply click on the Buy button next to it, and you will be redirected to the retailer’s website where you can complete the purchase of the item.

- To make bulk purchases through the Amazon retailer, click Buy From Amazon button located below the total price. If a part is not available on Amazon, you can buy it from other retailers.

- If a certain part is not currently available or out of stock at any retailer, the Buy button will be grayed out. In that case, you can save the part list and wait until the part becomes available again or consider buying it from a physical store.


That’s it! You now know how to build a PC from scratch using PCPartPicker. Try the website once and understand the various options and features before you finally get down to the task.
If you’re looking to buy a new graphics card for gaming, here are some of the best options available.
Should you have further questions or suggestions regarding building a PC, please drop them in the comments section.
Still experiencing issues?
SPONSORED
If the above suggestions have not solved your problem, your computer may experience more severe Windows troubles. We suggest choosing an all-in-one solution like Fortect to fix problems efficiently. After installation, just click the View&Fix button and then press Start Repair.