Auto-GPT: Easiest Way to Install & Set up
You'll have to cover some prerequisites beforehand
- Auto-GPT is dubbed the future of artificial intelligence.
- It can handle tasks autonomously without the need for human intervention.
- The tool is still in development, so if you want to install it locally, get your hands dirty with some code.
Artificial intelligence is pretty much on everyone’s mind these days. With ChatGPT taking the web by storm, we can’t help but talk about the next big thing. Auto-GPT is the latest AI-powered that has us talking. In this article, you’ll learn how to install Auto-GPT, what you can use it for, and how it differs from its competition.
What is Auto-GPT?
Auto-GPT is designed to perform tasks with little human intervention and act autonomously with self-prompts. It’s considered the first glimpse into artificial general intelligence (AGI) – AI that can perform human-level intellectual tasks.
Auto-GPT, driven by GPT (Generative pre-trained transformer), can generate natural language content and complete tasks by itself due to its AI agent feature.
The AI agents inside the tool’s architecture are programmed to act and solve problems per predetermined rules and objectives. In short, the GPT can act independently without needing a human to prompt its every action.
It manages to do so by employing an autonomous AI mechanism – it breaks down the task (initial prompt) into multiple subtasks and creates an AI agent to handle each one of them.
These include a task creation agent, a task prioritization agent, and a task execution agent. The three handle different subparts of the task and communicate with one another until the goal is reached.
The prospects sure sound exciting, right? However, it doesn’t come without flaws: the project is still experimental, requires programming knowledge (and possibly payment), and is reported to produce errors and not-so-engaging content.
What are Auto-GPT prerequisites to install?
Unlike its predecessor ChatGPT, which requires an internet connection and an account, if you want to use Auto-GPT, you must get your hands dirty with some code. Auto-GPT is an open-source free AI software available on GitHub.
Expert tip:
SPONSORED
Some PC issues are hard to tackle, especially when it comes to missing or corrupted system files and repositories of your Windows.
Be sure to use a dedicated tool, such as Fortect, which will scan and replace your broken files with their fresh versions from its repository.
You can download it and install it on your PC to use locally. Before that, you’ll need to download and enable:
- Python 3.8 or newer version: Make sure you have only one version of the library installed on your PC, as it could result in an error otherwise.
- Git
- An OpenAI API key: Auto-GPT is accessible with the GPT-3.5 and 4 models. Join the waitlist for the latter if you wish to get better performance and lower the risk of AI hallucinating.
- A Pinecone API key (optional): if you want to retrieve information, you can use a long-term memory library. Pinecone is among the most popular databases and requires just a free sign-up to create an API key. Keep in mind that due to high demand, there’s currently a waiting list.
- An ElevenLabs key (optional): This will allow Auto-GPT to speak back using AI text-to-speech.
Since the AI tool is still under development, you can only access it just like a developer would. Don’t worry; we’ll guide you through each step of the process. Here’s a detailed guide on how to install Auto-GPT on your Windows PC.
How do I install Auto-GPT?
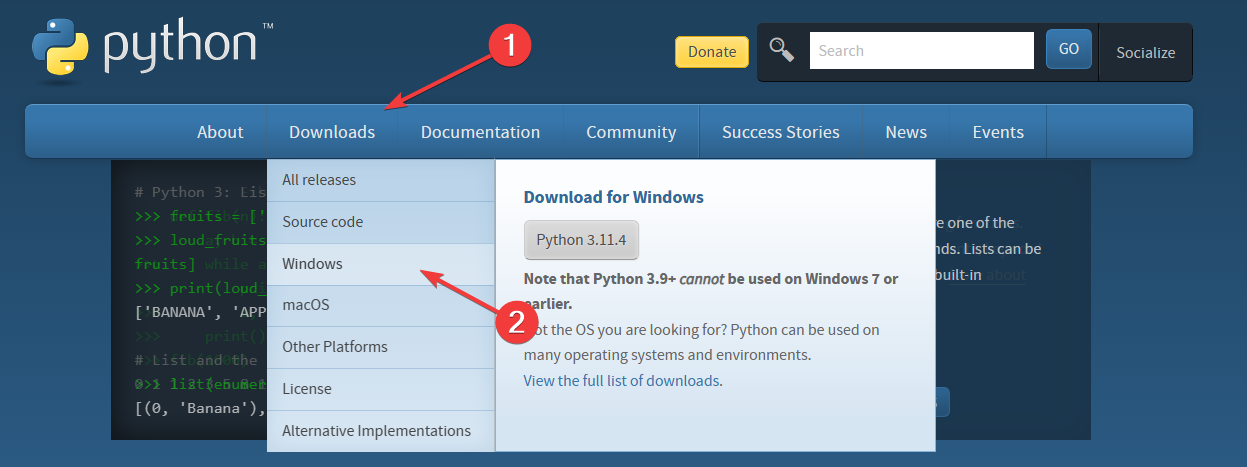
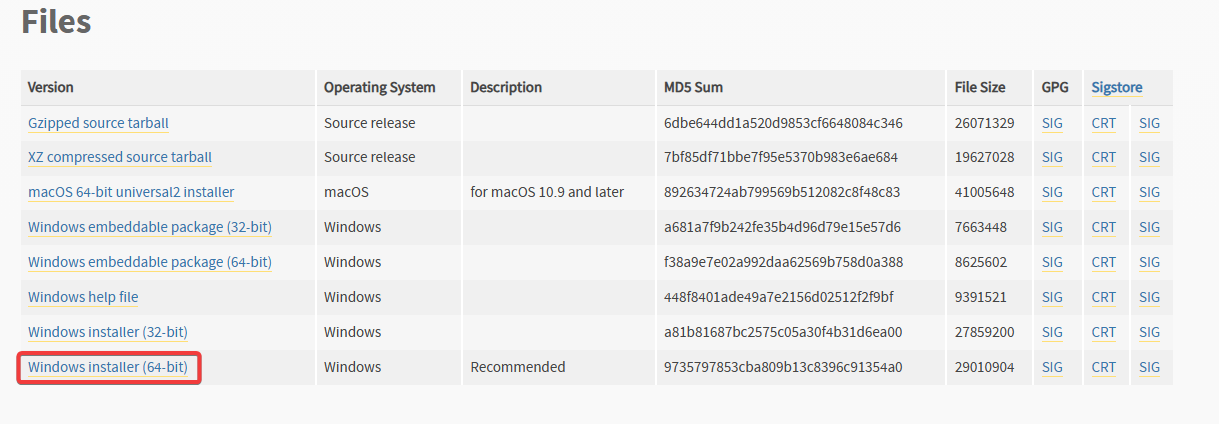
1. Install Python
- Go to Python’s website and download a version newer than 3.8.

- Click on the version compatible with your OS specs and download the file.

- Open the wizard and check the box next to the Add python.exe to PATH option. Then click on Install Now to complete the installation.


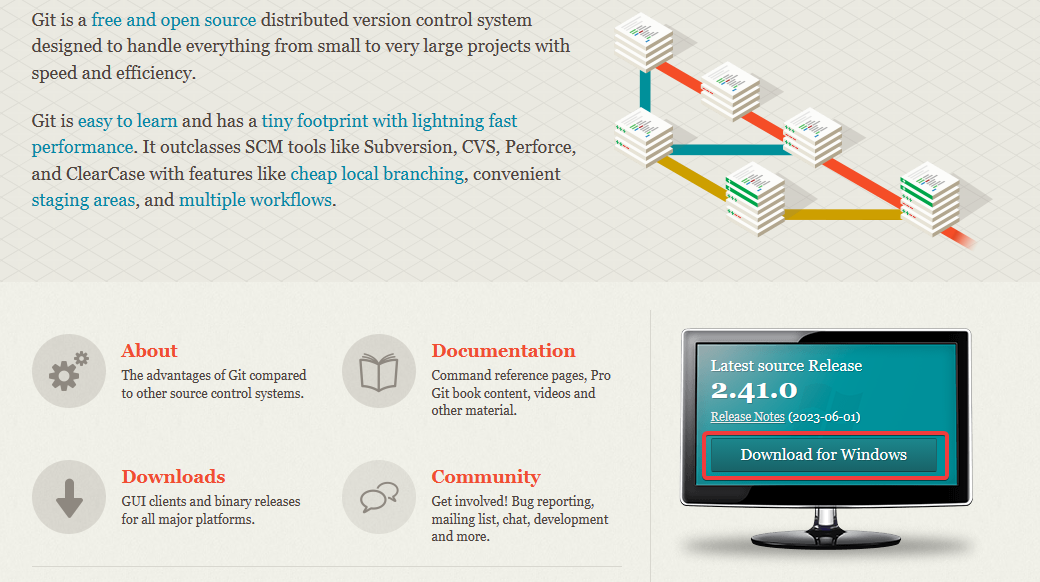
2. Install Git
- Go to Git’s website and download the Windows version.

- Follow the on-screen prompts (leave everything on default settings) and finish the installation process.
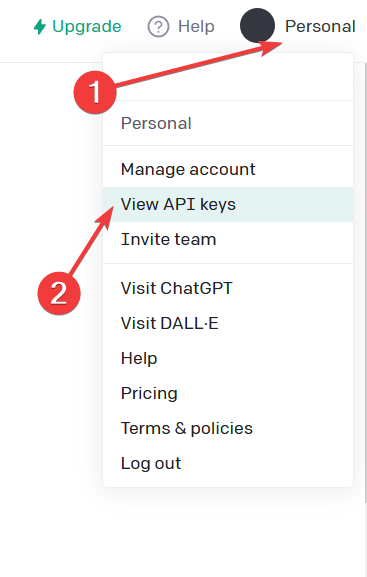
3. Create your OpenAI API key.
- Visit OpenAI’s website and log in.
- Click on Personal in the upper right corner and choose View API keys from the drop-down menu.

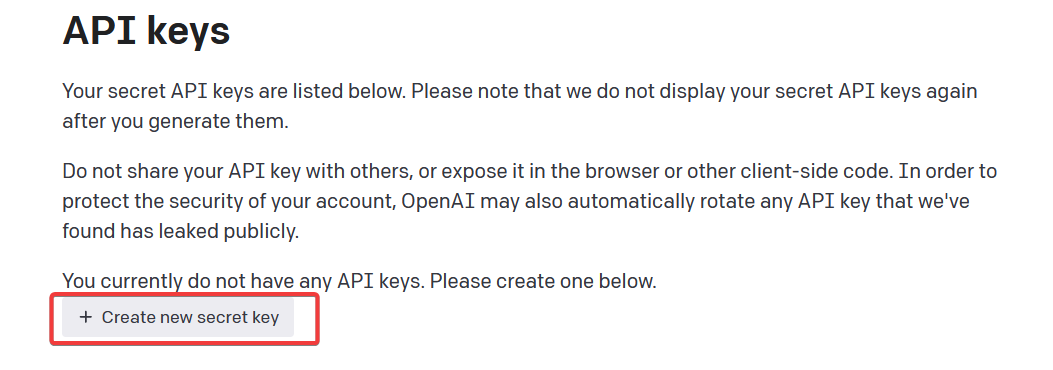
- Click on Create new secret key.

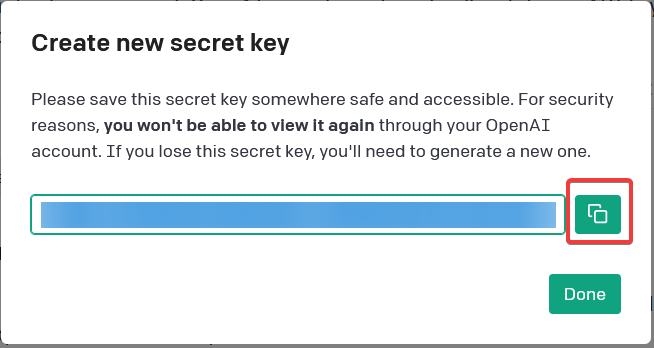
- Copy it from the green button and paste it into a text file. You’ll need it later in the setup process.

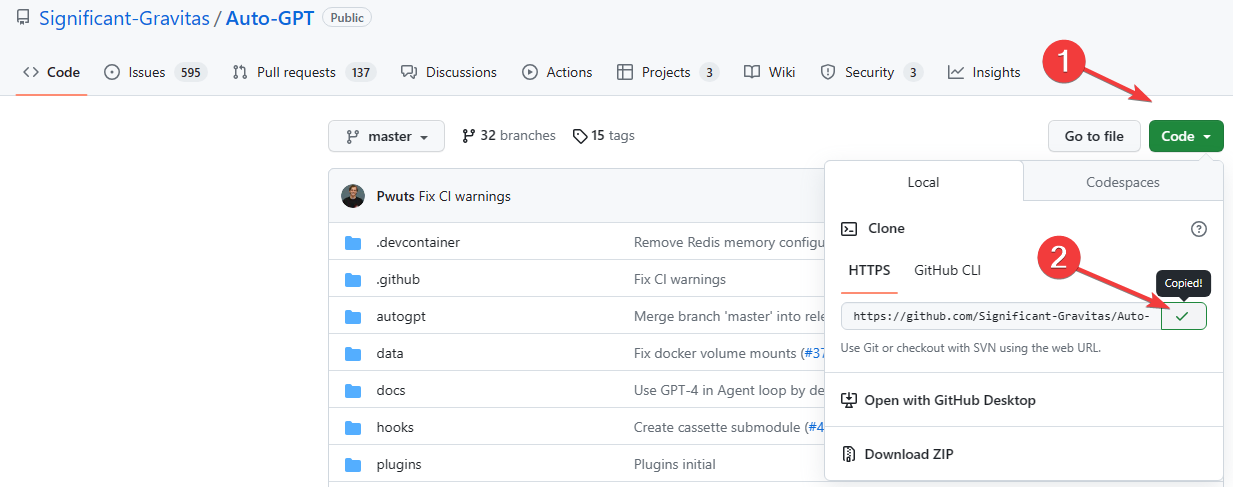
4. Clone Auto-GPT’s repository
- Open GitHub’s Auto-GPT page. Make sure you’re on the Significant-Gravitas version.
- Click on the green button named Code and copy the directory. Save it in the same text file from before for later.

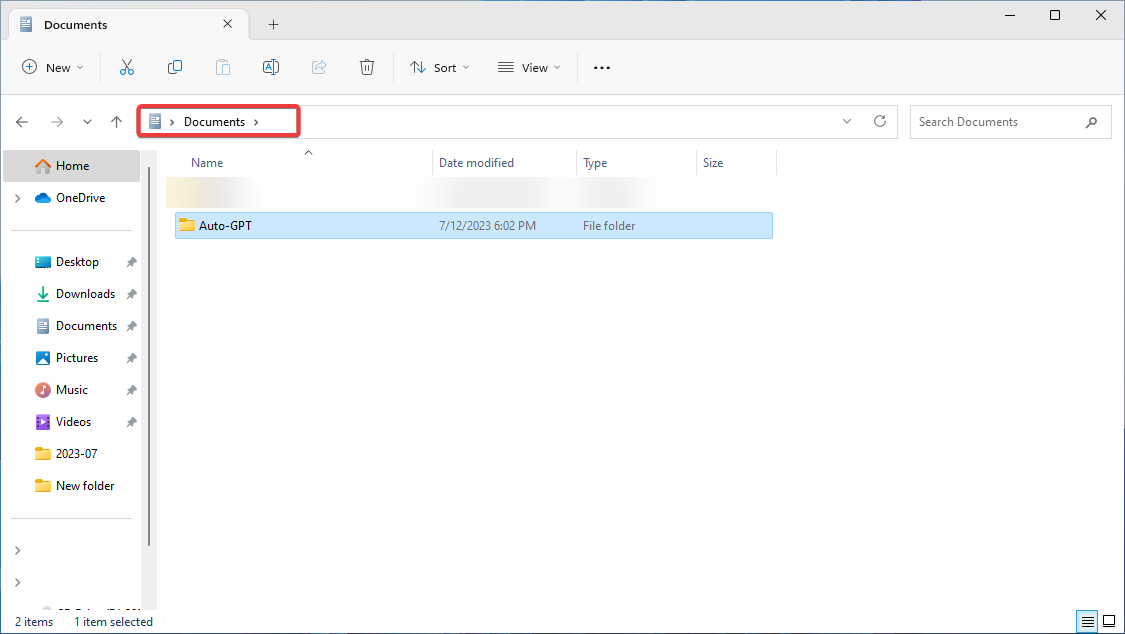
5. Create a folder for your Auto-GPT agent
- Open your Documents folder and create a new folder called Auto-GPT.

- Copy the location and paste it into your text file to save for later.
Alternatively, you can create the folder on your desktop. Don’t choose root C: drive, though, as currently, there are some issues with Auto-GPT writing files there.
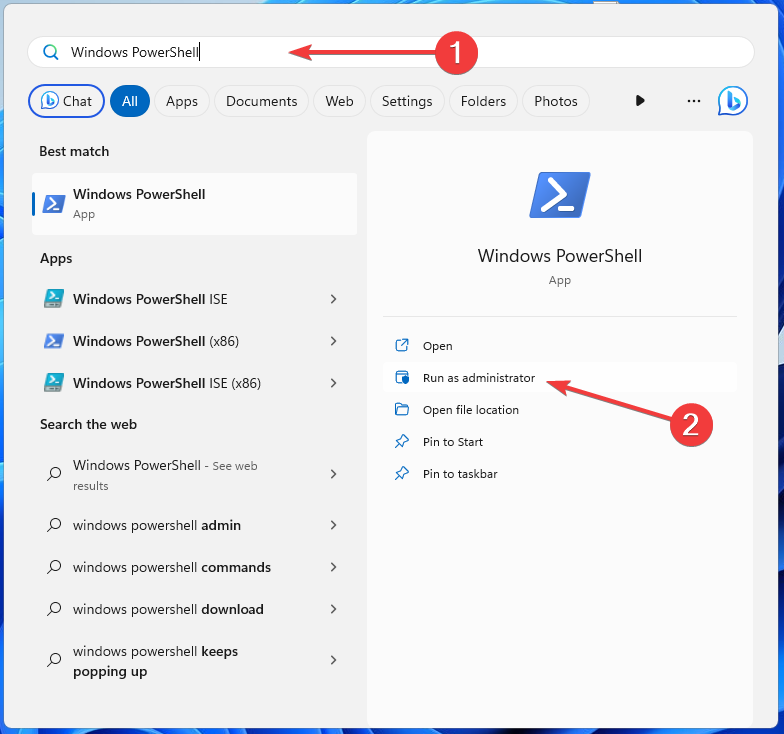
6. Run Windows PowerShell
- In order to get the tool running, you need to open Windows PowerShell. Press the Windows key, search for Windows PowerShell, and click on Run as administrator.

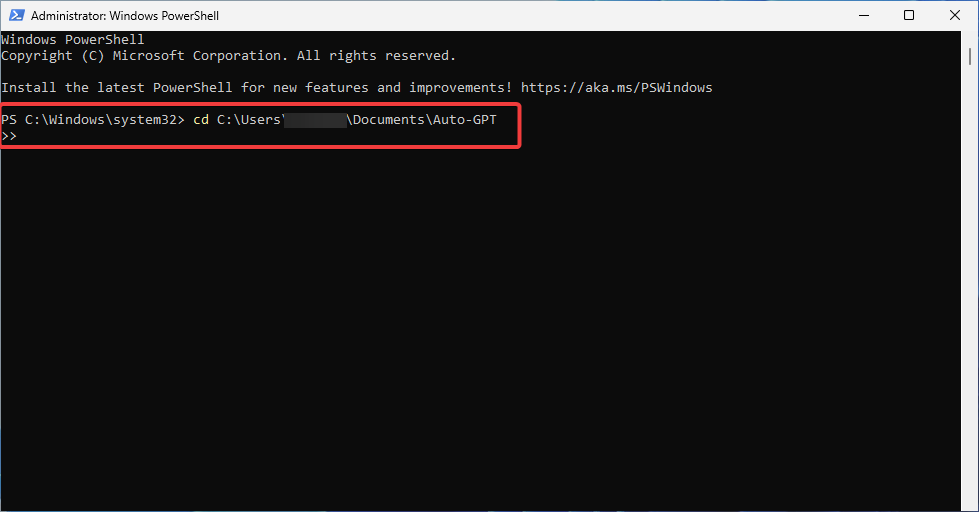
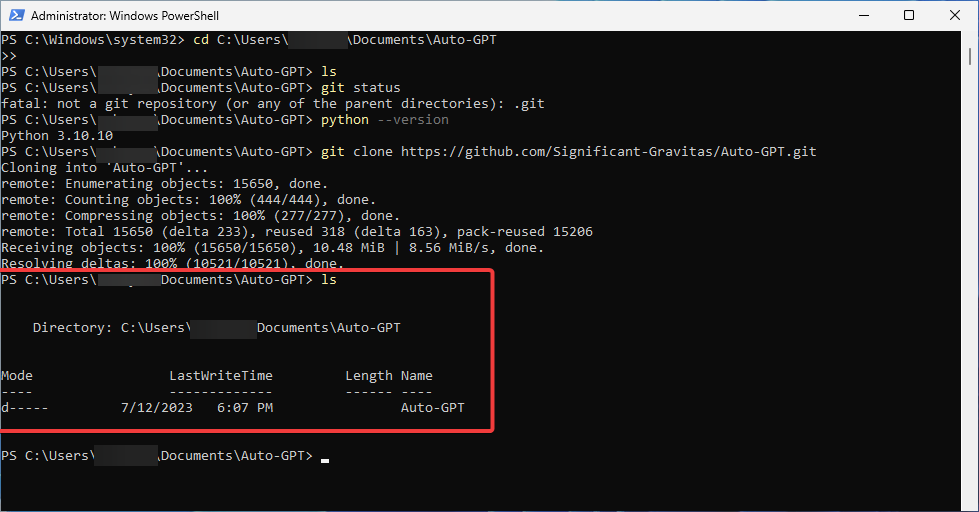
- Paste the following command, including your folder directory (replace user with your username) and click Enter:
cd C: \Users\user\Documents\Auto-GPT
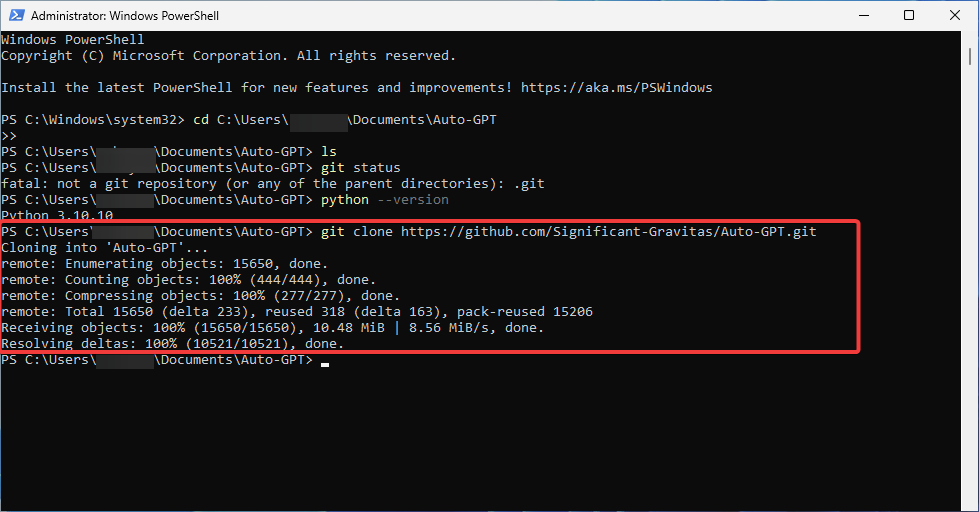
- Clone the GitHub repository to your machine. To do so, type the following command and click Enter:
git clone https://github.com/Significant-Gravitas/Auto-GPT.git - Check if you’ve created the Auto-GPT folder by typing this command followed by pressing Enter:
ls - Minimize the PowerShell window.
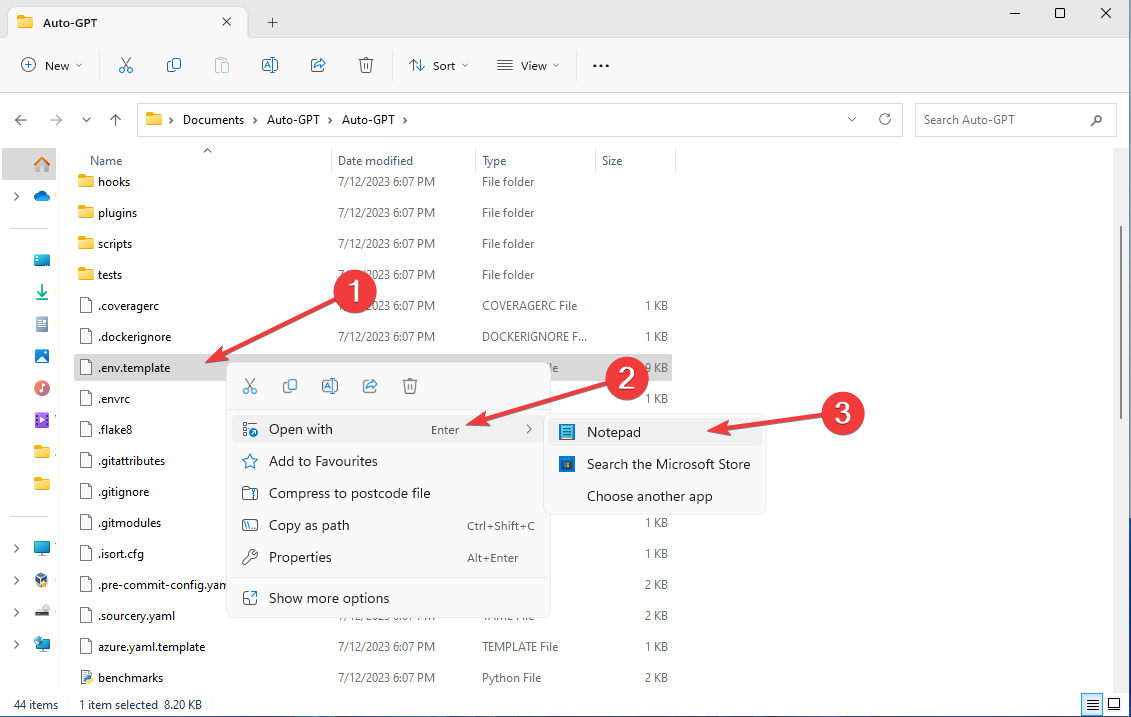
7. Edit your .env.template file
- Open your Auto-GPT folder and locate the .env.template file. Double-click on it and open it with Notepad.

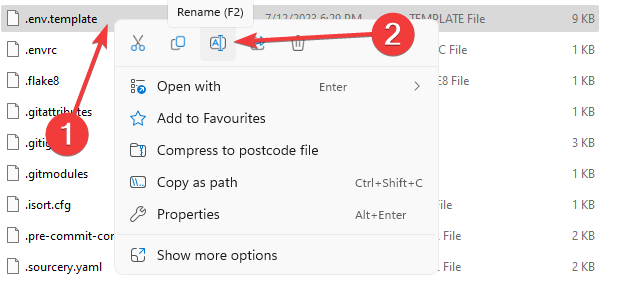
- Navigate to the OpenAI API key option and paste your generated OpenAI API key without adding anything.

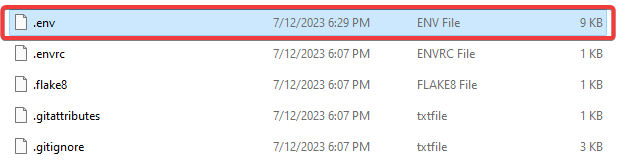
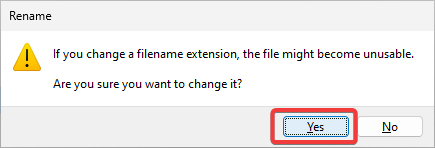
- Save your file. Rename it from .env.template to just .env.

- Make sure it’s saved as a .env file.

- Confirm by clicking Yes in the pop-up message.


Note that if you’ve chosen to add Pinecone and Eleven labs keys, this is where you have to replace them as well. Just locate the specific lines in the document and replace the values with your generated keys.
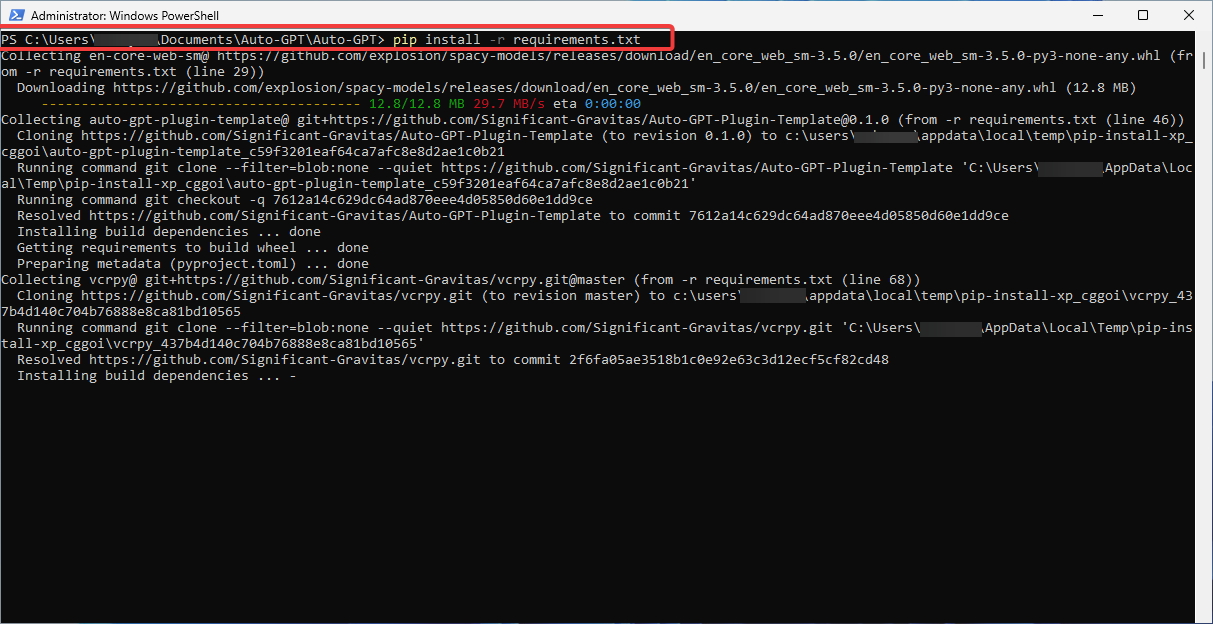
8. Install Auto-GPT requirements
- Open the PowerShell window. Type the following command and press Enter:
pip install -r requirements.txt
- Wait for the process to finish; it could take some time.
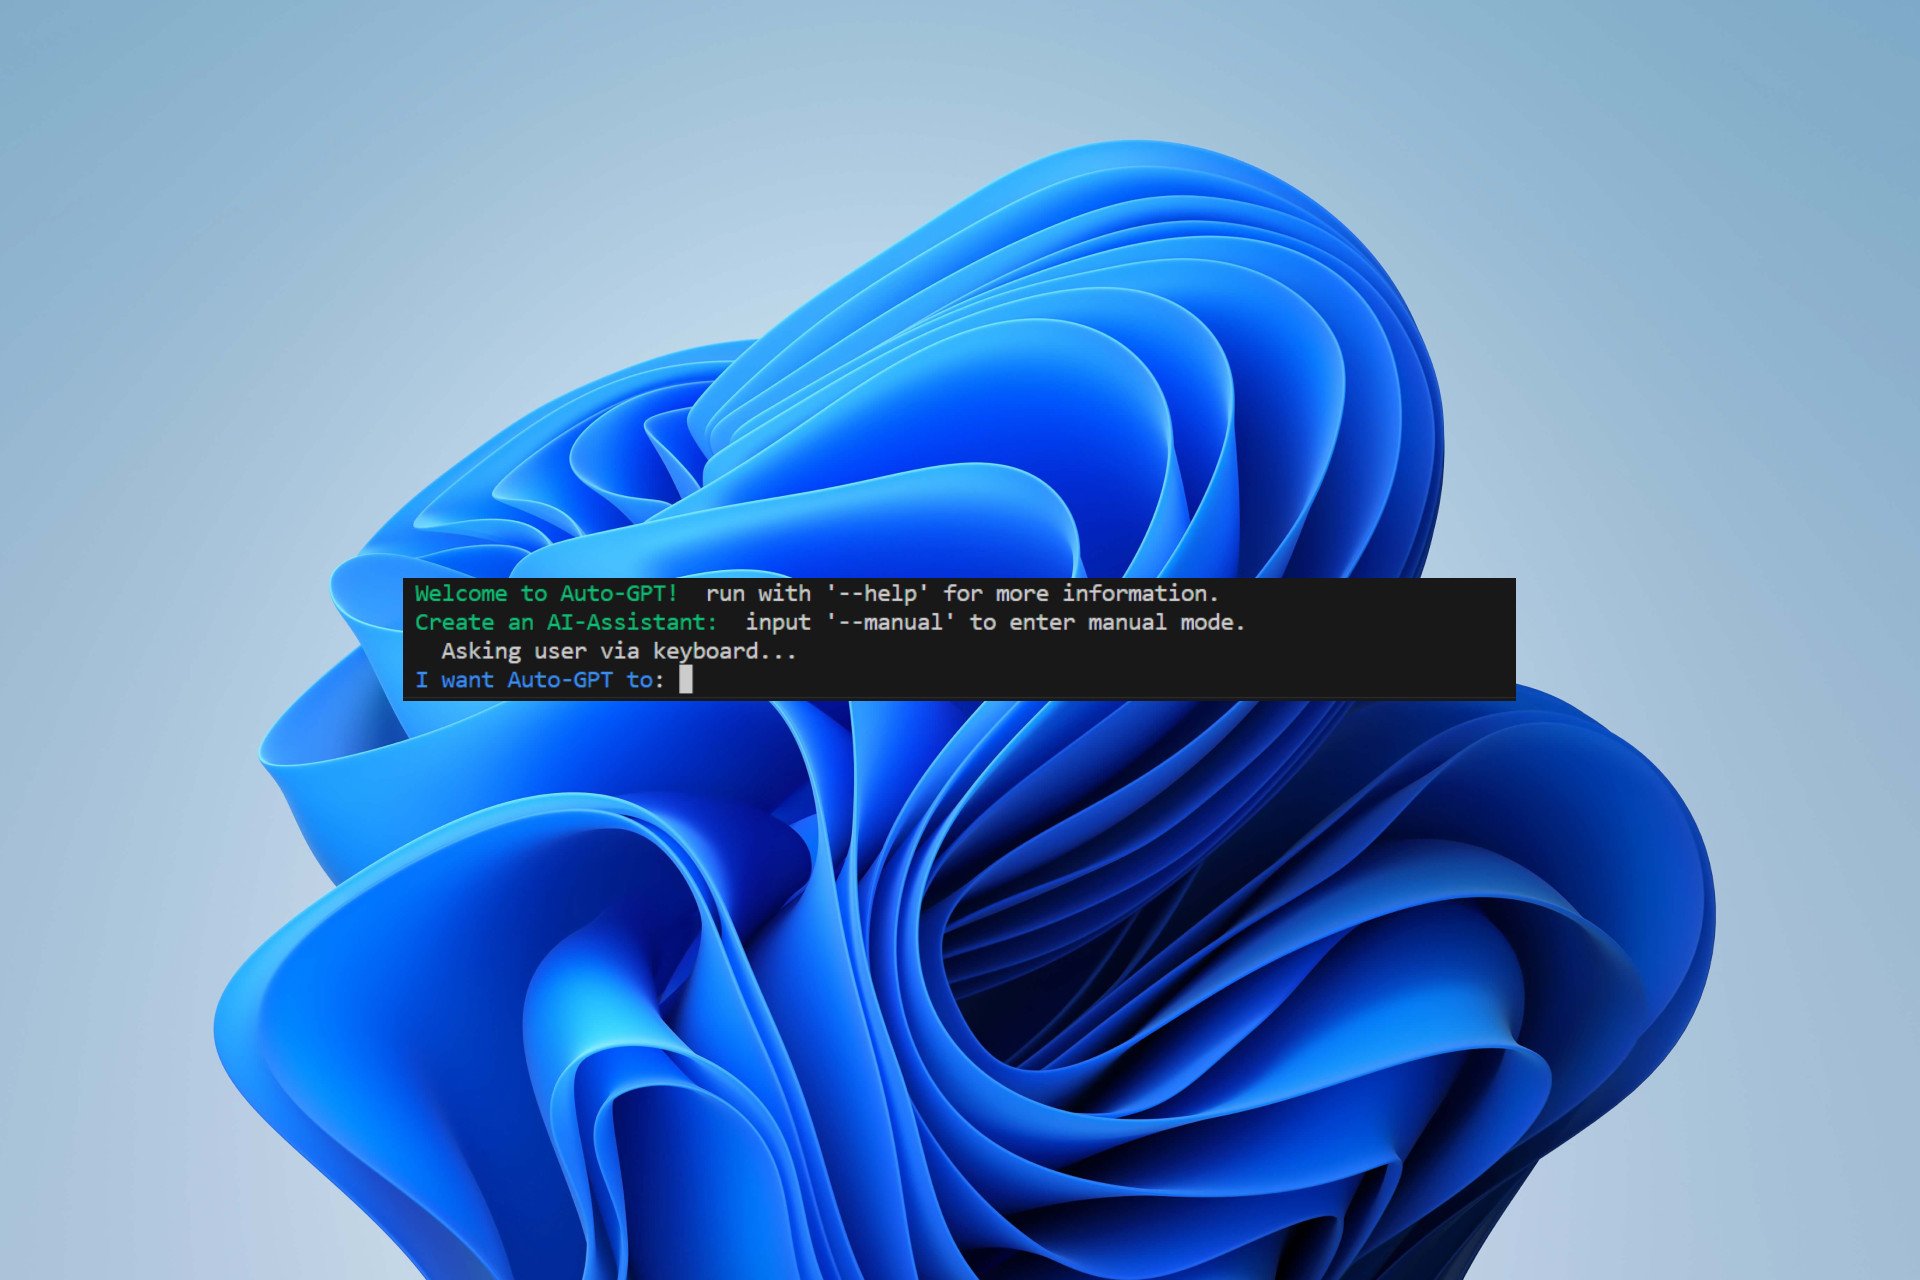
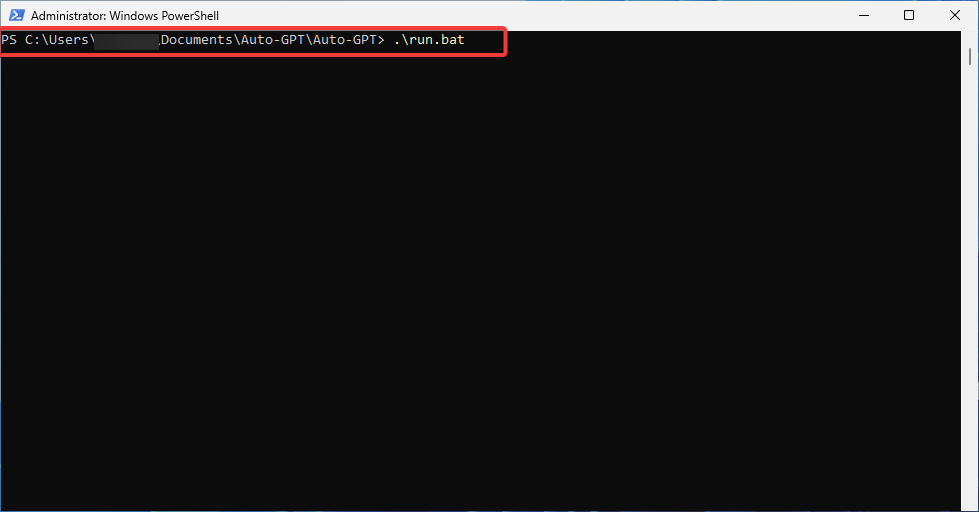
9. Run Auto-GPT
- Launch Auto-GPT by running the following command in your PowerShell window:
.\run.bat - Alternatively, you may use the following command:
python -m autogpt - You should get the following message:


Congrats! All that’s left now is to enjoy using your Auto-GPT tool. Though it mostly works under a paid account.
So if you want to use it for more complex purposes or even more often, you must add your billing details and set up spending limits.
Keep in mind that the app uses a lot of tokens, so those on a tight budget looking for an affordable AI tool might be out of luck. We hope that answers your wondering about whether Auto-GPT is free!
 Tip
Tip
So, that’s how to install Auto-GPT locally on your PC. Did you manage to do it?
If you’ve encountered any difficulties or errors along the way, don’t be afraid to reach out in the comment section below. As always, we’re happy to hear from you and provide any further assistance you may need.
Still experiencing issues?
SPONSORED
If the above suggestions have not solved your problem, your computer may experience more severe Windows troubles. We suggest choosing an all-in-one solution like Fortect to fix problems efficiently. After installation, just click the View&Fix button and then press Start Repair.