How to Sort Photos by Face on Windows 10 & 11
Everything you need to successfully group your photos by face
- To sort your photos by face on Windows 11, you need to have the Photos Legacy app.
- Your PC must support facial recognition before you can use the People tab for grouping.
- You can link your grouped photos to contacts for easy access.

The Windows operating keeps getting better with every release, with tantalizing features to improve user experience. One feature users are looking to explore on Windows 10, and 11 is the ability to sort photos by face.
This feature allows you to group photos of your friends and family by facial recognition. It sounds interesting, right? Read on how to learn how to take advantage of the feature.
Can I group photos by face on Windows?
Yes, you can group pictures by face on Windows 10 and 11 with the Photos app. However, this feature is not available on versions of the Photo app.
What’s more, you can link these photos to contacts using the People tab. So, there are many possibilities to explore with this feature, and we will discuss them in detail in the next section of this guide.
However, it must be noted that you need to determine the version of the Photos app you are using. You need to have the Photos Legacy app on your PC to use this feature, especially on Windows 11.
If you see Updated in the About section of your app, then that is not it. You will need to download the Photos Legacy app by clicking the Get Photos Legacy button in the latest Photos app.
On Windows 10, however, the July 2019 update of the Photos app should do.
How can I sort photos by face on Windows 11?
1. Activate facial grouping
1.1. Using the People tab
- Launch the Photos app.
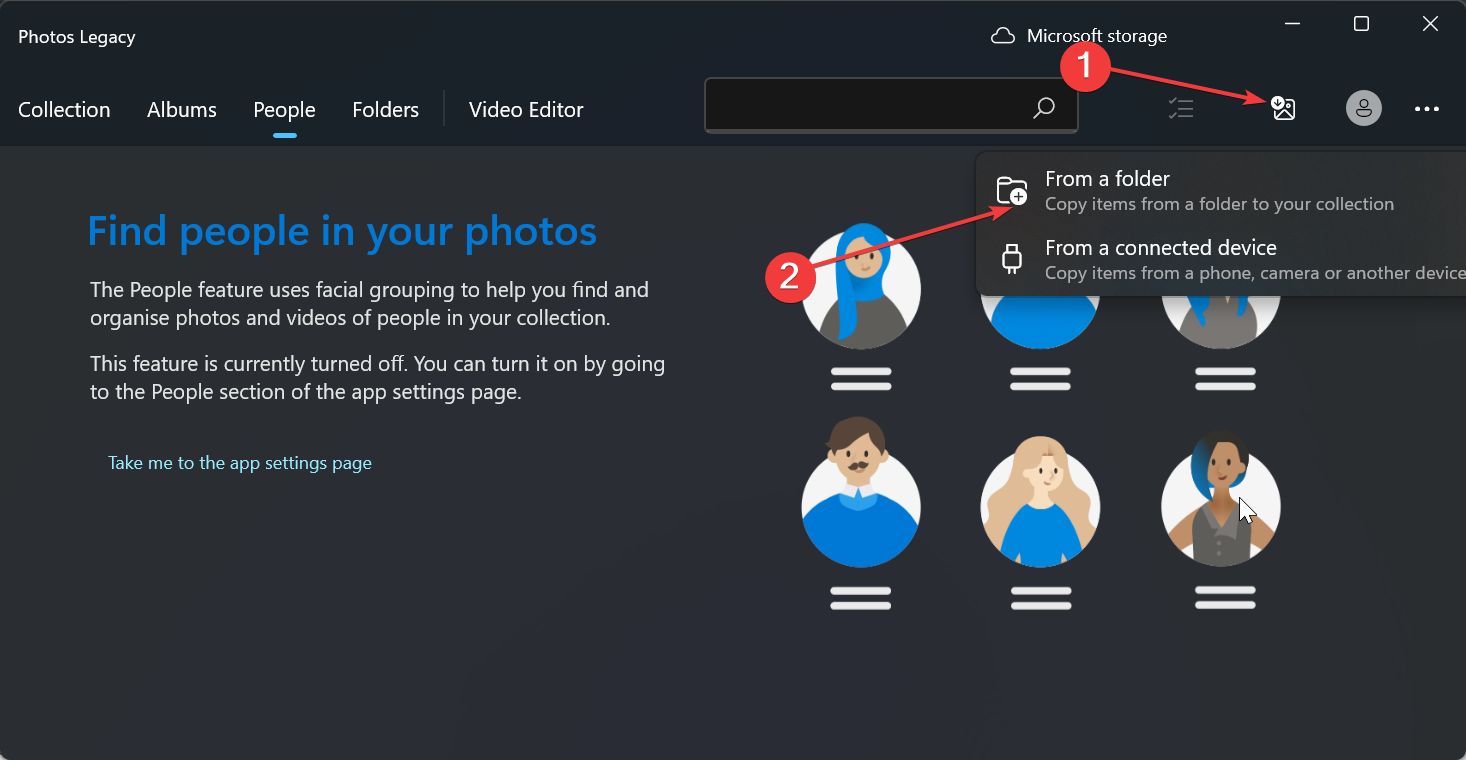
- If you have not uploaded your pictures on the app, click the Import icon at the top. If your pictures are in the photos app already, proceed to Step 6.
- Select whether to upload the pictures from a folder on your PC or via a connected device.

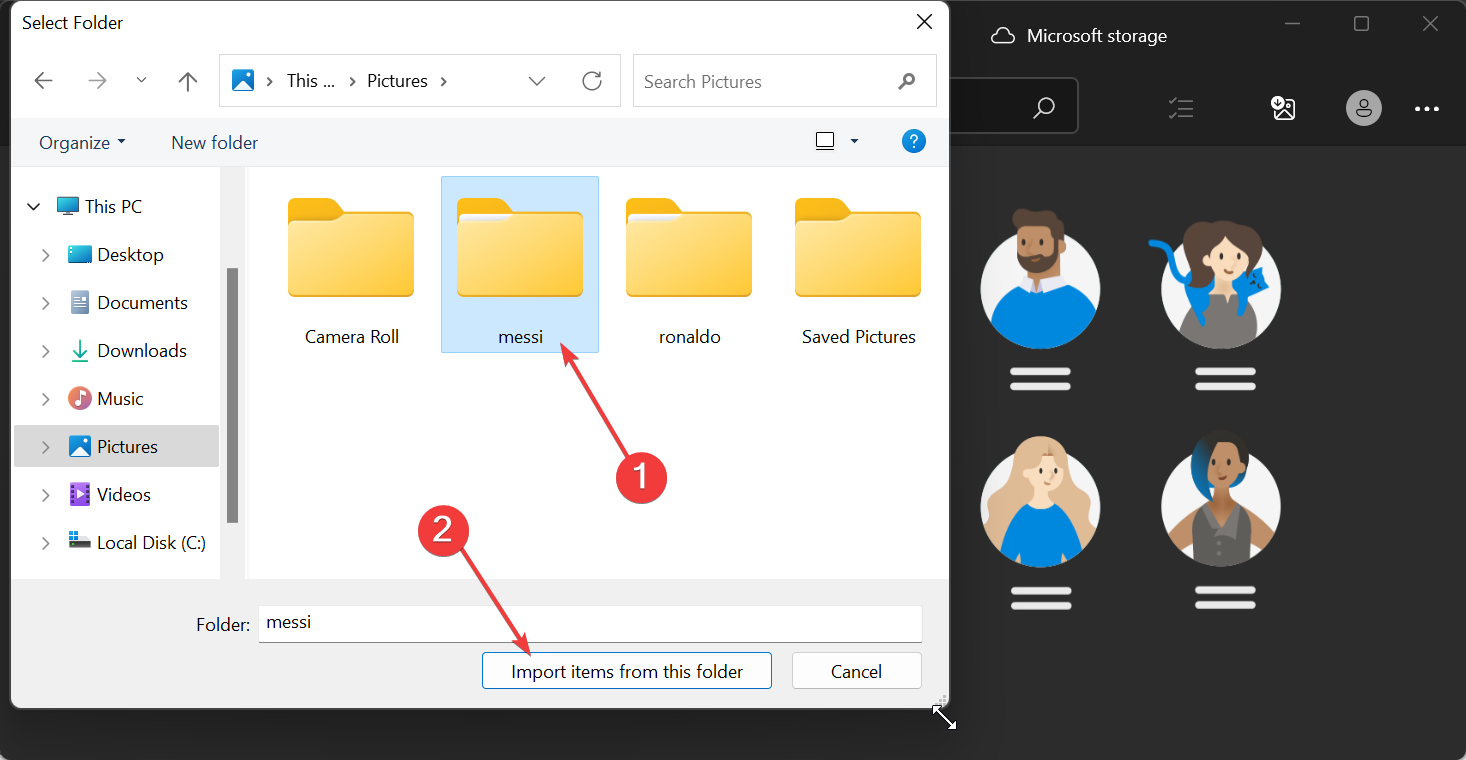
- Now, select the folders where you have your photos and click the Import items from this folder button.
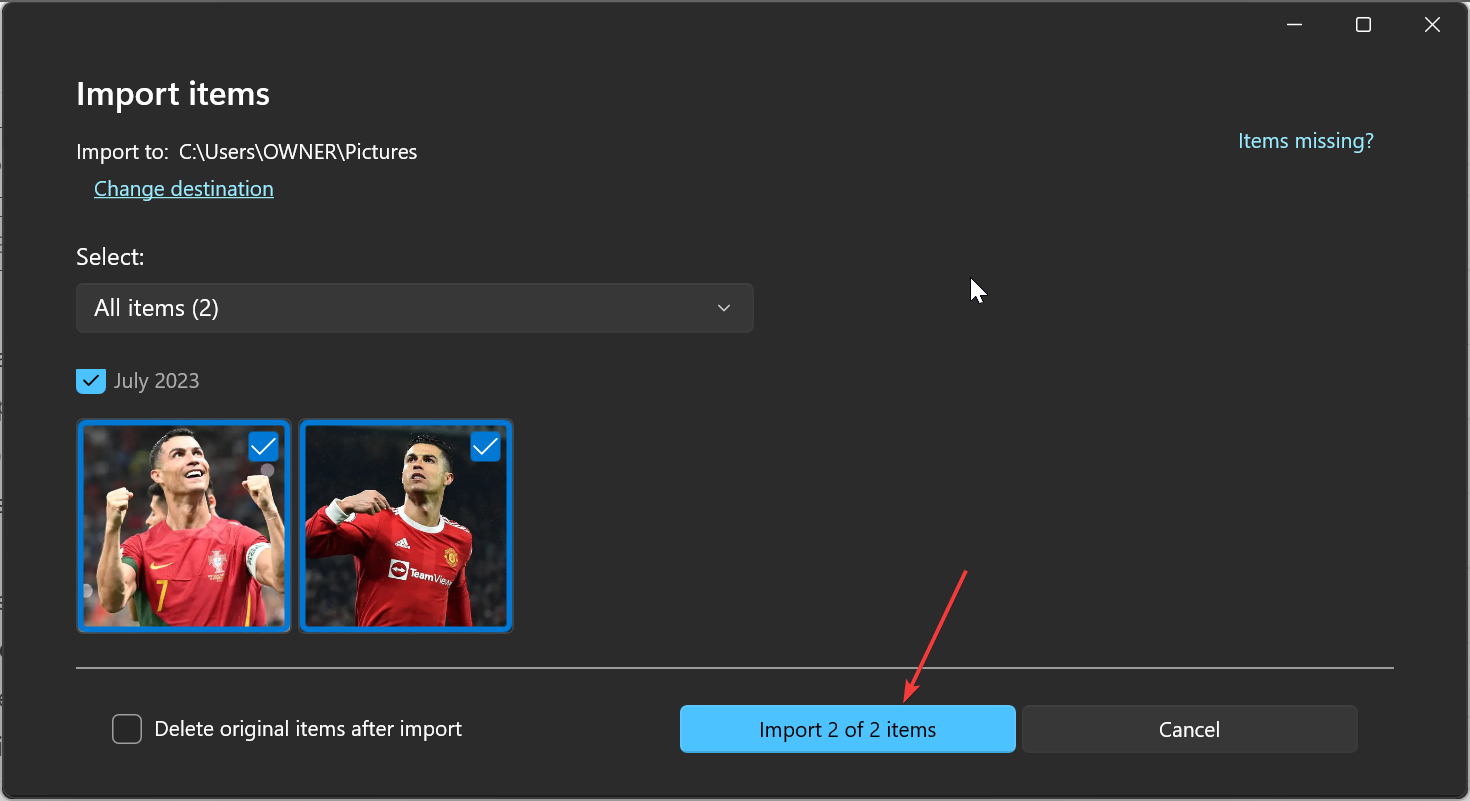
- Select the date at the top of the photos and click the Import items button.

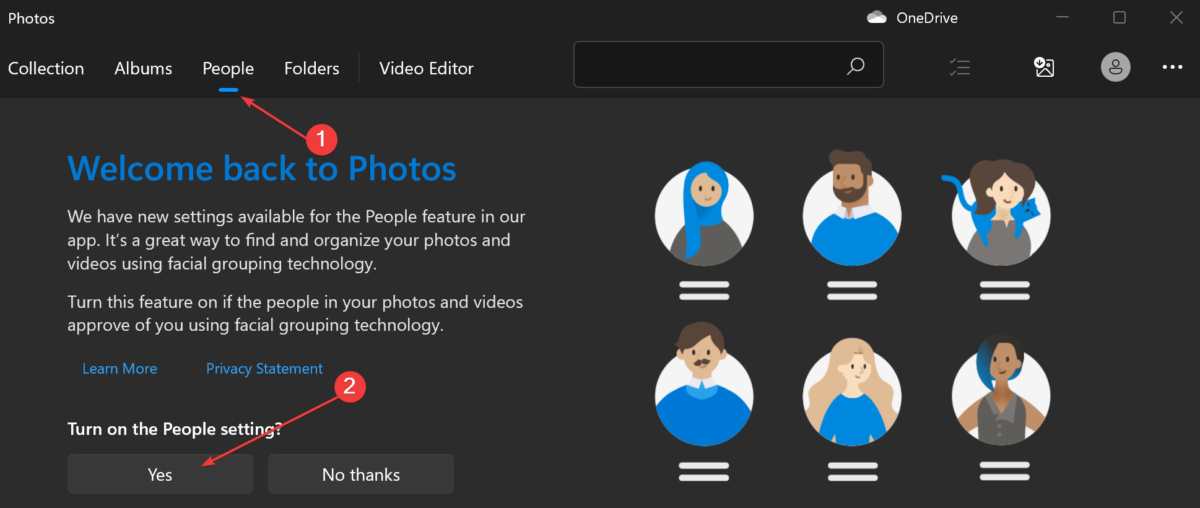
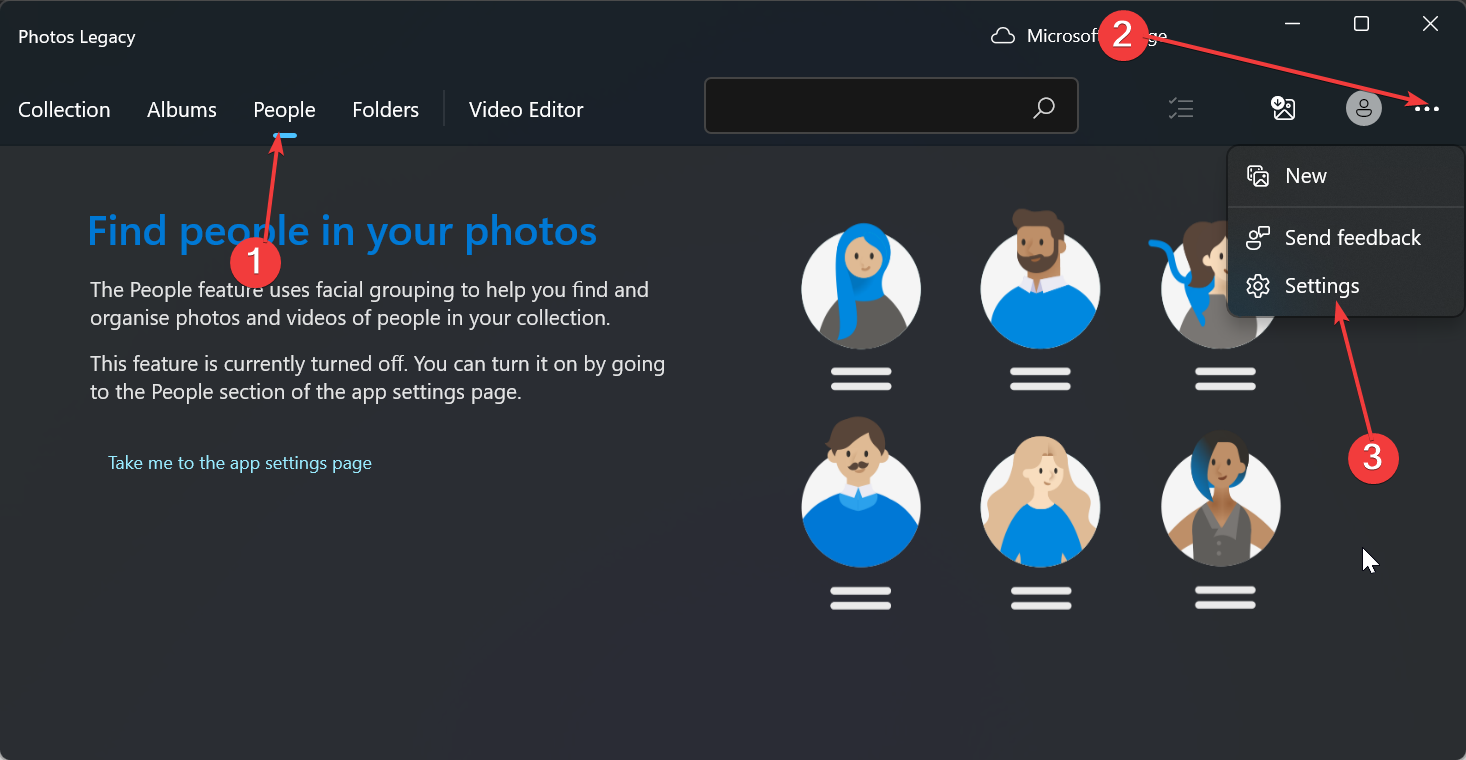
- Next, click the People tab at the top.
- In the Welcome screen asking to turn the People setting on, click the Yes button. This will help keep your determined facial groupings.

1.2. Use Settings
- Launch the Photos app and click the People tab at the top.
- Now, click the More button (three horizontal dots) in the top left corner.
- Select the Settings option.
- Finally, scroll down to the Viewing and editing section and toggle the switch under the People option forward to edit it.


With this, you have enabled facial recognition. Windows should now sort your photos by face under the People tab. You will see different picture groupings with a face representing each of the groups.
Expert tip:
SPONSORED
Some PC issues are hard to tackle, especially when it comes to missing or corrupted system files and repositories of your Windows.
Be sure to use a dedicated tool, such as Fortect, which will scan and replace your broken files with their fresh versions from its repository.
Note that facial grouping is only available on Windows 10 (2019.19061.17310.0, the July 2019 Photos app version, or later) and Windows 11 (some versions of Windows 11 if you have the Photos Legacy app).
If you do not meet the above requirements, you might not be able to use the feature.
2. Name and link your facial groupings to contacts
- After enabling the People feature, as shown above, click the Start tagging button under the People tab.

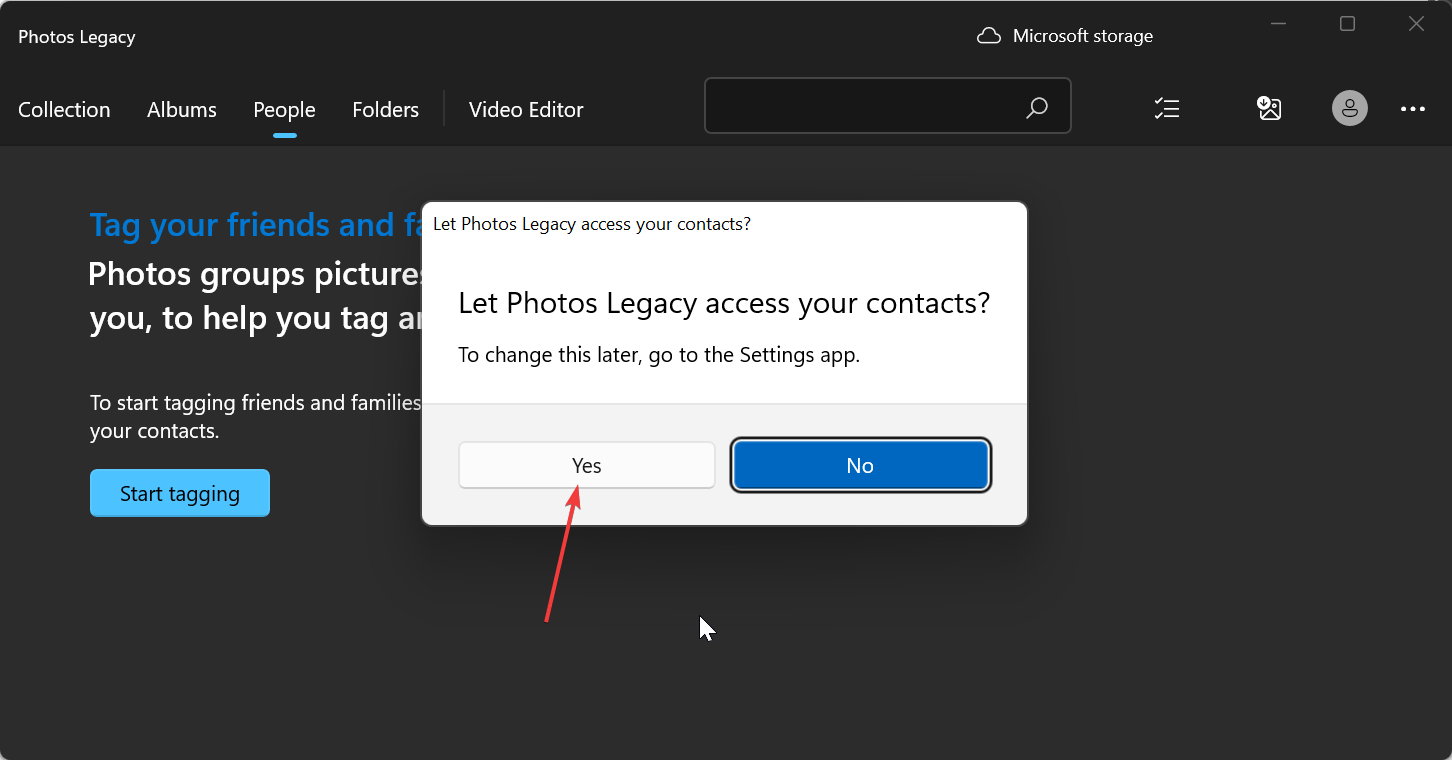
- Now, click the Yes button when asked to grant permission to access your Contact.

- If you can’t find the button, it means your photos are likely grouped and tagged. You can move to step 7 instead.
- Click the Open Privacy Settings option.
- Now, toggle the switch before the Contacts access forward to turn it on.
- Toggle the Let apps access your contacts switch forward.
- Next, close the Photos app and relaunch it, and your photos should now be grouped by faces.
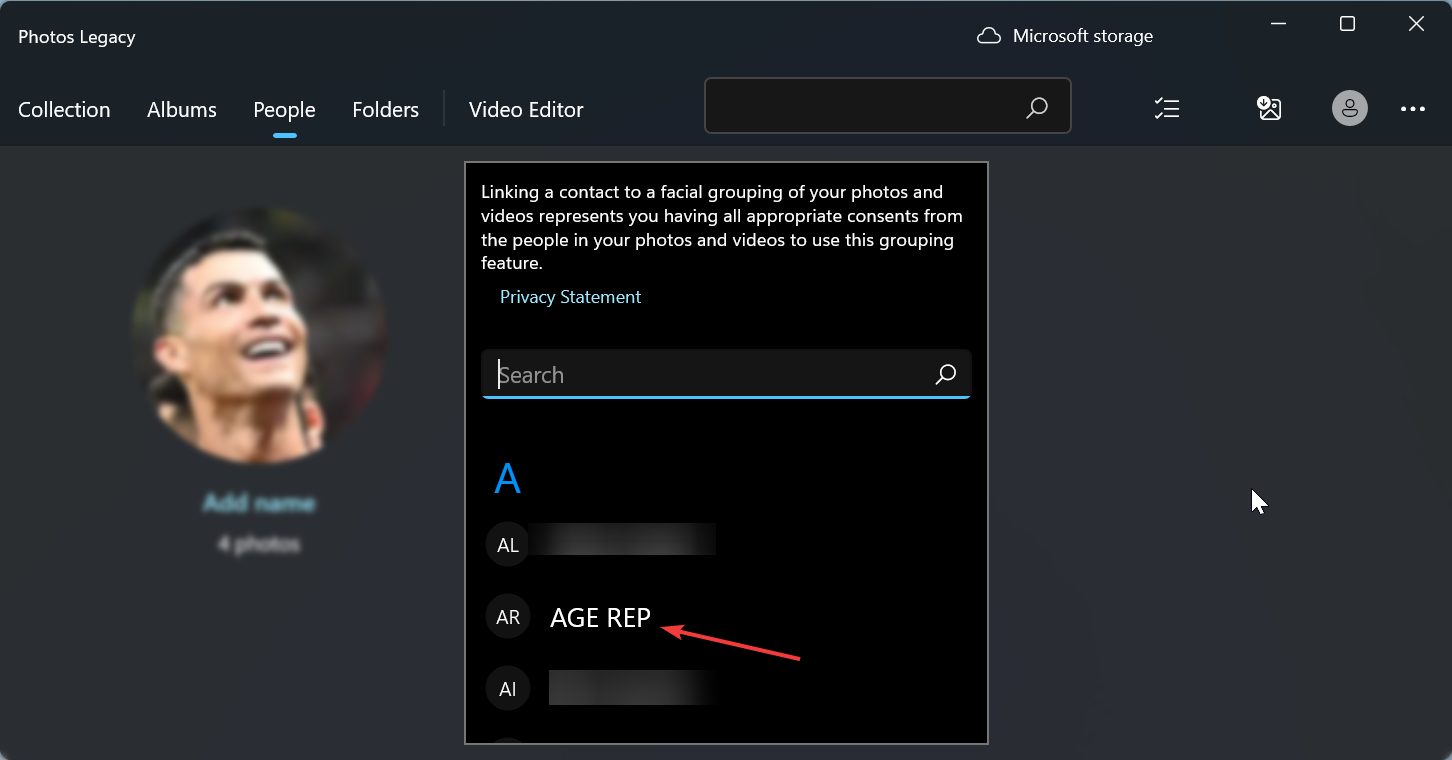
- From here, click the Add name option under each group to name it.
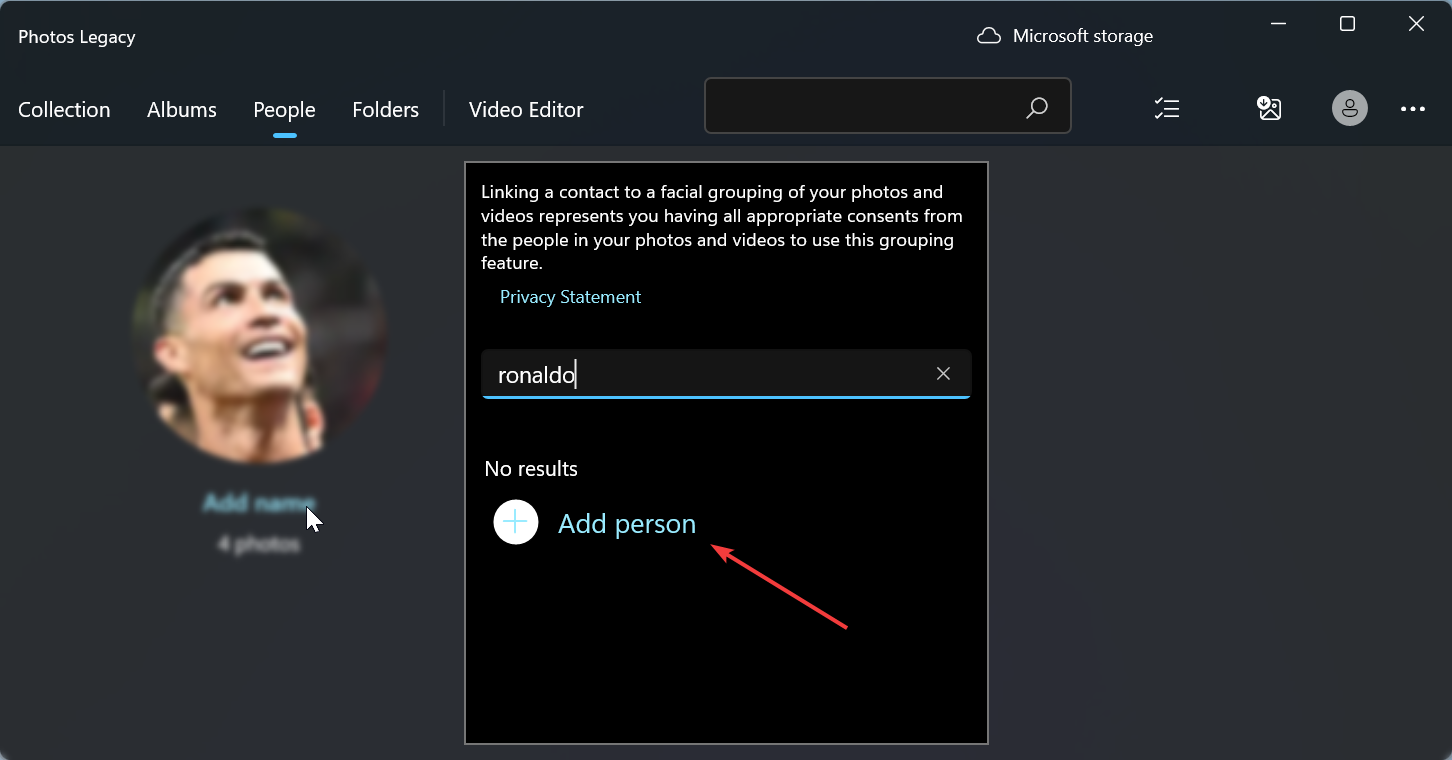
- Select a Contact from the options available.
- Finally, if there is no contact for the name yet, you can quickly create one for it.


By doing this, you can now sort your Photos by face on Windows 11 and link them to your contacts. Also, you now find your friends using the names assigned, contact info, or any other tags used for grouping.
How can I sort photos by face on Windows 10?
The process of sorting by face is basically the same on Windows 10 and 11. You only need to check your OS and Photos app version.
If you have Windows 10 (2019.19061.17310.0, the July 2019 Photos app version, or later), you should be able to perform the task following the steps above.
This is the end of this detailed guide on how to sort your photos by face on Windows 10 and 11. We have covered everything you need to know, with no stone left unturned.
Also, the steps are the same on Windows 10 and 11. So, just open your Photos app and follow the instructions above. Similarly, if you need a list of the best photo management apps to complement the photos app, check our guide on the topic.
Feel free to let us know in the comments below if you encounter any problems performing the steps above.
Still experiencing issues?
SPONSORED
If the above suggestions have not solved your problem, your computer may experience more severe Windows troubles. We suggest choosing an all-in-one solution like Fortect to fix problems efficiently. After installation, just click the View&Fix button and then press Start Repair.